BookStack
Installation
https://www.bookstackapp.com/docs/admin/installation/
BookStack Configuration
Environment Settings
Bookstack stores custom settings file .env within its active directory, /var/www/bookstack/ this is where you will go to modify most settings within your bookstack instance. Check the GitHub link below for a complete list of environment variables on the active release branch.
https://github.com/BookStackApp/BookStack/blob/release/.env.example.complete
APP_URL environment variable must lead with http:// or https:// and end with /
such as http://website.com/ or https://website.com/.
Any form of the following will cause URL redirect issues:
www.website.com, website.com or subdomain.website.com
Mail Setup
To allow BookStacks to send mail using Google's free mail server, ensure that your .env settings within your bookstack directory ( /var/www/bookstack/.env ) contains the below.
# The below url has to be set if using social auth options
# or if you are not using BookStack at the root path of your domain.
APP_URL=https://knoats.com/

#Mailsettings
MAIL_DRIVER=smtp
MAIL_HOST=smtp.gmail.com
MAIL_PORT=587
MAIL_USERNAME=email@gmail.com
MAIL_PASSWORD=password
MAIL_ENCRYPTION=tls
MAIL_FROM=email@gmail.com
Now head over to Configure Postfix to setup a Mail Transfer Agent (MTA) on your host. If you have a firewall, be sure you open the port you enter for MAIL_PORT.
Once that's done, test sending mail with the command below, where emailuser@example.com is the destination email address -
echo "This email confirms that Postfix is working" | mail -s "Testing Posfix" emailuser@example.com
You must have a valid HTTPS certificate configured, if you are using DigitalOcean. See the link below.
DO - DNS Records
Knoats - NGINX SSL Configuration
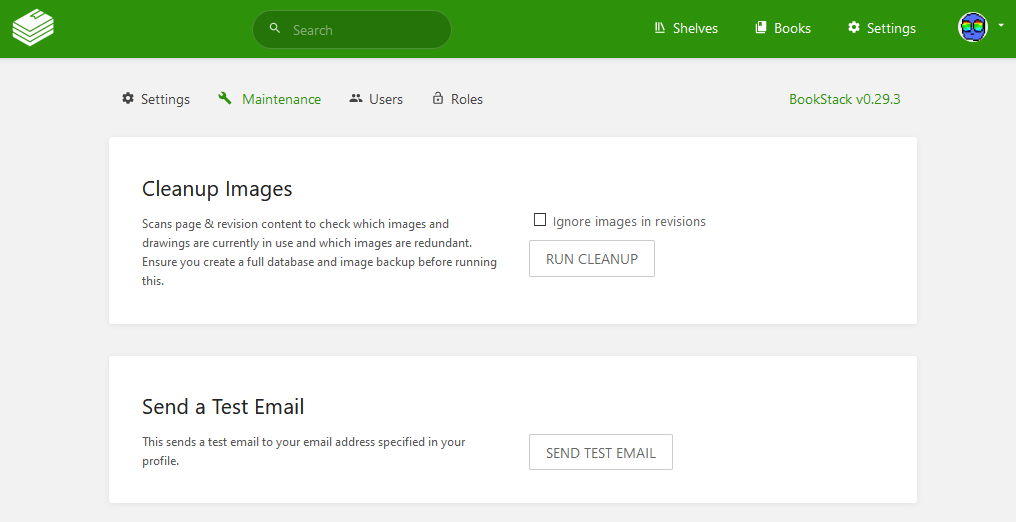
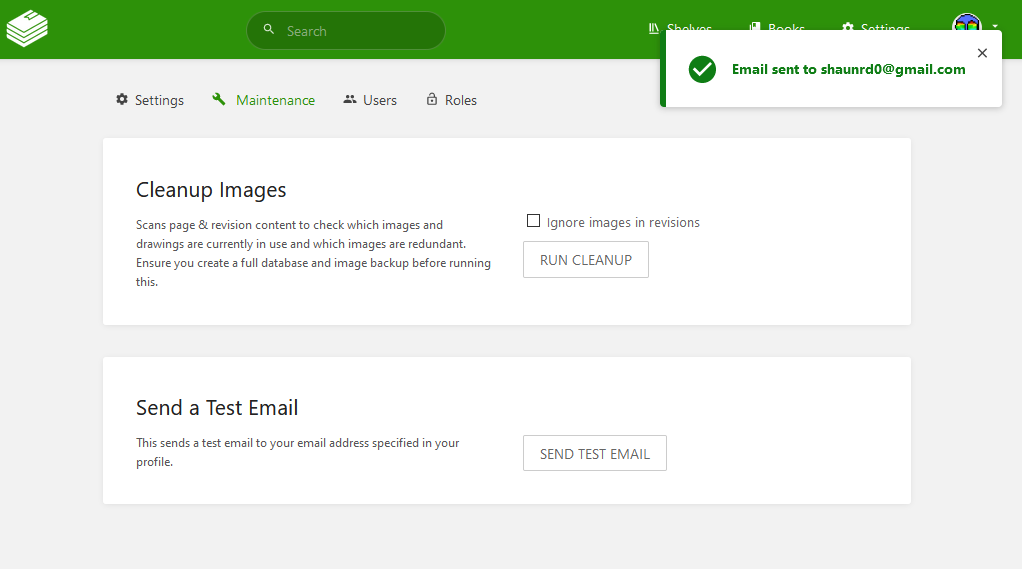
As a final step, we can use BookStack's builtin mail test within the Settings->Maintenance panel -
Once we click the button to send a test email, we should see something like the below
Bookstack Using Docker Compose
Creating a Bookstack on localhost
A Bookstack can be easily ran with docker using the default .env settings and tested through visiting localhost in a web browser. Follow the Docker Installation Instructions and create a docker-compose.yml configuration that matches the format on the Linuxserver.io Repository (DockerHub Image) page. If you've never used Docker before, it's a good idea to check out Play With Docker - a community project sponsored by Docker.
Creating a docker-compose.yml
Docker Compose utilizes a docker-compose.yml file to organize and configure the services running on a host using Docker. The docker-compose.yml should look something like the following, grabbed directly from the Linuxserver.io GitHub Repository for the Docker image we are using below - linuxserver/bookstack.
version: "2"
services:
  bookstack:
    image: linuxserver/bookstack
    container_name: bookstack
    environment:
      - PUID=1000
      - PGID=1000
      - DB_HOST=bookstack_db
      - DB_USER=bookstack
      - DB_PASS=<yourdbpass>
      - DB_DATABASE=bookstackapp
    volumes:
      - ./bookstack/:/config
    ports:
      - 6875:80
    restart: unless-stopped
    depends_on:
      - bookstack_db
  bookstack_db:
    image: linuxserver/mariadb
    container_name: bookstack_db
    environment:
      - PUID=1000
      - PGID=1000
      - MYSQL_ROOT_PASSWORD=<yourdbpass>
      - TZ=Europe/London
      - MYSQL_DATABASE=bookstackapp
      - MYSQL_USER=bookstack
      - MYSQL_PASSWORD=<yourdbpass>
    volumes:
      - ./database/:/config
    restart: unless-stopped
Be sure to edit this file to change the passwords above before spinning up your container, and pay attention to the path specified within the docker-compose volumes. This should be the path to the data directory which will hold the mounted volumes shared between the Docker Container and its host. It's usually a good idea to send each container to its own directory, which will be created if it doesn't already exist.
For example, If you specify a volume as ./bookstack/:/config, then the bookstack directory will be created within the directory of the docker-compose.yml that was ran to spin up the service. Docker will then mount the bookstack directory to the contaier's /config directory
If you are running a strict firewall or set of iptables, be sure to adjust them accordingly to the ports within the docker-compose.yml. If you are just spinning up a container locally, you shouldn't need to worry about firewall rules since all the traffic will be internal.
The final configuration step is to change <yourdbpass> in the docker-compose.yml above to your preferred password.
Starting Our Containers
Now, all we need to do is store this docker-compose.yml file within a directory we wish to admin the container from, and run docker-compose up -d to start our services that we have defined. the -d flag simply tells docker-compose that we wish the detatch the processes from our current terminal session, which prevents us from inheriting the active logs from the services we started. If you want to see these logs as an active feed after you spin up your services, simply run docker-compose logs -f to do so.
That's it! As long as you have no custom domain configuration and only plan to view this Bookstack instance locally, there is no other configuration to be done on the back end of your test-wiki. You should be able to open your web browser and visit localhost:6875 to see your Bookstack application.
Run docker ps to see a list of containers, and the ports they are running on. This helps to debug network issues when attempting to view our application. If localhost:6875 does not work, check that your output is appropriate for the use of that port.
You will need to include the port within the URL to view your BookStack unless you are using NGINX to proxy traffic to the appropraite port
Testing BookStack
Working from a headless server, but still trying to run containers locally? Run elinks http//localhost:6875 to check if you see the page below
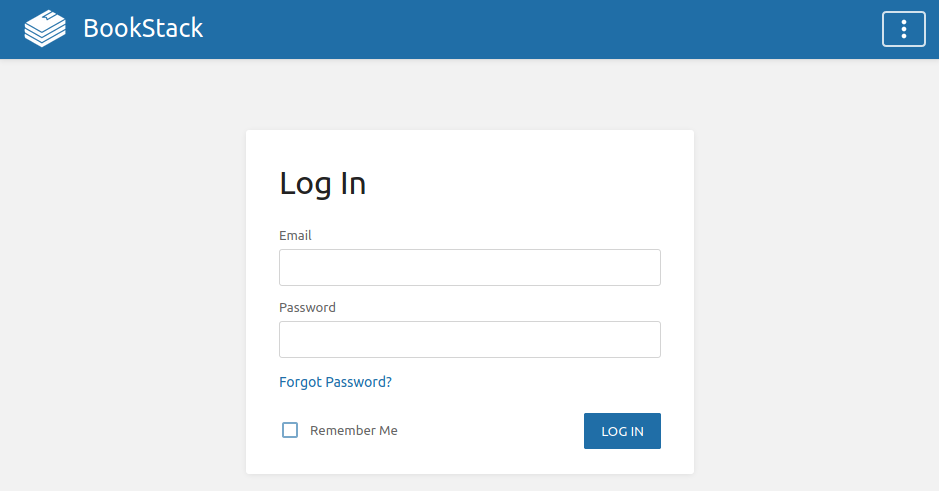
Alternatively, if you are working in a full DE or otherwise using a registered domain name, you can visit the page within your preferred web browser to see the page below
Troubleshooting
Generally, you should be able to find all relative logs and error messages by running either docker logs bookstack or docker logs bookstack_db. If you want docker to provide a live feed of logs, you'll need to add the -f flag to do so, as in docker logs bookstack -f.
In the case of this Bookstack instance, we are using https to encrypt the web traffic, which runs over port 443/tcp. So when you visit knoats.com in your web browser, I have an NGINX configuration in place to ensure that all traffic is routed through the port 443, which is decrypted and passed internally to the localhost port 0.0.0.0:6875 where our containerized port 80 then serves our web content using NGINX.
CONTAINER ID        IMAGE                   COMMAND             CREATED             STATUS              PORTS                           NAMES
xxxxxxxxxxxx        linuxserver/bookstack   "/init"             25 hours ago        Up 25 hours         443/tcp, 0.0.0.0:6875->80/tcp   bookstack
xxxxxxxxxxxx        linuxserver/mariadb     "/init"             26 hours ago        Up 25 hours         3306/tcp                        bookstack_db
Some of this information has been changed for security reasons - such as ports and the CONTAINER ID's seen above. If you want to configure SSL for your bookstack, see Knoats - NGINX SSL Configuration
Development
For my development notes
Backup Bookstack Using Docker
Don't drive as root, create a BookStack administrator account by following the adduser instructions.
If you are running Bookstack in a docker container, run the following command to backup the database from outside the docker container. Navigate to the root of the running docker container, and run the following command. Don't forget to replace the <INSERTS> with actual file names, users, or other information regarding your Bookstack instance.
sudo docker exec <DOCKER-CONTAINER-NAME> /usr/bin/mysqldump -u <USER> -p <DATABASE> > <DATABASE>.backup.sql so an example of this command would be the following -
sudo docker exec bookstack /usr/bin/mysqldump -u bookstackadmin -p bookstack_db > bookstack.backup.sql
This will output the file bookstack.backup.sql into your working directory, move this file to a safe place so you can restore the database should something go wrong in the future. Alternatively, you could manually enter the container with sudo docker exec -it CONTAINER bash and then just run mysqldump -u USER -p DATABASE > DATABASE.backup.sql && exit followed by sudo docker cp CONTAINER:/container/path/DATABASE.backup.sql local/path to copy the SQL backup onto our container's host.
This is all that needs to be done to backup the base content of BookStack, but there are some important configurations and upload directories you'll want to zip up, too. To zip these directories, enter your docker container and run the following commands
sudo docker exec -it BOOKSTACK_CONTAINER bash
tar -czvf bookstack-files-backup.tar.gz /var/www/html/.env /var/www/html/public/uploads /var/www/html/storage/uploads
exit
sudo docker cp BOOKSTACK_CONTAINER:/var/www/html/bookstack/bookstack-files-backup.tar.gz /home/USER/ftp/
If you used the method above, the database can be easily restored using the following commands
# Move our backup files into the containers that need them
sudo docker cp /home/USER/ftp/backup/bookstack.backup.sql BOOKSTACK_MYSQL_CONTAINER:/
sudo docker cp /home/USER/ftp/backup/bookstack-files-backup.tar.gz BOOKSTACK_CONTAINER:/var/www/html/bookstack/

# Enter MySQL container and restore the DB
sudo docker exec -it BOOKSTACK_MYQL_CONTAINER bash
mysql -u {mysql_user} -p {database_name} < {backup_file_name}
exit

# Enter Bookstack container and restore local data
sudo docker exec -it BOOKSTACK_CONTAINER bash
tar -xvzf bookstack-files-backup.tar.gz
exit
If you are restoring to a new version of BookStack you will have to run php artisan migrate after restore to perform any required updates to the database. For safe keeping, toss this file somewhere so you can quickly peek at it whenever you need it. But once you run these commands a few times, you won't forget them.
#!/bin/bash
##Reference for backing up the BookStack database within docker container
################

# Backup Bookstack Database
sudo docker exec DOCKER_MYSQL_CONTAINER /usr/bin/mysqldump -u USER --password=PASSWORD DATABASE > DATABASE.backup.sql

# Backup Bookstack Files
sudo docker exec -it DOCKER_CONTAINER bash
tar -czvf bookstack-files-backup.tar.gz .env public/uploads storage/uploads
exit
sudo docker cp CONTAINER:/var/www/html/bookstack/bookstack-files-backup.tar.gz /home/USER/ftp/

# Or manually copy them...
 # sudo docker cp BOOKSTACK_CONTAINER:/var/www/html/bookstack/.env /home/USER/ftp/
 # sudo docker cp BOOKSTACK_CONTAINER:/var/www/html/bookstack/storage/uploads /home/USER/ftp/
 # sudo docker cp BOOKSTACK_CONTAINER:/var/www/html/bookstack/public/uploads /home/USER/ftp/

# Restore
# Move our backup files into the containers that need them
 # sudo docker cp /home/USER/ftp/backup/bookstack.backup.sql BOOKSTACK_MYSQL_CONTAINER:/
 # sudo docker cp /home/USER/ftp/backup/bookstack-files-backup.tar.gz BOOKSTACK_CONTAINER:/var/www/html/bookstack/

# Enter MySQL container and restore the DB
 # sudo docker exec -it BOOKSTACK_MYQL_CONTAINER bash
 # mysql -u USER -p DATABASE < DATABASE.backup.sql
 # exit

# Enter Bookstack container and restore local data
 # sudo docker exec -it BOOKSTACK_CONTAINER bash
 # tar -xvzf bookstack-files-backup.tar.gz
# exitUpdating BookStack Using Docker
You can use volumes within docker-compose to store your configurations for your services, including other files and databases, on the host and pass them to the container to be used - this enables you to easily remove containers and purge images without worrying about backing up your data. As personal preference, I still run manual backups using the instructions shared on the Backup BookStack Page, but you shouldn't need to worry as the data is never touched when you are updating these images - the only concern would be if the image changes the way it uses the information, in which case you may need to change some paths for the volumes within your docker-compose.yml.
Run the below commands to update all services defined within your docker-compose.yml.
docker-compose down
docker container prune
docker image prune -a

#Verify you have no images left with your service, if you do, remove them.
docker images -a
docker-compose ps -a

#Once you verify the above, you are ready to spin up your services and pull the latest images.
docker-compose up -d
The above commands are more general and less specific to BookStack, and the same approach could be used to update containers for any service you are using, just be sure to persist and / or backup your data.
For this example, we run the commands to update BookStack -
user@bookstack:~/linuxserver-bookstack$ docker-compose down
Stopping bookstack    ... done
Stopping bookstack_db ... done
Removing bookstack    ... done
Removing bookstack_db ... done
Removing network linuxserver-bookstack_default
user@bookstack:~/linuxserver-bookstack$ docker image prune
WARNING! This will remove all dangling images.
Are you sure you want to continue? [y/N] y
Deleted Images:
untagged: linuxserver/bookstack@sha256:d94bdeaea3eb9d2935e38s1dcca85450cdbd144706ccb6x78a2e75f0bde07
deleted: sha256:c32f40ccc7s51e508d2x2b241a00d529a35123a18d661b1edde15aac9bfee
deleted: sha256:5f2a803x93bb9fa8ab547c31d5a4f3e8520402d6425s85b53df80ebe515a9
deleted: sha256:84c9530d404015fc887c22xeecb1aebd99d2303aade5d48a2sfda044427f8
deleted: sha256:ff6dcf5097f8cfa05ff357d8axaf334c3a06259d97a6f2082cs8e7f280608

Total reclaimed space: 150.9MB
user@bookstack:~/linuxserver-bookstack$ docker-compose images
Container   Repository   Tag   Image Id   Size
----------------------------------------------
user@bookstack:~/linuxserver-bookstack$ docker-compose up -d
Creating network "linuxserver-bookstack_default" with the default driver
Creating bookstack_db ... done
Creating bookstack    ... done
user@bookstack:~/linuxserver-bookstack$Exploring the Database
I'm running my Bookstack in a docker container, so for me if I want to explore my database the first step is to get a bash terminal within the container. Lets say you've named your bookstack database container db_bookstack - the command to enter a bash terminal within the container would be docker exec -it db_bookstack bash
Once you have a terminal, login to the database by running mysql -u username -p and enter the password to login when prompted. If you setup your bookstack with a docker container this should have been configured within your docker-compose.yml that you use to spin up your services.
Once your logged in, you'll see a mysql prompt like the below -
MariaDB [(none)]>
The prompt shows (none) because we haven't selected a database. Run show databases; to show the databases available to you and select one with use database;, see below for an example.
MariaDB [(none)]> show databases;
+--------------------+
| Database           |
+--------------------+
| bookstack          |
| information_schema |
+--------------------+
2 rows in set (0.000 sec)

MariaDB [(none)]> use bookstack;
Reading table information for completion of table and column names
You can turn off this feature to get a quicker startup with -A

Database changed
MariaDB [bookstack]>
NOTE: The names of these databases do not reflect any actual databases
Now that we've selected the database we want to explore, let's see what it contains by running show tables; -
MariaDB [bookstack]> show tables;
+---------------------+
| Tables_in_bookstack |
+---------------------+
| activities          |
| api_tokens          |
| attachments         |
| books               |
| bookshelves         |
| bookshelves_books   |
| cache               |
| chapters            |
| comments            |
| email_confirmations |
| entity_permissions  |
| images              |
| joint_permissions   |
| migrations          |
| page_revisions      |
| pages               |
| password_resets     |
| permission_role     |
| role_permissions    |
| role_user           |
| roles               |
| search_terms        |
| sessions            |
| settings            |
| social_accounts     |
| tags                |
| user_invites        |
| users               |
| views               |
+---------------------+
29 rows in set (0.000 sec)
See something you want to explore further? Describe it by ruinng describe table;, like below where I describe the books table.
MariaDB [bookstack]> describe books;
+-------------+------------------+------+-----+---------+----------------+
| Field       | Type             | Null | Key | Default | Extra          |
+-------------+------------------+------+-----+---------+----------------+
| id          | int(10) unsigned | NO   | PRI | NULL    | auto_increment |
| name        | varchar(191)     | NO   |     | NULL    |                |
| slug        | varchar(191)     | NO   | MUL | NULL    |                |
| description | text             | NO   |     | NULL    |                |
| created_at  | timestamp        | YES  |     | NULL    |                |
| updated_at  | timestamp        | YES  |     | NULL    |                |
| created_by  | int(11)          | NO   | MUL | NULL    |                |
| updated_by  | int(11)          | NO   | MUL | NULL    |                |
| restricted  | tinyint(1)       | NO   | MUL | 0       |                |
| image_id    | int(11)          | YES  |     | NULL    |                |
+-------------+------------------+------+-----+---------+----------------+
10 rows in set (0.001 sec)
Neat! We have all the tools we need to step through any database that we have access to explore, and now we just need to be able to list the actual content within the tables of the database. Below, we run select and from commands that refer to specific tables and elements within our database. After the commands are input, the tables and their values we selected are displayed. See below for an example.
MariaDB [bookstack]> select id, name, created_at, updated_at, created_by from books;
+----+--------------------------+---------------------+---------------------+------------+
| id | name                     | created_at          | updated_at          | created_by |
+----+--------------------------+---------------------+---------------------+------------+
|  1 | Pi                       | 2019-04-06 00:00:35 | 2019-05-17 15:41:22 |          1 |
|  4 | Docker                   | 2019-04-06 00:02:12 | 2020-02-24 03:26:34 |          1 |
|  7 | BookStack                | 2019-04-06 04:41:38 | 2019-05-17 20:42:20 |          4 |
|  9 | Self-Hosted Applications | 2019-04-06 12:12:51 | 2019-07-06 14:17:31 |          4 |
| 13 | Networking               | 2019-04-19 06:48:57 | 2019-07-06 12:54:22 |          4 |
| 16 | Security                 | 2019-05-04 15:02:19 | 2019-05-12 13:53:57 |          4 |
| 20 | Linux Admin              | 2019-07-06 12:57:22 | 2019-07-06 13:20:10 |          4 |
| 21 | Git                      | 2019-07-19 03:11:03 | 2019-07-26 21:54:29 |          4 |
| 23 | Vim                      | 2019-07-21 05:15:16 | 2019-08-30 08:22:47 |          4 |
| 24 | Ansible                  | 2019-07-28 08:17:04 | 2019-08-30 07:58:16 |          4 |
| 28 | C++                      | 2019-10-13 20:24:23 | 2020-03-01 14:31:16 |          4 |
+----+--------------------------+---------------------+---------------------+------------+
Knoats
Welcome to Knoats!
This is a personal project in server-administration, documentation, and development. None of the information here is considered official documentation of any kind. Sign up is open, email verification is required, and upon logging in you will only be able to view some books and pages that are hidden to public visitors. If you have any questions or concerns, reach out to me via email - mailedknoats@gmail.com.
Feel free to sign up and look around, there isn't much here but some personal notes on various topics like NGINX, Bash, Docker, etc.
As the sole administrator of Knoats, on a back-end server level, I have no access (or desire) to view private content such as passwords or information from linked accounts.