Linux
- Getting Started
- Linux on Chromebooks
- XPS 9310
- Bash
- SSH Configuration
- Configuring SSHD Authentication
- Enabling Google 2FA
- User Administration
- Yubikey SSH Authentication
- Tunneling
- System Admin
- Configure FTP
- Configure Postfix
- Configuring Multi-boot Filesystems
- Crontab
- Server Hostname
- Swap Allocation
- Synchronizing Time Using NTP
- Systemd Services
- Unattended Upgrades
- Interfaces
- Distributions
- Customization
- Kernel Management
- GRUB
- VirtualBox
- Boot Process
Getting Started
Overview
This page should contain the basic information needed to anyone starting out using a Linux server. Much of this information has been compiled from other guides, but I have rewritten and reformatted the content to be more readily available. Some of the content here was referenced from sources such as the Linux Filesystem Hierarchy Standard (Linux FHS).
Basics
We'll start with using the terminal for basic tasks we usually do with GUIs in full desktop environments.
Searching for packages
sudo apt search "Dell XPS 13 9300"
Sorting... Done
Full Text Search... Done
oem-somerville-factory-melisa-meta/unknown,unknown,now 20.04ubuntu12 all [installed]
hardware support for Dell XPS 13 9300
oem-somerville-melisa-meta/unknown,unknown,now 20.04ubuntu12 all [installed]
hardware support for Dell XPS 13 9300
Installing packages
sudo apt install oem-somerville-melisa-meta
Updating package registry and upgrading installed packages
sudo apt update && sudo apt upgrade
Updating package registry, upgrading packages, removing unused, fixing broken installed packages
sudo apt update -y && sudo apt upgrade -y && sudo apt upgrade --fix-broken --fix-missing --auto-remove
Checking system resources
htop
Checking Battery Consumption
sudo powertop
Connecting to WiFi
sudo nmcli device wifi list
IN-USE BSSID SSID MODE CHAN RATE SIGNAL BARS SECURITY
* 40:B8:9A:D7:EC:AF FAKE WIFI-2G Infra 1 195 Mbit/s 100 ▂▄▆█ WPA2
40:B8:9A:D7:EC:B0 FAKE WIFI-5G Infra 149 405 Mbit/s 94 ▂▄▆█ WPA2
FA:8F:CA:95:43:9B Living Room Infra 6 65 Mbit/s 75 ▂▄▆_ --
FA:8F:CA:82:9D:D4 Family Room TV.b Infra 6 65 Mbit/s 57 ▂▄▆_ --
14:ED:BB:1F:44:6D Hi Infra 8 130 Mbit/s 57 ▂▄▆_ WPA2
14:ED:BB:1F:44:76 ATT9eu7M6L Infra 149 540 Mbit/s 44 ▂▄__ WPA2
4C:ED:FB:AD:D8:08 Fluffymarshmellow Infra 1 540 Mbit/s 30 ▂___ WPA2
70:77:81:DE:43:59 WIFIDE4355 Infra 1 195 Mbit/s 24 ▂___ WPA2
70:5A:9E:6C:D4:29 TC8717T23 Infra 6 195 Mbit/s 19 ▂___ WPA2
A8:A7:95:E8:68:82 Wildflower-2G Infra 1 195 Mbit/s 14 ▂___ WPA2
CC:2D:21:57:E0:71 Rudy Infra 6 130 Mbit/s 14 ▂___ WPA1 WPA2
CE:A5:11:3C:E4:C2 Orbi_setup Infra 9 130 Mbit/s 14 ▂___ --
A8:6B:AD:EB:B4:56 Gypsy-2 Infra 6 195 Mbit/s 12 ▂___ WPA1 WPA2
CE:A5:11:3C:EF:8E Orbi_setup Infra 9 130 Mbit/s 12 ▂___ --
Now bring up a connection with the access point we want, and pass the --ask flag to enter a password for authentication.
sudo nmcli c up "FAKE WIFI-2G" --ask
Passwords or encryption keys are required to access the wireless network 'FAKE WIFI-2G'.
Password (802-11-wireless-security.psk): •••••••••••••••••••
Connection successfully activated (D-Bus active path: /org/freedesktop/NetworkManager/ActiveConnection/9)
Disable transmission devices with rfctl
sudo rfkill list
0: phy0: Wireless LAN
Soft blocked: no
Hard blocked: no
1: hci0: Bluetooth
Soft blocked: yes
Hard blocked: no
Block WiFi
sudo rfkill block wlan
Block Bluetooth
sudo rfkill block bluetooth
Creating a User
sudo adduser username
Granting sudo to a user
sudo usermod -G sudo username
Resetting a user's password
sudo passwd username
Logging out of our user session, where kapper is my username.
sudo pkill -KILL -u kapper
Rebooting
sudo reboot now
Man Pages
When encountering issues with Linux servers, its important to know how to gather specific information from credible resources quickly via tools given to us within our Bash terminal. One of these tools is known as the man pages - this set of documentation is not only well maintained and credible in its content but also readily available to us from any terminal.
Local Storage Location
These pages are usually stored locally within /usr/share/man/ where they can be updated as new packages are released and documentation changed. These local files allow us to reference the man pages offline should we disconnect from the internet, and also within /usr/share/man/ you will see locale named directories - these are simply housing different language man pages should you need to reference them. See the example output below when we check the contents of /usr/share/man
ls /usr/share/man/
cs/ es/ hu/ ja/ man2/ man5/ man8/ pl/ ru/ sv/ zh_TW/
da/ fi/ id/ ko/ man3/ man6/ man9/ pt/ sl/ tr/
de/ fr/ it/ man1/ man4/ man7/ nl/ pt_BR/ sr/ zh_CN/
| Directory | Content Category |
| /usr/share/man/man1 | User programs |
| /usr/share/man/man2 | System calls |
| /usr/share/man/man3 | Library calls |
| /usr/share/man/man4 | Special files |
| /usr/share/man/man5 | File formats |
| /usr/share/man/man6 | Games |
| /usr/share/man/man7 | Miscellaneous |
| /usr/share/man/man8 | System administration |
| /usr/share/man/man9 | vmxnet.9.gz |
Contents of these directories are optional depending on system and distribution
This may seem like besides-the-fact information - but it's good to know where these files are stored and to step through the locations yourself so you know what resources you have available to you. I would urge anyone interested to check out the contents of these locations from your own system, and then view the man pages associated with some of the topics that stand out to you. This should be relatively easy to do, but for completeness, the below is an example of checking a directory and then viewing the man page of topic I found within it. You will not see the man page in the example below, as it is ran within the active terminal.
ls /usr/share/man/man4
cciss.4.gz initrd.4.gz mem.4.gz random.4.gz vcs.4.gz
console_codes.4.gz intro.4.gz mouse.4.gz rtc.4.gz vcsa.4.gz
cpuid.4.gz kmem.4.gz msr.4.gz sd.4.gz veth.4.gz
dsp56k.4.gz lirc.4.gz null.4.gz smartpqi.4.gz wavelan.4.gz
full.4.gz loop-control.4.gz port.4.gz st.4.gz zero.4.gz
fuse.4.gz loop.4.gz ptmx.4.gz tty.4.gz
hd.4.gz lp.4.gz pts.4.gz ttyS.4.gz
hpsa.4.gz md.4.gz ram.4.gz urandom.4.gz
man console_codes
Indexing Pages
When viewing the manual pages, the amount of information can be overwhelming at times and it is easy to miss subtle things that could prove very useful in a situation where information on a topic is otherwise scarce. We should note that there can be sections to a manual entry for any given package, these sections are indexed according to the number of the corresponding category that the referenced package subtopic falls under. Its really useful and easy to understand once you work with it a bit. See the commands below, where we check for all man pages associated with whatis intro, and then look for the correspondence in the Local Man Page Storage table above.
whatis intro
intro (1) - introduction to user commands
intro (2) - introduction to system calls
intro (3) - introduction to library functions
intro (4) - introduction to special files
intro (5) - introduction to file formats and filesystems
intro (6) - introduction to games
intro (7) - introduction to overview and miscellany section
intro (8) - introduction to administration and privileged commands
find /usr/share/man/man* -name intro*
/usr/share/man/man1/intro.1.gz
/usr/share/man/man2/intro.2.gz
/usr/share/man/man3/intro.3.gz
/usr/share/man/man4/intro.4.gz
/usr/share/man/man5/intro.5.gz
/usr/share/man/man6/intro.6.gz
/usr/share/man/man7/intro.7.gz
/usr/share/man/man8/intro.8.gz
So, the intro manual pages proves to be a perfect example since its easy to relate this information to our table above. Below, we ask whatis time
whatis time
time (1) - run programs and summarize system resource usage
time (7) - overview of time and timers
time (3am) - time functions for gawk
Then look into the results by running man <PageID> time where <PageID> corresponds with the page we'd like to view.
user@knoats:~$ man 3am time
We see that the information is organized as we expect, having researched the Local Man Page Storage above. The first section, time (1), is a man page for the time command and how to use it when running user programs. The next section, time (3am), The final section, time (7), is a general overview of time and timers within Linux.
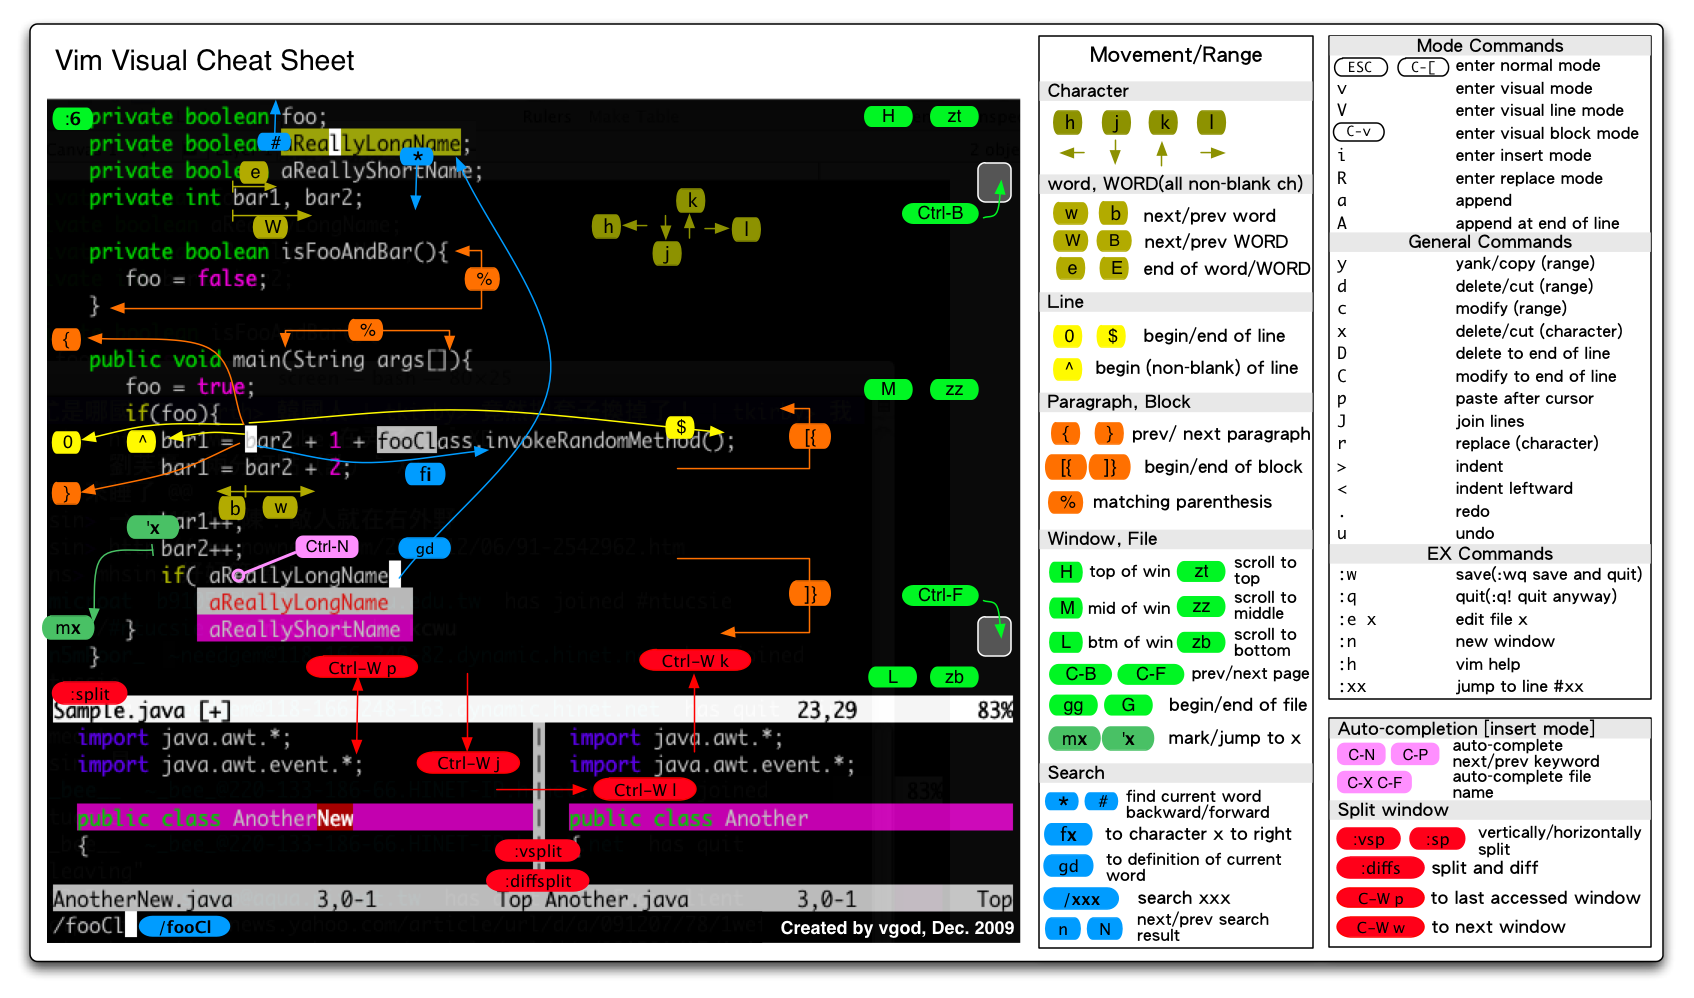
Text Editor
You will need to edit text when working in Linux, and a popular and powerful tool for doing so is vim. Vim can be a tricky program to use at first, but there are resources available to help teach vim to newcomers. There is even a commandline tutor that will walk you through vim from within the default viewport of a terminal using interactive text tutorials. to run this tutorial, simply run vimtutor from any Linux commandline. I would elaborate more on this topic, since it is such an important tool within Linux Server Administration - but there are plenty of tools and resources out there that offer much more information. Instead, I'll link to some good information here. Or, if you don't have immediate access to a terminal, check out a quick google search for some vim interactive tutorials and you're sure to find some games available to teach you within a web browser.
| Plugins / Enhancements | |
| Syntax Checker for Vim | https://github.com/vim-syntastic/syntastic |
| Snippets | https://github.com/SirVer/ultisnips |
| Vim Solarized | https://github.com/altercation/vim-colors-solarized |
| Code Completion | https://github.com/ycm-core/YouCompleteMe |
| Git Plugin | https://github.com/tpope/vim-fugitive |
| Auto Configuration Tool | https://github.com/chxuan/vimplus |
| Community Vim Distribution | https://github.com/SpaceVim/SpaceVim |
| Everything Else | https://github.com/mhinz/vim-galore |
Linux on Chromebooks
Booting Persistent USB
It is possible to boot into a 3.1 USB stick with persistent data saved between sessions. There are plenty of cheap options out there for ultra portable USBs that you'll hardly notice due to their low-profiles. Even better, if you have a chromebook with USB C ports. The main limiter on your system will often be read/write speed, as you are funnelling all of your data through a USB device opposed to internal storage. Be careful to choose the port on your device with the best speed, you will be glad you did later on.
If you boot this way, you won't have to run or use crouton, or even boot into ChromeOS (CrOS). You'll need to enable developer mode, and press CTRL+L when rebooting the chromebook and the warning is displayed for 'OS Detection' being disabled. To boot into CrOS instead, press CTRL+D. If you press nothing, a loud BEEP will happen and it will boot into CrOS.
If you have a windows machine handy, check out the links below to see how you can create a persistent USB for booting. This method does not install linux onto the USB, but rather creates a Live USB (Installation media) of your selected distribution. On this Live USB, if created following these directions, there exists a persistent filesystem, which allows you to retain settings and application data between reboots.
Normally, on a Live USB there is no persistence and all data will be lost between reboots, so be careful to follow the steps carefully when creating your USB.
Consider how much you plan to store on your system, for me 30GB storage is plenty to do all my programming and server administration from a Lubuntu installation.
My Toshiba 2 Chromebook is running on a massive 2GB of RAM, paired with a generation 6 Intel Duo ~2GhZ and 16GB internal storage. It ran me $100 in 2015 used off ebay and is still running strong. I run Lubuntu booting into a 3.1 USB, which uses i3wm and the bare minimum for packages installed / running. I have no issues in VS Code, Pycharm, LaTeX editors, and all office applications work fine. The main issue to note is web browsing. Chrome or any derivitive will consume nearly all of your RAM. Firefox does ok, and if you visit about:memory in your address bar it will allow you to 'Minimize Memory Usage' by clicking a button. Midori is my preferred browser when not dealing with personal accounts and just reading documentation.
Enable Developer Mode
Once you have the USB stick made with the linux distro you want to run, you can start your chromebook and open a terminal. For me, this is CTRL+ALT+t. Once in the console window, you'll see a crosh> prompt. Type the commands below and read the output.
Welcome to crosh, the Chrome OS developer shell.
If you got here by mistake, don't panic! Just close this tab and carry on.
Type 'help' for a list of commands.
If you want to customize the look/behavior, you can use the options page.
Load it by using the Ctrl-Shift-P keyboard shortcut.
crosh> shell
chronos@localhost / $
Next, check the available settings by running the crossystem command. This output is useful if you want more information on what values you're setting, and why.
chronos@localhost / $ sudo crossystem
Password:
arch = x86 # [RO/str] Platform architecture
backup_nvram_request = 1 # [RW/int] Backup the nvram somewhere at the next boot. Cleared on success.
battery_cutoff_request = 0 # [RW/int] Cut off battery and shutdown on next boot
block_devmode = 0 # [RW/int] Block all use of developer mode
clear_tpm_owner_done = 0 # [RW/int] Clear TPM owner done
clear_tpm_owner_request = 0 # [RW/int] Clear TPM owner on next boot
cros_debug = 1 # [RO/int] OS should allow debug features
dbg_reset = 0 # [RW/int] Debug reset mode request
debug_build = 0 # [RO/int] OS image built for debug features
dev_boot_altfw = 0 # [RW/int] Enable developer mode alternate bootloader
dev_boot_signed_only = 0 # [RW/int] Enable developer mode boot only from official kernels
dev_boot_usb = 0 # [RW/int] Enable developer mode boot from external disk (USB/SD)
dev_default_boot = disk # [RW/str] Default boot from disk, altfw or usb
dev_enable_udc = 0 # [RW/int] Enable USB Device Controller
devsw_boot = 1 # [RO/int] Developer switch position at boot
devsw_cur = 1 # [RO/int] Developer switch current position
diagnostic_request = 0 # [RW/int] Request diagnostic rom run on next boot
disable_dev_request = 0 # [RW/int] Disable virtual dev-mode on next boot
ecfw_act = RW # [RO/str] Active EC firmware
post_ec_sync_delay = 0 # [RW/int] Short delay after EC software sync (persistent, writable, eve only)
fw_prev_result = unknown # [RO/str] Firmware result of previous boot (vboot2)
fw_prev_tried = A # [RO/str] Firmware tried on previous boot (vboot2)
fw_result = unknown # [RW/str] Firmware result this boot (vboot2)
fw_tried = A # [RO/str] Firmware tried this boot (vboot2)
fw_try_count = 0 # [RW/int] Number of times to try fw_try_next
fw_try_next = A # [RW/str] Firmware to try next (vboot2)
fw_vboot2 = 0 # [RO/int] 1 if firmware was selected by vboot2 or 0 otherwise
fwb_tries = 0 # [RW/int] Try firmware B count
fwid = Google_Swanky.5216.238.150 # [RO/str] Active firmware ID
fwupdate_tries = 0 # [RW/int] Times to try OS firmware update (inside kern_nv)
hwid = SWANKY E5A-E3P-A47 # [RO/str] Hardware ID
inside_vm = 0 # [RO/int] Running in a VM?
kern_nv = 0x0000 # [RO/int] Non-volatile field for kernel use
kernel_max_rollforward = 0x00000000 # [RW/int] Max kernel version to store into TPM
kernkey_vfy = sig # [RO/str] Type of verification done on kernel keyblock
loc_idx = 0 # [RW/int] Localization index for firmware screens
mainfw_act = A # [RO/str] Active main firmware
mainfw_type = developer # [RO/str] Active main firmware type
nvram_cleared = 0 # [RW/int] Have NV settings been lost? Write 0 to clear
display_request = 0 # [RW/int] Should we initialize the display at boot?
phase_enforcement = (error) # [RO/int] Board should have full security settings applied
recovery_reason = 0 # [RO/int] Recovery mode reason for current boot
recovery_request = 0 # [RW/int] Recovery mode request
recovery_subcode = 0 # [RW/int] Recovery reason subcode
recoverysw_boot = 0 # [RO/int] Recovery switch position at boot
recoverysw_cur = (error) # [RO/int] Recovery switch current position
recoverysw_ec_boot = 0 # [RO/int] Recovery switch position at EC boot
ro_fwid = Google_Swanky.5216.238.5 # [RO/str] Read-only firmware ID
tpm_attack = 0 # [RW/int] TPM was interrupted since this flag was cleared
tpm_fwver = 0x00050003 # [RO/int] Firmware version stored in TPM
tpm_kernver = 0x00030001 # [RO/int] Kernel version stored in TPM
tpm_rebooted = 0 # [RO/int] TPM requesting repeated reboot (vboot2)
tried_fwb = 0 # [RO/int] Tried firmware B before A this boot
try_ro_sync = 0 # [RO/int] try read only software sync
vdat_flags = 0x00002c56 # [RO/int] Flags from VbSharedData
wipeout_request = 0 # [RW/int] Firmware requested factory reset (wipeout)
wpsw_cur = 1 # [RO/int] Firmware write protect hardware switch current position
The settings we are interested in is dev_boot_usb and dev_boot_altfw, so run the following commands to enable developer mode -
chronos@localhost / $ sudo crossystem dev_boot_usb=1
chronos@localhost / $ sudo crossystem dev_boot_altfw=1
Now plug in the USB and reboot the chromebook. When you see the white screen warning about thrid party operating systems, press CTRL+ALT+L and you'll see a prompt to select the USB device to boot from. Since you installed your distribution to your USB with persistence, your data will be saved to the USB. You will need to keep the USB plugged in all the time, and it may not be the best - but it works, and it's better then being stuck in CrOS.
NOTE: The old command for this was dev_boot_legacy, but it has since changed. We can see this when trying to set the old variable name, which leads us to setting dev_boot_altfw.
chronos@localhost / $ sudo crossystem dev_boot_legacy=1
Password:
!!!
!!! PLEASE USE 'dev_boot_altfw' INSTEAD OF 'dev_boot_legacy'
!!!
Booting From USB
That's it! Now be sure the USB is plugged in when you boot up your chromebook, you'll see a warning that 'OS Detection' is disabled, press CTRL+L and select your USB. Alternatively, to boot into CrOS instead, press CTRL+D when you see this message. Since we never actually wrote to the laptop's storage media, CrOS is still just fine and you can hop between that and the linux distribution you've installed on your USB. I usually browsed the web during class on CrOS, then switched over to my linux USB if we started to do some programming.
Since you created the USB with persistent data, you won't need to install the distribution, you can just use it as-is right off the USB drive. It's not ideal, you will run much slower than installing on an SSD or HDD, but this method got me through college on a budget when all I had to use for a laptop was a chromebook.
Using Crouton
Crouton allows you to install linux alongside ChromeOS on a chromebook. Click here to grab the latest crouton installer directly, or alternatively visit Crouton's Repository and click the goo link in the description for the same.
To sync your Chromebook's local clipboard with your Linux install, grab the Crouton extension from the Chrome Web Store.
Once you have this file, be sure it is found in your Chromebook's ~/Downloads directory using the file browser and run the commands below to install Linux -
# Install the crouton binary for use within your chromebook's shell
sudo install -Dt /usr/local/bin -m 755 ~/Downloads/crouton
# Passing -e for encryption, we install all the dependencies for X11 and name(-n) it i3
sudo crouton -e -t core,keyboard,audio,cli-extra,gtk-extra,extension,x11,xorg -n i3
# Enter the chroot
sudo enter-chroot -n i3
# Install i3
sudo apt install i3
# Tell Xorg to start i3 automatically
echo "exec i3" > ~/.xinitrc
# Exit the chroot
# Add an alias for starting i3 in crouton using X
sudo echo "alias starti3='sudo enter-chroot -n i3 xinit'" >> /home/chronos/user/.bashrc
Want i3-gaps instead? See the i3-gaps GitHub for instructions, or run the commands below.
sudo apt-get install software-properties-common
If you're unsure which Distro or DE to install, see the below commands for lists of supported versions.
# List supported Linux releases
sudo crouton -r list
# List supported Linux desktop environments
sudo crouton -t list
# Update chroot (you will need this eventually)
sudo crouton -u -n chrootname
Removing / editing chroots is done via the edit-chroot CLI -
# Print help text
sudo edit-chroot
# Remove chroot named i3
sudo edit-chroot -d i3
# Backup chroot
sudo edit-chroot -b chrootname
# Restore chroot from most recent tarball
sudo edit-chroot -r chrootname
# Restore from specific tarball (new machine?)
sudo edit-chroot -f mybackup.tar.gz
https://github.com/dnschneid/crouton https://github.com/pasiegel/i3-gaps-install-ubuntu/blob/master/i3-gaps https://launchpad.net/~simon-monette/+archive/ubuntu/i3-gaps https://stackoverflow.com/questions/53800051/repository-does-not-have-a-release-file-error
XPS 9310
I intalled my own SSD after purchasing a model from dell with a small SSD installed. This was mostly because I wanted to store the SSD from dell as-is in a box so if I had to submit a claim or sell the laptop later I could reinstall it and it would be as it arrived from dell brand new. The install of the SSD was not difficult but did require a plastic prybar tool for removing the back cover of the laptop. Be very careful not to use any hard tools or too much force or you could damage the chasis. I was able to replace the SSD several times without issue and no damage to the chasis.

The heat shield removed, and my new SSD installed. Of course, be sure to put the heat shield back before closing up the laptop.
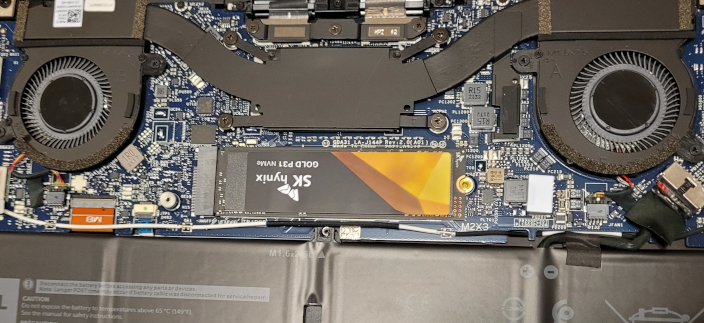
Dell provides service manuals for all laptops, check Dell's website for instructions. You'll just need to remove the back plate, then remove a heat shield over the SSD, then swap out the M.2 for your own. It's really not too difficult, but the back plate was a challenege the first time around. You'll get a feel for it after that, just be careful and take your time as your top priority should be to not damage the thing. Putting the back plate back on is also a bit strange, just follow the service manual. Start from the hinges and rotate the plate down into place. It should not require a lot of force, so be careful.
You'll need a Torx-5 screwdriver for the chasis, and I used a common Craftsman 6-in-1 screwdriver for the M.2. Don't use too small of a screwdriver on the M.2 screw, or you'll strip it out. Dell service manual has exact sizes for all screw heads.
WiFi worked out of the box on Kubuntu 20.04.
Had issues with Steam download speeds, see Steam section for details.
Fingerprint reader works, haven't configured my display manager to use it for login yet. See fingerprint section for details.
Iris graphics device works out of the box. OpenGL detects graphics interface.
OpenGL 4.6 (Core Profile) Mesa 21.0.3 ( CoreProfile )
OpenGL Vendor: Intel
Rendering Device: Mesa Intel(R) Xe Graphics (TGL GT2)
Some output from lscpu for context -
kapper@xps:~/Code/qtk/build$ lscpu
Architecture: x86_64
CPU op-mode(s): 32-bit, 64-bit
Byte Order: Little Endian
Address sizes: 39 bits physical, 48 bits virtual
CPU(s): 8
On-line CPU(s) list: 0-7
Thread(s) per core: 2
Core(s) per socket: 4
Socket(s): 1
NUMA node(s): 1
Vendor ID: GenuineIntel
CPU family: 6
Model: 140
Model name: 11th Gen Intel(R) Core(TM) i7-1195G7 @ 2.90GHz
Stepping: 2
CPU MHz: 2504.062
CPU max MHz: 5000.0000
CPU min MHz: 400.0000
BogoMIPS: 5836.80
Virtualization: VT-x
L1d cache: 192 KiB
L1i cache: 128 KiB
L2 cache: 5 MiB
L3 cache: 12 MiB
NUMA node0 CPU(s): 0-7
Dell XPS Linux Drivers
First, search for Dell's OEM driver package for the XPS 13 9300 oem-somerville-melisa-meta.
sudo apt search "XPS 13 9300"
Sorting... Done
Full Text Search... Done
oem-somerville-factory-melisa-meta/unknown,unknown 20.04ubuntu12 all
hardware support for Dell XPS 13 9300
oem-somerville-melisa-meta/unknown,unknown,now 20.04ubuntu12 all [installed]
hardware support for Dell XPS 13 9300
Now, install both packages, and then update the package registry. We're updating because installing the somerville packages adds additional package repositories to our apt sources -
sudo apt install oem-somerville-melisa-meta oem-somerville-factory-melisa-meta && sudo apt update
Now you have installed factory drivers and updated your apt package registry to include additional drivers you can optionally download. To install fingerprint reader drivers, we will need the packages in these repositories.
Application Shortcuts
This is more of a Linux / Kubuntu thing, but it was a lot of help in setting up the XPS 9310 to use the start menu for launching custom AppImages, commands, and executables stored in /opt/.
ls ~/.local/share/applications
'7 Days to Die.desktop' jetbrains-datagrip.desktop jetbrains-webstorm.desktop
bitwarden.desktop jetbrains-dataspell.desktop 'Medieval Dynasty.desktop'
'Cities Skylines.desktop' jetbrains-goland.desktop mimeinfo.cache
CryoFall.desktop jetbrains-pycharm.desktop 'Oxygen Not Included.desktop'
'Gunfire Reborn.desktop' jetbrains-rider.desktop Rust.desktop
Icarus.desktop jetbrains-rubymine.desktop unity-hub.desktop
jetbrains-clion.desktop jetbrains-toolbox.desktop
Here's an example of running the exeuctable at /opt/bitwarden to start the Bitwarden Linux client. For the Icon, you can just go online and download any .ico or .png file and use a full path to it.
[Desktop Entry]
Comment[en_US]=
Comment=
Exec=/opt/bitwarden
GenericName[en_US]=
GenericName=
Icon=/home/kapper/Documents/Icons/bitwarden_icon.ico
MimeType=
Name[en_US]=Bitwarden
Name=Bitwarden
Path=
StartupNotify=true
Terminal=false
TerminalOptions=
Type=Application
X-DBUS-ServiceName=
X-DBUS-StartupType=
X-KDE-SubstituteUID=false
X-KDE-Username=
Hidden=false
The libreoffice package installs a desktop file that customizes the right-click conext menu. See below for an example.
# sudo apt install libreoffice
# sudoedit /usr/share/applications/libreoffice-startcenter.desktop
[Desktop Entry]
Version=1.0
Terminal=false
NoDisplay=false
Icon=libreoffice-startcenter
Type=Application
Categories=Office;X-Red-Hat-Base;X-SuSE-Core-Office;X-MandrivaLinux-Office-Other;
Exec=libreoffice %U
MimeType=application/vnd.openofficeorg.extension;x-scheme-handler/vnd.libreoffice.cmis;
Name=LibreOffice
GenericName=Office
Comment=The office productivity suite compatible to the open and standardized ODF document for
mat. Supported by The Document Foundation.
StartupNotify=true
X-GIO-NoFuse=true
StartupWMClass=libreoffice-startcenter
X-KDE-Protocols=file,http,ftp,webdav,webdavs
X-AppStream-Ignore=True
NotShowIn=GNOME;
##Define Actions
Actions=Writer;Calc;Impress;Draw;Base;Math;
[Desktop Action Writer]
Name=Writer
Exec=libreoffice --writer
[Desktop Action Calc]
Name=Calc
Exec=libreoffice --calc
[Desktop Action Impress]
Name=Impress
Exec=libreoffice --impress
[Desktop Action Draw]
Name=Draw
Exec=libreoffice --draw
[Desktop Action Base]
Name=Base
Exec=libreoffice --base
[Desktop Action Math]
Name=Math
Exec=libreoffice --math
##End of actions menu
BIOS Upgrade
Only perform these commands when you have access to power, and the laptop is plugged in. If the laptop shuts down unexpectedly, you will have serious issues and will probably need to ship your machine to dell for a fix.
fwupdmgr get-devices
fwupdmgr refresh --force
fwupdmgr get-updates
fwupdmgr update
Then reboot the PC when connected to AC power and the BIOS update will start.
Steam
Bad download speeds on Steam
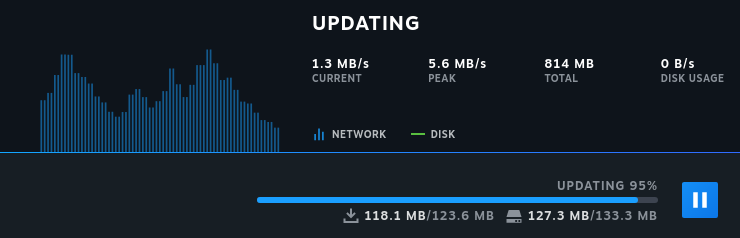
Download speeds fixed by disabling IPv6. After running the commands below and restarting Steam -
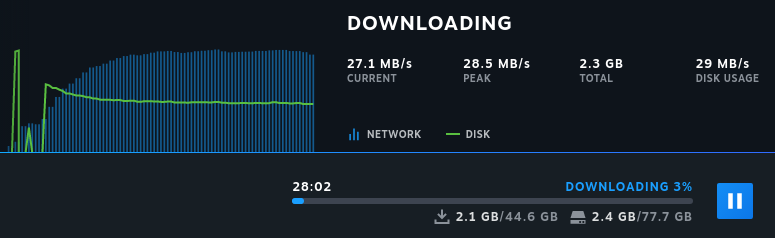
Followed instructions on linuxconfig.org
sudo sysctl -w net.ipv6.conf.all.disable_ipv6=1
sudo sysctl -w net.ipv6.conf.default.disable_ipv6=1
You should restart Steam if it is already running when changing these settings. There will be no notification to tell you to do so, but you could experience connection issues until you do.
You can enable IPv6 later with the opposite of these commands
sudo sysctl -w net.ipv6.conf.all.disable_ipv6=0
sudo sysctl -w net.ipv6.conf.default.disable_ipv6=0
To make this setting persist, you can add the lines above to the /etc/sysctl.conf configuration file. There will be a lot of comments and information in this file when you open it for editing, but just add the lines below and when you reboot the settings will be applied automatically.
#/etc/sysctl.conf
net.ipv6.conf.all.disable_ipv6=1
net.ipv6.conf.default.disable_ipv6=1
To check if we missed any settings, we can use the sysctl CLI -
sudo sysctl -a | grep disable_ipv6
net.ipv6.conf.all.disable_ipv6 = 1
net.ipv6.conf.default.disable_ipv6 = 1
net.ipv6.conf.lo.disable_ipv6 = 1
net.ipv6.conf.wlp0s20f3.disable_ipv6 = 1
These additional settings can be added to our configurations if needed.
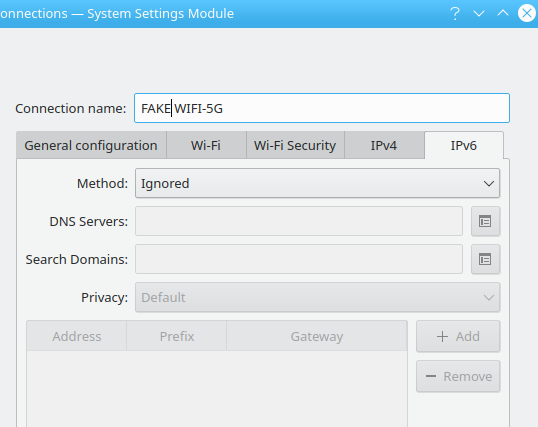
Editing the /etc/sysctl.conf file did not make these settings persist between reboots. What I ended up doing was just editing the connection settings using the default network manager that comes installed with Kubuntu in a Plasma desktop session. This is simply right-clicking the wifi icon in the start menu and editing the connections in the GUI window, or you can run kcmshell5 kcm_networkmanagement to open the same GUI directly from a console. The added benefit to doing it this way is you don't need to modify any kernel options, so the only time your computer will ignore IPv6 is if you're using this specific connection. Otherwise, IPv6 will be enabled as normal.
Fingerprint
Install the fingerprint reader drivers. To get these, you must have installed oem-somerville package in the first section.
sudo apt install libfprint-2-tod1-goodix
That's it! Now the fingerprint reader will work, but I haven't configured it to be used for any login or lock screen yet on Kubuntu. To enroll a fingerprint for the kapper user, run the command below
fprintd-enroll kapper -f right-index-finger
And to test, run the following command
fprintd-verify kapper -f right-index-finger
Using device /net/reactivated/Fprint/Device/0
Listing enrolled fingers:
- #0: left-index-finger
- #1: right-index-finger
Verify started!
Verifying: right-index-finger
Verify result: verify-match (done)
Battery Life Improvements
To improve battery I installed tlp and configured /etc/tlp.d/01-kapper.conf. These settings will be loaded the next time you reboot, or you can run tlp start to load the settings now without rebooting.
First, to see what the min and max frequency is for our CPU we should run the following command and check the output
sudo tlp-stat -p
--- TLP 1.3.1 --------------------------------------------
+++ Processor
CPU model = 11th Gen Intel(R) Core(TM) i7-1195G7 @ 2.90GHz
/sys/devices/system/cpu/cpu0/cpufreq/scaling_driver = intel_pstate
/sys/devices/system/cpu/cpu0/cpufreq/scaling_governor = powersave
/sys/devices/system/cpu/cpu0/cpufreq/scaling_available_governors = performance powersave
/sys/devices/system/cpu/cpu0/cpufreq/scaling_min_freq = 400000 [kHz]
/sys/devices/system/cpu/cpu0/cpufreq/scaling_max_freq = 5000000 [kHz]
/sys/devices/system/cpu/cpu0/cpufreq/energy_performance_preference = balance_power [HWP.EPP]
/sys/devices/system/cpu/cpu0/cpufreq/energy_performance_available_preferences = default performance balance_performance balance_power power
/sys/devices/system/cpu/cpu1/cpufreq/scaling_driver = intel_pstate
/sys/devices/system/cpu/cpu1/cpufreq/scaling_governor = powersave
/sys/devices/system/cpu/cpu1/cpufreq/scaling_available_governors = performance powersave
/sys/devices/system/cpu/cpu1/cpufreq/scaling_min_freq = 400000 [kHz]
/sys/devices/system/cpu/cpu1/cpufreq/scaling_max_freq = 4800000 [kHz]
/sys/devices/system/cpu/cpu1/cpufreq/energy_performance_preference = balance_power [HWP.EPP]
/sys/devices/system/cpu/cpu1/cpufreq/energy_performance_available_preferences = default performance balance_performance balance_power power
/sys/devices/system/cpu/cpu2/cpufreq/scaling_driver = intel_pstate
/sys/devices/system/cpu/cpu2/cpufreq/scaling_governor = powersave
/sys/devices/system/cpu/cpu2/cpufreq/scaling_available_governors = performance powersave
/sys/devices/system/cpu/cpu2/cpufreq/scaling_min_freq = 400000 [kHz]
/sys/devices/system/cpu/cpu2/cpufreq/scaling_max_freq = 4800000 [kHz]
/sys/devices/system/cpu/cpu2/cpufreq/energy_performance_preference = balance_power [HWP.EPP]
/sys/devices/system/cpu/cpu2/cpufreq/energy_performance_available_preferences = default performance balance_performance balance_power power
/sys/devices/system/cpu/cpu3/cpufreq/scaling_driver = intel_pstate
/sys/devices/system/cpu/cpu3/cpufreq/scaling_governor = powersave
/sys/devices/system/cpu/cpu3/cpufreq/scaling_available_governors = performance powersave
/sys/devices/system/cpu/cpu3/cpufreq/scaling_min_freq = 400000 [kHz]
/sys/devices/system/cpu/cpu3/cpufreq/scaling_max_freq = 5000000 [kHz]
/sys/devices/system/cpu/cpu3/cpufreq/energy_performance_preference = balance_power [HWP.EPP]
/sys/devices/system/cpu/cpu3/cpufreq/energy_performance_available_preferences = default performance balance_performance balance_power power
/sys/devices/system/cpu/cpu4/cpufreq/scaling_driver = intel_pstate
/sys/devices/system/cpu/cpu4/cpufreq/scaling_governor = powersave
/sys/devices/system/cpu/cpu4/cpufreq/scaling_available_governors = performance powersave
/sys/devices/system/cpu/cpu4/cpufreq/scaling_min_freq = 400000 [kHz]
/sys/devices/system/cpu/cpu4/cpufreq/scaling_max_freq = 5000000 [kHz]
/sys/devices/system/cpu/cpu4/cpufreq/energy_performance_preference = balance_power [HWP.EPP]
/sys/devices/system/cpu/cpu4/cpufreq/energy_performance_available_preferences = default performance balance_performance balance_power power
/sys/devices/system/cpu/cpu5/cpufreq/scaling_driver = intel_pstate
/sys/devices/system/cpu/cpu5/cpufreq/scaling_governor = powersave
/sys/devices/system/cpu/cpu5/cpufreq/scaling_available_governors = performance powersave
/sys/devices/system/cpu/cpu5/cpufreq/scaling_min_freq = 400000 [kHz]
/sys/devices/system/cpu/cpu5/cpufreq/scaling_max_freq = 4800000 [kHz]
/sys/devices/system/cpu/cpu5/cpufreq/energy_performance_preference = balance_power [HWP.EPP]
/sys/devices/system/cpu/cpu5/cpufreq/energy_performance_available_preferences = default performance balance_performance balance_power power
/sys/devices/system/cpu/cpu6/cpufreq/scaling_driver = intel_pstate
/sys/devices/system/cpu/cpu6/cpufreq/scaling_governor = powersave
/sys/devices/system/cpu/cpu6/cpufreq/scaling_available_governors = performance powersave
/sys/devices/system/cpu/cpu6/cpufreq/scaling_min_freq = 400000 [kHz]
/sys/devices/system/cpu/cpu6/cpufreq/scaling_max_freq = 4800000 [kHz]
/sys/devices/system/cpu/cpu6/cpufreq/energy_performance_preference = balance_power [HWP.EPP]
/sys/devices/system/cpu/cpu6/cpufreq/energy_performance_available_preferences = default performance balance_performance balance_power power
/sys/devices/system/cpu/cpu7/cpufreq/scaling_driver = intel_pstate
/sys/devices/system/cpu/cpu7/cpufreq/scaling_governor = powersave
/sys/devices/system/cpu/cpu7/cpufreq/scaling_available_governors = performance powersave
/sys/devices/system/cpu/cpu7/cpufreq/scaling_min_freq = 400000 [kHz]
/sys/devices/system/cpu/cpu7/cpufreq/scaling_max_freq = 5000000 [kHz]
/sys/devices/system/cpu/cpu7/cpufreq/energy_performance_preference = balance_power [HWP.EPP]
/sys/devices/system/cpu/cpu7/cpufreq/energy_performance_available_preferences = default performance balance_performance balance_power power
/sys/devices/system/cpu/intel_pstate/min_perf_pct = 8 [%]
/sys/devices/system/cpu/intel_pstate/max_perf_pct = 100 [%]
/sys/devices/system/cpu/intel_pstate/no_turbo = 0
/sys/devices/system/cpu/intel_pstate/turbo_pct = 45 [%]
/sys/devices/system/cpu/intel_pstate/num_pstates = 47
/sys/module/workqueue/parameters/power_efficient = Y
/proc/sys/kernel/nmi_watchdog = 0
We can see our min and max CPU frequency is 400000 and 5000000
Next, we should check the frequency for our GPU. For me, this is an integrated intel CPU. To check the min and maximum frequencies I ran the following command
sudo tlp-stat -g
--- TLP 1.3.1 --------------------------------------------
+++ Intel Graphics
/sys/module/i915/parameters/enable_dc = -1 (use per-chip default)
/sys/module/i915/parameters/enable_fbc = -1 (use per-chip default)
/sys/module/i915/parameters/enable_psr = -1 (use per-chip default)
/sys/module/i915/parameters/modeset = -1 (use per-chip default)
/sys/class/drm/card0/gt_min_freq_mhz = 100 [MHz]
/sys/class/drm/card0/gt_max_freq_mhz = 1400 [MHz]
/sys/class/drm/card0/gt_boost_freq_mhz = 1400 [MHz]
The minimum and maximum frequency for my GPU is 100 and 1400
Using only this information and my own personal preferences, this is my configuration at /etc/01-kapepr.conf. To create this I just looked through the settings in /etc/tlp.conf and copied over the interesting ones.
TLP_ENABLE=1
TLP_DEFAULT_MODE=AC
# By checking output of `tlp-stat -p`
# + My CPU min freq is 400000; max is 5000000
CPU_SCALING_MIN_FREQ_ON_AC=400000
CPU_SCALING_MAX_FREQ_ON_AC=5000000
CPU_SCALING_MIN_FREQ_ON_BAT=400000
CPU_SCALING_MAX_FREQ_ON_BAT=1000000
# By checking output of `tlp-stat -g`
# + My Intel GPU min freq is 100; Max is 1400; Boost is 1400
INTEL_GPU_MIN_FREQ_ON_AC=100
INTEL_GPU_MAX_FREQ_ON_AC=1400
INTEL_GPU_BOOST_FREQ_ON_AC=1400
INTEL_GPU_MIN_FREQ_ON_BAT=100
INTEL_GPU_MAX_FREQ_ON_BAT=1000
INTEL_GPU_BOOST_FREQ_ON_BAT=1000
# Default: off (AC), on (BAT)
WIFI_PWR_ON_AC=off
WIFI_PWR_ON_BAT=on
# Set to 0 to disable, 1 to enable USB autosuspend feature.
# Default: 1
USB_AUTOSUSPEND=1
# Exclude listed devices from USB autosuspend (separate with spaces).
# Use lsusb to get the ids.
# Note: input devices (usbhid) are excluded automatically
# Default: <none>
#USB_BLACKLIST="1111:2222 3333:4444"
# Bluetooth devices are excluded from USB autosuspend:
# 0=do not exclude, 1=exclude.
# Default: 0
USB_BLACKLIST_BTUSB=0
# Radio devices to disable on startup: bluetooth, wifi, wwan.
# Separate multiple devices with spaces.
# Default: <none>
DEVICES_TO_DISABLE_ON_STARTUP="bluetooth"
# Radio devices to disable on battery: bluetooth, wifi, wwan.
# Default: <none>
#DEVICES_TO_DISABLE_ON_BAT="bluetooth"
# Radio devices to disable on battery when not in use (not connected):
# bluetooth, wifi, wwan.
# Default: <none>
DEVICES_TO_DISABLE_ON_BAT_NOT_IN_USE="bluetooth"
Do't forget to run tlp start or reboot to apply the changes.
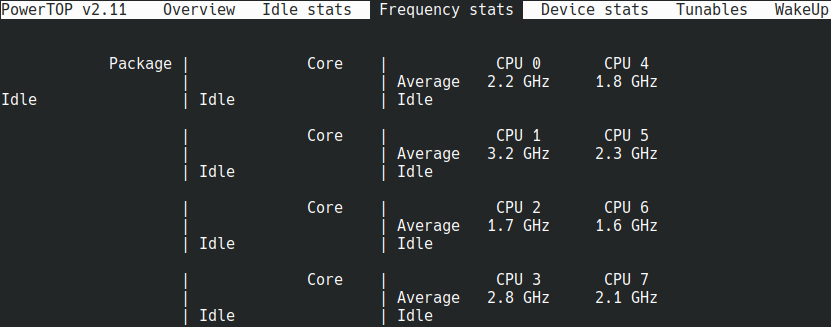
To see that the settings have been applied, you can check on your CPU frequencies and battery usage with and without tlp. Run sudo powertop and check the different tabs. Here's my CPU frequencies without tlp enabled -
And here it is with tlp enabled
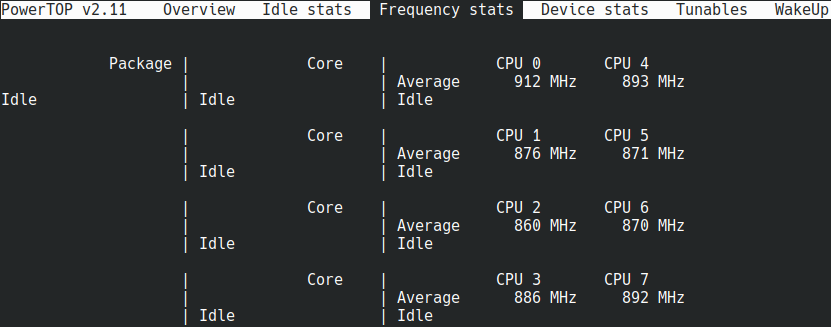
And i'm seeing an hour or two extra on battery life in general. Maybe more in extreme cases where I'm doing really light browsing and not using bluetooth, low backlight, now keyboard backlight, etc.

Docker Power Usage
Surprisingly, I found through monitoring battery usage with powertop that since installing docker I've seen an increase of around ~3W consistent power draw when using my laptop.
This is an insane amount of power draw, - actually it's over 30% of my total power consumtion. To disable the docker network interface causing this power drain, run the following command
sudo ifconfig docker0 down
And when you're actually doing docker things, you can reenable it with a similiar command
sudo ifconfig docker0 up
I just can't reason with leaving this enabled all the time. The docker0 network interface consumes more battery than my display at times, and I can't help but feel that's an unreasonable amount of power draw for something I'm only using some of the time.
Bash
Bash Profiles
The following block contains a list of files related to bash, and their location / use.
/bin/bash
The bash executable
/etc/bash.bashrc
The system-wide bashrc for interactive bash shells, invoked on any login to an interactive shell.
/etc/skel/.bashrc
Used as a template for new users when initializing a basic .bashrc in their home directory.
/etc/profile
The systemwide initialization file, executed for login shells
/etc/bash.bash_logout
The systemwide login shell cleanup file, executed when a login shell exits
~/.bash_profile
The personal initialization file, executed for login shells
~/.bashrc
The individual per-interactive-shell startup file
~/.bash_aliases
An optional file sourced by .bashrc by default
~/.bash_logout
The individual login shell cleanup file, executed when a login shell exits
For more help, you can refer to the references and examples in /usr/share/doc/bash/, or if you don't have these files you can download them on Ubuntu with sudo apt install bash-doc and see the /usr/share/doc/bash-doc/ directory. To help you explore these files, consider installing the terminal file browser ranger with sudo apt install ranger. If it is a .html file, open it in a web browser to browse the file easily.
Creating Shells
From within man bash, we can find the following explanation for the creation of an interactive bash shell -
When bash is invoked as an interactive login shell, or as a non-interactive shell with the --login option, it first reads and executes commands from the file /etc/profile, if that file exists. After reading that file, it looks for ~/.bash_profile, ~/.bash_login, and ~/.profile, in that order, and reads and executes commands from the first one that exists and is readable. The --noprofile option may be used when the shell is started to inhibit this behavior.
What this means is when a bash session is started that allows the user to interact with it by reading and writing, it will read from the /etc/profile. After reading from this file, it will look for one of three files within the user's home directory and read the first one that exists. This means that we can use the /etc/profile file to set system-wide settings for all interactive terminal sessions. For me, this is useful to set the editor for all users to default to Vim with the exports to EDITOR and VISUAL below - if they want to override it, they can.
System Profile
First, the default /etc/profile/ can be seen in the code block below. I wrote some comments in the file to explain what the script is doing.
# /etc/profile: system-wide .profile file for the Bourne shell (sh(1))
# and Bourne compatible shells (bash(1), ksh(1), ash(1), ...).
# This line sets the system-wide default text editor to vim
export EDITOR='/usr/bin/vim'
export VISUAL='/usr/bin/vim'
if [ "${PS1-}" ]; then
if [ "${BASH-}" ] && [ "$BASH" != "/bin/sh" ]; then
# The file bash.bashrc already sets the default PS1.
# PS1='\h:\w\$ '
if [ -f /etc/bash.bashrc ]; then
. /etc/bash.bashrc
fi
else
if [ "`id -u`" -eq 0 ]; then
PS1='# '
# This block allows for configuring any user whos id == 0
# In other words, these settings will be applied to the root user only.
else
PS1='$ '
# These settings will apply in all other cases, system-wide
# In other words, upon successful login to an authroized user who is not root, this block will be executed
fi
fi
fi
# If the directory /etc/profile.d/ exists, source every file within it
# + See this directory for system defaults for interactive login shells for various programs
if [ -d /etc/profile.d ]; then
for i in /etc/profile.d/*.sh; do
if [ -r $i ]; then
. $i
fi
done
unset i
fi
The above /etc/profile configuration will set the default editor to vim, system-wide, regardless of which user is logged in. This includes the root user. Users can choose to override this in their own ~/.bashrc, but users won't be prompted to select their default editor since the system will now use Vim by default.
If you want to specify which user, or if you want to handle the root user independent from the rest of the system, take a closer look at the comments I've added in the above configuration file and modify as needed. You could specify a user ID here to source additional files, or you could just handle that sort of thing in that user's ~/.bashrc.
If you are trying to use the default text editor for any command ran with sudo, be sure that you pass either the -E or --preserve-env argument. So, if we wanted to preserve our environment settings for the default text editor Vim when running vigr or visudo we would simply run sudo -E vigr or sudo --preserve-env visudo to ensure these settings are referred to when using sudo
User Profiles
After reading from /etc/profile/, bash looks for one of three files - ~/.bash_profile, ~/.bash_login, and ~/.profile, in that order. The first file that exists is sourced and bash stops looking. For evidence of this, notice the comments in the first few lines of the ~/.profile file descibed by man bash that points out the file's order of execution. Just after, within the first condition of the file, it becomes obvious where ~/.bashrc comes into play and things start to come to an end -
# ~/.profile: executed by the command interpreter for login shells.
# This file is not read by bash(1), if ~/.bash_profile or ~/.bash_login
# exists.
# see /usr/share/doc/bash/examples/startup-files for examples.
# the files are located in the bash-doc package.
# the default umask is set in /etc/profile; for setting the umask
# for ssh logins, install and configure the libpam-umask package.
#umask 022
# if running bash
if [ -n "$BASH_VERSION" ]; then
# Include ~/.bashrc if it exists
if [ -f "$HOME/.bashrc" ]; then
. "$HOME/.bashrc"
fi
fi
# set PATH so it includes user's private bin if it exists
# + Any executables added to this directory will exist on your PATH
if [ -d "$HOME/bin" ] ; then
PATH="$HOME/bin:$PATH"
fi
# set PATH so it includes user's private bin if it exists (Alternate path)
# + Any executables added to this directory will exist on your PATH
if [ -d "$HOME/.local/bin" ] ; then
PATH="$HOME/.local/bin:$PATH"
fi
All my ~/.profile is doing above is sourcing the ~/.bashrc file if it exists, and then adding some default directories to my user's PATH, if they exist. On different systems this can be handled differently. For example, below is an example of the same thing happening in a ~/.bash_profile -
if [ -f ~/.bashrc ]; then . ~/.bashrc; fi
So we know now that when you want to edit settings for certain users who invoke their own interactive shells, the ~/.bashrc file should be created or reconfigured. The rest of the page below will show some basic syntax for editing the ~/.bashrc file, along with some examples.
Interactive Shells
An interactive shell is one that can read and write to the user's terminal. This means that bash can take input from the user and provide some input back to them as a result. As described on the GNU Bash documentation, these shells often define the PS1 variable which we will cover later. This variable describes how the user's bash prompt should appear within their session, and can often be fun or useful to customize. To start an interactive shell, you often use a login shell since you need to first authenticate with the system. On some more feature-rich systems though, you can start an interactive shell as a non-login shell, for example if you run a terminal application and you are already logged in - you are starting a new interactive shell without logging in, so you are in a non-login interactve shell.
Non-interactive Shells
An example of a non-interactive shell is one which does not take input and often does not provide output. An example of these could be running a script, when we invoke the script we start a new shell that runs that script - this shell is non-interactive. These shells do require login, since they are invoked by users who are already logged in, so they are also considered to be a non-login shell.
Skeleton Configurations
As stated in the first section, the /etc/skel/ directory contains files that are distributed to each new user created on our system. This is useful to know, since we can directly modify these files to provide different default configurations provided when new users are created. This can be a nice way to ensure that all users start with the same aliases, or are shown a similar prompt. We can even specify other defaults here, like providing a default .vimrc to distribute to new users, or setting certain shell options.
Customizing Bashrc
Once logged in as your bash user, you can adjust your personal bash settings by modifying ~/.bashrc, or /home/username/.bashrc. If the file doesn't exist, you can just create it and follow along with no additional setup required. If this file exists, it can at first be a lot to look at, but some of the more important lines to consider are seen below -
Bash prompt
# This controls how your prompt looks within terminals logged in as your user
if [ "$color_prompt" = yes ]; then
PS1='${debian_chroot:+($debian_chroot)}\[\033[01;32m\]\u@\h\[\033[00m\]:\[\033[01;34m\]\w\[\033[00m\]\$ '
else
PS1='${debian_chroot:+($debian_chroot)}\u@\h:\w\$ '
fi
Alias / export customizations
# some more ls aliases
alias ll='ls -alF'
alias la='ls -A'
alias l='ls -CF'
Additional files to source
# You may want to put all your additions into a separate file like
# ~/.bash_aliases, instead of adding them here directly.
# See /usr/share/doc/bash-doc/examples in the bash-doc package.
if [ -f ~/.bash_aliases ]; then
. ~/.bash_aliases
fi1
Auto-completion
# enable programmable completion features (you don't need to enable
# this for each user, if it's already enabled in /etc/bash.bashrc and /etc/profile
if ! shopt -oq posix; then
if [ -f /usr/share/bash-completion/bash_completion ]; then
. /usr/share/bash-completion/bash_completion
elif [ -f /etc/bash_completion ]; then
. /etc/bash_completion
fi
fi
Environment Variables
PS1: Environment variable which contains the value of the default prompt. It changes the shell command prompt appearance.
kapper@kubuntu-vbox $ export PS1='[\u@\h \W]\$'
[kapper@kubuntu-vbox ~]$
PS2: Environment variable which contains the value the prompt used for a command continuation interpretation. You see it when you write a long command in many lines. In most cases, this is set to > , and is seen below after using the \ character to break the command into several lines -
[kapper@kubuntu-vbox ~]$ export PS2='--> '
[kapper@kubuntu-vbox ~]$ cp /some/really/long/system/path/fileOne \
--> fileTwo
PS3: Environment variable which contains the value of the prompt for the select operator inside the shell script.
PS4: Environment variable which contains the value of the prompt used to show script lines during the execution of a bash script in debug mode. This could be used to show the line number at the current point of execution -
# $0 is the current file being executed, $LINENO is the current line number
[kapper@kubuntu-vbox ~]$ export PS4='$0:$LINENO'
[kapper@kubuntu-vbox ~]$ bash -x fix-vbox.sh
fix-vbox.sh:5grep 'VBoxClient --draganddrop'
fix-vbox.sh:6awk '{print $2}'
fix-vbox.sh:7xargs kill
fix-vbox.sh:8ps aux www
PROMPT_COMMAND: Environment variable which contains command(s) to run before printing the prompt within the terminal.
[kapper@kubuntu-vbox ~]$export PROMPT_COMMAND='echo -n "$(date): " && pwd'
Sun 12 Sep 2021 05:00:55 PM EDT: /home/kapper
[kapper@kubuntu-vbox ~]$ls
Desktop Music Pictures Videos
Code Public Documents Downloads
Sun 12 Sep 2021 05:01:02 PM EDT: /home/kapper
Bash Aliases
Create a list of aliases within your home directory inside a file named .bash_aliases, and add any custom aliases or PATH modifications there. The file may not exist, and if it doesn't just create one and start listing aliases or settings. This way when you want to adjust something like your PATH or aliases, you don't have to dig through all the contents of .bashrc. For example, some of the contents of my ~/.bash_aliases is seen below. This file will automatically be sourced by bash when logging into our user, in addition to the contents of the ~/.bashrc.
# Alias / export customizations
alias gitkapp='git config --global user.name "Shaun Reed" && git config --global user.email "shaunrd0@gmail.com"'
# colored GCC warnings and errors
export GCC_COLORS='error=01;31:warning=01;35:note=01;36:caret=01;32:locus=01:quote=01'
# some more ls aliases
alias ll='ls -alF'
alias la='ls -A'
alias l='ls -CF'
The gitkapp alias above is a quick way of telling git who I am when logged in as a new user. You could imagine having more versions of this alias to switch to different git users quickly. Alternatively, you could use the git config --local ... command within the alias to automate configuring a specific repository for a certain user in a single command without modifying your global git user. Aliases even automatically show up using auto completion -
[user@host ~]$git
git git-shell git-upload-pack
git-receive-pack git-upload-archive gitkapp
[user@host ~]$gitkapp
Identifying Unicode Symbols for use in .bashrc
Character search engine
If you dont have access to a terminal, you can search up a symbol to get UTF8, see the below character and the corresponding UTF8 format as an example. ഽ = 0xE0 0xB4 0xBD
To output this symbol in a bash terminal using this hex value, we can test with echo -
echo -e '\xe0\xb4\xbd'
Note that these hexidecimal values are not case sensitive.
Hexdump unicode symbol
Most linux systems already have hexdump installed, so we could also run echo ✓ | hexdump -C to see the following output. Note that the -C option displays character data in hexidecimal ascii format -
[kapper@kubuntu-vbox ~]$echo ✓ | hexdump -C
00000000 e2 9c 93 0a |....|
00000004
From this output, we can see that the UTF8 hexidecimal format of our symbol is e2 9c 93. Using this information, we can test the character with the echo statement below.
echo -e '\xe2\x9c\x93'
This will out our ✓ symbol, colored green. \001\033[1;32m\002 Begins the green color, and \001\033[0m\002 returns to
echo -e '\001\033[1;32m\002\xe2\x9c\x93\001\033[0m\002'
Unicode.vim
Worth mentioning that if you are using vim, an easy to use plugin that is useful for identifying characters is unicode.vim. See my notes on Unicode vim plugin for more information, or check out the official Unicode vim repository.
In any case, when using special characters and symbols in an assignment to PS1, you need to tell bash to interpret these values with a $ before opening your single-quotes, as in export PS1=$'\xe2\x9c\x93'
Bash Prompt
Your bash prompt is seen before you type a command -
user@host:~/$
The prompt above, user@host:~/$, is defined by the PS1 variable within your ~/.bashrc where \u is your username user, and \h is the hostname host in the prompt above. The \w in the prompt is what places our current directory ~/ before the final $ within the prompt -
# Bash prompt settings
if [ "$color_prompt" = yes ]; then
PS1='${debian_chroot:+($debian_chroot)}\[\033[01;32m\]\u@\h\[\033[00m\]:\[\033[01;34m\]\w\[\033[00m\]\$ '
else
PS1='${debian_chroot:+($debian_chroot)}\u@\h:\w\$ '
fi
By default within your .bashrc there's two settings to configure, the first block includes color, the second does not. When first learning about the prompt and all the available options like \u, \h, and \w, it might be easier to look at the second prompt without the escape sequences for adding color. As we will see later, care must be taken to properly escape non-printing characters within your prompt, specifically color codes. That is the meaning of character sequences like \[\033[01;32m\] or \001\033[01;32m\002. Later we will cover the meaning of these symbols and how to properly organize them within your prompt.
You can change this prompt using the variety of settings below. Test your prompts with export PS1='<YOUR_PROMPT_HERE>' and after you've got a good export working, paste it into the ~/.bashrc to apply your changes each time you login. If you do not put the PS1 assignment within your ~/.bashrc and log out of your terminal with an export applied, when you login it will be overwritten by the code above.
The ${debian_chroot:+($debian_chroot)} portion of PS1 above only impacts our shell when we are using a chroot, which is a way of chaging the root directory of the system into a smaller virtualized environment that exists within the system. So if we are using a chroot, the we will see the following prompt -
(chroot-name)user@host:~/$
You can remove this ${debian_chroot:+($debian_chroot)} portion or leave it, entirely up to you.
Prompt Options
When setting your bash prompt, we have the following options available to use. Options are useful for getting information from the current bash session dynamically. For example, \u can be used to place the current username in the prompt, and \h will print the hostname. So the prompt export PS1='\u@\h: will make our prompt username@hostname:
\a The ASCII bell character (you can also type \007)
\d Date in “Sat Sep 04″ format
\e ASCII escape character (you can also type \033 or \x1B)
\h First part of hostname (such as “mybox”)
\H Full hostname (such as “mybox.mydomain.com”)
\j The number of processes you’ve suspended in this shell by hitting ^Z
\l The name of the shell’s terminal device (such as “ttyp4″)
\n Newline
\r Carriage return
\s The name of the shell executable (such as “bash”)
\t Time in 24-hour format (such as “23:59:59″)
\T Time in 12-hour format (such as “11:59:59″)
\@ Time in 12-hour format with am/pm
\u Your username
\v Version of bash (such as 2.04)
\V Bash version, including patchlevel
\w Current working directory (such as “/home/kapper”)
\W The “basename” of the current working directory (such as “kapper”)
\! Current command’s position in the history buffer
\# Command number (this will count up at each prompt, as long as you type something)
\$ If you are not root, inserts a “$”; if you are root, you get a “#”
\xxx Inserts an ASCII character based on three-digit number xxx (replace unused digits with zeros, such as “\007″)
\\ A backslash
\[ This sequence should appear before a sequence of characters that don’t move the cursor (like color escape sequences). This allows bash to calculate word wrapping correctly.
\] Same as \002, This sequence should appear after a sequence of non-printing characters.
\001 can be used directly in place of \[ and is recommended as a more portable option
\002 can be used directly in place of \] and is recommended as a more portable option
Background color codes
This section will cover using escape sequences to change the background color used within your bash prompt. This will have the effect of 'highlighting' the text in a certain color.
The following sequences can be used to set attributes that impact the background color of text print within a bash terminal. Notice that each color has a corresponding light color by changing the leading 4 to a 10. For example, in the color sequence [42m and [102m for green and light green background colors, respectively -
| Default color | \001\033[0;49m\002 | ||
| Black | \001\033[0;40m\002 | White | \001\033[0;107m\002 |
| Light Gray | \001\033[0;47m\002 | Dark Gray | \001\033[0;100m\002 |
| Red | \001\033[0;41m\002 | Light Red | \001\033[0;101m\002 |
| Green | \001\033[0;42m\002 | Light Green | \001\033[0;102m\002 |
| Yellow | \001\033[0;43m\002 | Light Yellow | \001\033[0;103m\002 |
| Blue | \001\033[0;44m\002 | Light Blue | \001\033[0;104m\002 |
| Magenta | \001\033[0;45m\002 | Light Magenta | \001\033[0;105m\002 |
| Cyan | \001\033[0;46m\002 | Light Cyan | \001\033[0;106m\002 |
Foreground color codes
This section will cover using escape sequences to change the font color used within your bash prompt
Using the appropriate bash syntax and the codes below, the \001\033[32m\002 escape code will colorize everything green after until output is reset with \001\033[0m\002. Technically, the color code is only the [32m portion, but it needs to be enclosed in \001\033 and \002. \001\033 is the more portable option for \[\e, and \002 is the more portable option for \].
So \001\003[32m\002 is both technically equivalent to and more portable than \[\e[32m\]
Also, the next section covers attributes, which make up the 0 in \[\e[0;32m\]. So any attribute can be applied to any color by changing this leading value, or the 0; can be removed entirely if normal text is used, as in \[\e[32m\].
The following sequences can be used to set attributes that impact the color of text in a bash terminal. Notice that each color has a corresponding light color by changing the leading 3 to a 9. For example, in the color sequence [32m and [92m for green and light green, respectively -
| Default color | \001\033[0;39m\002 | ||
| Black | \001\033[0;30m\002 | White | \001\033[0;97m\002 |
| Light Gray | \001\033[0;37m\002 | Dark Gray | \001\033[0;90m\002 |
| Red | \001\033[0;31m\002 | Light Red | \001\033[0;91m\002 |
| Green | \001\033[0;32m\002 | Light Green | \001\033[0;92m\002 |
| Yellow | \001\033[0;33m\002 | Light Yellow | \001\033[0;93m\002 |
| Blue | \001\033[0;34m\002 | Light Blue | \001\033[0;94m\002 |
| Magenta | \001\033[0;35m\002 | Light Magenta | \001\033[0;95m\002 |
| Cyan | \001\033[0;36m\002 | Light Cyan | \001\033[0;96m\002 |
Reset attributes
The following sequences can be used to reset attributes that impact the appearance of text in a bash terminal, returning them to normal after the attribute was previously set. Note that the reset is technically only [0m but these also need to be wrapped in \001\033 and \002 -
| Reset all attributes | \001\033[0m\002 |
| Reset bold and bright | \001\033[21m\002 |
| Reset dim | \001\033[22m\002 |
| Reset underline | \001\033[24m\002 |
| Reset blink | \001\033[25m\002 |
| Reset reverse | \001\033[27m\002 |
| Reset hidden | \001\033[28m\002 |
Set attributes
Any attribute can be applied to any color by changing the leading 0;, or the attribute value can be removed entirely and the current attribute settings are used, as in \[\e[32m\].
The following sequences can be used to set attributes that impact the appearance of text in a bash terminal. Note that the set is technically only [1m but these also need to be wrapped in \001\033 and \002 -
| Set bold and bright | \001\033[1m\002 |
| Set dim | \001\033[2m\002 |
| Set underline | \001\033[4m\002 |
| Set blink | \001\033[5m\002 |
| Set reverse | \001\033[7m\002 |
| Set hidden | \001\033[8m\002 |
Prompt Examples
Any of the below exports can be pasted directly into the terminal to be tested. Once the terminal is closed, these settings will be lost, so no worries about getting back to default. This is a good way to test what would happen if you changed the PS1 within your ~/.bashrc, without actually doing so. If you mess up too bad, just close your terminal and open a new one. If you are logged in via ssh, you'll have to either source ~/.bashrc or log out and back into the server.
Note that when using special characters and symbols, you need to tell bash to interpret these values with a $ before opening your single-quotes, as in export PS1=$'\xe2\x9c\x93'
Note that we do not need to escape hexidecimal characters that will be interpreted. See the below for examples
# Ok
echo -e '\001\033[1;32m\002\xde\x90\x0a\001\033[0m\002'
# Wrong, no need to wrap symbol hex value with `\001` and `\002`
echo -e '\001\033[1;32m\002\001\xde\x90\x0a\002\001\033[0m\002'
# Wrong, hexidecimal symbol is wrapped within `\001` and `\002`
echo -e '\001\033[1;32m\xde\x90\x0a\033[0m\002'
When writing custom prompts, this can become a lot to take in all at once. The following prompt doesn't even use color codes yet, and already it is quite the line -
export PS1=$'\xe2\x94\x8c\xe2\x94\x80\xe2\x94\x80\u@\h\xe2\x94\x80[\W]\n\xe2\x94\x94\xe2\x94\x80\xe2\x95\xbc\$'
What I like to do is split the prompt between several append statements to PS1 within my .bashrc. An example of this prompt split across multiple lines shows it is much more readable and easier to adjust -
# Printing ┌──
PS1=''
PS1+=$'\xe2\x94\x8c'
PS1+=$'\xe2\x94\x80'
PS1+=$'\xe2\x94\x80'
# Printing kapper@kubuntu-vbox─[~]
PS1+='\u@\h'
PS1+=$'\xe2\x94\x80'
PS1+='[\W]'
# Move to next line
PS1+=$'\n'
# Printing └──╼$
PS1+=$'\xe2\x94\x94'
PS1+=$'\xe2\x94\x80'
PS1+=$'\xe2\x95\xbc'
PS1+='\$'
Alternatively, for practice or playing around, we can create a new file called .practice_prompt with the following contents. Then, we can just save the file and run source ~/.practice_prompt from a different terminal to enable the custom prompt and see the changes -
# Printing ┌──
export PS1=''
export PS1+=$'\xe2\x94\x8c'
export PS1+=$'\xe2\x94\x80'
export PS1+=$'\xe2\x94\x80'
# Printing kapper@kubuntu-vbox─[~]
export PS1+='\u@\h'
export PS1+=$'\xe2\x94\x80'
export PS1+='[\W]'
# Move to next line
export PS1+=$'\n'
# Printing └──╼$
export PS1+=$'\xe2\x94\x94'
export PS1+=$'\xe2\x94\x80'
export PS1+=$'\xe2\x95\xbc'
export PS1+='\$'
Splitting your PS1 assignment up not only makes it easier to read, but it suddenly becomes easy to comment out specific sections of the prompt when debugging issues with character spacing or adjusting the final appearance.
Simple Prompt
We can create a bare-minimum and simple export like the below, before adding any color
# Example of what the prompt will look like
[kapper@kubuntu-vbox ~]$
# Export to use this prompt
export PS1='[\u@\h \W]\$'
Colorized Prompt
Adding color to the prompt makes things look a bit more complicated, but if we stick to the rules outlined in the sections above we shouldn't have too much of an issue. Remember, if the prompt gets too long feel free to split it up between multiple appending statements within a file, then source that file. An example of this is shown in the earlier sections.
# Example of what the prompt will look like
[kapper@kubuntu-vbox ~]$
# Export to use this prompt
export PS1='\001\033[1;32m\002[\u@\h\001\033[0m\002 \W\001\033[1;32m\002]\$\001\033[0m\002'
Symbols in Prompt
Let's take the colors out for now, and use some symbols to create a more interesting prompt. This prompt is based on the default prompt from the Parrot linux distribution. This prompt will use special symbols, so to begin we use echo ┌ └ ─ ╼ | hexdump -C to get the below output.
[kapper@kubuntu-vbox ~]$echo ┌ └ ─ ╼ | hexdump -C
00000000 e2 94 8c 20 e2 94 94 20 e2 94 80 20 e2 95 bc 0a |... ... ... ....|
00000010
[kapper@kubuntu-vbox ~]$
Notice we passed three symbols with spaces between them. If we run the command ascii to see the ascii table, we can see that the value of the hexidecimal column for the space character is 20. This is seen in the above output and helps to separate the hexidecimal values of our symbols so we can easily see where one begins and ends. We see that ┌ is e2 94 8c followed by a space 20, then └ which is e2 94 94, and another space value of 20. Next, the ─ symbol is e2 94 80, followed by one more 20 and the final ╼ symbol's hex value of e2 95 bc. We will need to place the hexidecimal values of our special characters in the position we want the symbol to appear within our PS1 export.
Below, we use this information to correctly use symbols in our bash prompt. Note that while pasting the raw symbol will appear to work, it will cause bugs in your prompt. The method below requires more effort, but it will not cause character spacing issues within your prompt.
# Example of what the prompt will look like
┌──kapper@kubuntu-vbox─[~]
└──╼$
# Export to use this prompt
export PS1=$'\xe2\x94\x8c\xe2\x94\x80\xe2\x94\x80\u@\h\xe2\x94\x80[\W]\n\xe2\x94\x94\xe2\x94\x80\xe2\x95\xbc\$'
Symbols and colors in Prompt
Here's everthing together in one prompt.
# Example of what the prompt will look like
# NOTE: Color is lost here, but there will be color within your terminal
┌──kapper@kubuntu-vbox─[~]
└──╼$
# Export to use this prompt
export PS1=$'\001\033[1;31m\002\xe2\x94\x8c\xe2\x94\x80\xe2\x94\x80\001\033[1;32m\002\u@\h\001\033[1;31m\002\xe2\x94\x80[\001\033[0m\002\W\001\033[1;31m\002]\n\xe2\x94\x94\xe2\x94\x80\xe2\x95\xbc\001\033[1;32m\002\$\001\033[0;39m\002'
Examples
Read the manual page for bash!
If needed, check out my not-so-brief Introduction to Manual Pages to learn how to reference these manual pages more efficiently.
I would also recommend the book Bash Pocket Reference by Arnold Robbins, it is a pretty dense read but worth looking over. There are a lot of good examples, and it has actually been a pretty useful reference for me to keep close by. It isn't a book, but rather a collection of examples and concepts that are common in bash scripting.
Redirecting Output
Knowing how to control your output streams in bash can help to make you much more effective at writing commands. For example, say you want to run clion on the CWD and fork the process to the background.
clion . &
[1] 178345
2021-12-18 16:13:28,384 [ 3869] WARN - l.NotificationGroupManagerImpl - Notification group CodeWithMe is already registered (group=com.intellij.notification.NotificationGroup@68d6e24d). Plugin descriptor: PluginDescriptor(name=Code With Me, id=com.jetbrains.codeWithMe, descriptorPath=plugin.xml, path=~/.local/share/JetBrains/Toolbox/apps/CLion/ch-0/213.5744.254/plugins/cwm-plugin, version=213.5744.254, package=null, isBundled=true)
2021-12-18 16:13:29,647 [ 5132] WARN - pl.local.NativeFileWatcherImpl - Watcher terminated with exit code 130
Woah! We've inhertied the output from the process we forked to the background, and we've also lost immdeiate control of the process so CTRL+C won't interrupt the program and stop the output as it normally would. To fix this, run fg to bring the process back to the foreground, and then try pressing CTRL+C again. The process will terminate and the output will stop.
If we want to fork this process to the background and redirect all of it's output so we don't need to see it, we can run the following command. Note that in this case, we are redirecting to /dev/null to throw away the output. If we wanted to, we could instead redirect to a file and log the output.
clion . 2>/dev/null 1>&2 &
Or, a shorter version, which is shorthand for redirecting all output.
clion . &>/dev/null &
If we want to redirect only standard output
clion 1>/dev/null &
And if we want to redirect only standard error
clion. 2>/dev/null
Creating Scripts
Bash scripting is much like interacting with the bash terminal - the similarity can be easily seen in how we would split a bash command to multiple lines...
kapak@base:~$ l\
> s -la
total 76
drwxr-xr-x 9 username username 4096 Jul 28 01:24 .
drwxr-xr-x 3 root root 4096 Jul 6 09:49 ..
-rw------- 1 username username 5423 Jul 20 18:10 .bash_history
-rw-r--r-- 1 username username 220 Jul 6 09:49 .bash_logout
-rw-r--r-- 1 username username 3771 Jul 6 09:49 .bashrc
...( Reduced Output ) ...
kapak@base:~$ ls -la
total 76
drwxr-xr-x 9 username username 4096 Jul 28 01:24 .
drwxr-xr-x 3 root root 4096 Jul 6 09:49 ..
-rw------- 1 username username 5423 Jul 20 18:10 .bash_history
-rw-r--r-- 1 username username 220 Jul 6 09:49 .bash_logout
-rw-r--r-- 1 username username 3771 Jul 6 09:49 .bashrc
...( Reduced Output ) ...
In a bash script, we would handle splitting ls -la across multiple lines much the same. Create the file below, name it test.sh -
#/bin/bash
ls -la
l\
s -la
Now make the file executable and run the script, you should see the output of ls -la twice, since this script is a simple example of splitting commands across lines.
# Make the script executable
sudo chmod a+x test.sh
# Run the script
./test.sh
This of course isn't a common use case, but it shows how you can use \ to effectively escape a newline and continue your command on the next line.
Printf Formatting
This is just one of many commands in bash, but you will use it a lot so getting to know the syntax well will make your life a lot easier.
#!/bin/bash
## Author: Shaun Reed | Contact: shaunrd0@gmail.com | URL: www.shaunreed.com ##
## A custom bash script to configure vim with my preferred settings ##
## Run as user with sudo within directory to store / stash .vimrc configs ##
###############################################################################
# Example of easy colorization using printf
GREEN=$(tput setaf 2)
RED=$(tput setaf 1)
UNDERLINE=$(tput smul)
NORMAL=$(tput sgr0)
# Script Reduced, lines removed
# Example of creating an array of strings to be passed to printf
welcome=( "\nEnter 1 to configure vim with the Klips repository, any other value to exit." \
"The up-to-date .vimrc config can be found here: https://github.com/shaunrd0/klips/tree/master/configs" \
"${RED}Configuring Vim with this tool will update / upgrade your packages${NORMAL}\n\n")
# Create a printf format and pass the entire array to it
# Will iterate through array, filling format provided with array contents
# Useful for printing / formatting lists, instructions, etc
printf '%b\n' "${welcome[@]}"
read cChoice
# Script Reduced, lines removed
Using the above method, you could easily create a single array containing multiple responses to related paths the script could take for a related option, and refer to the appropriate index of the array directly, instead of passing all of the contents of the array to the same format.
For more advanced formatting, read the below script carefully, and you will have a basic understanding of how printf can be used dynamically within scripts to provide consistent formatting.
#/bin/bash
divider===============================
divider=$divider$divider
header="\n %-10s %8s %10s %11s\n"
format=" %-10s %08d %10s %11.2f\n"
width=43
printf "$header" "ITEM NAME" "ITEM ID" "COLOR" "PRICE"
printf "%$width.${width}s\n" "$divider"
printf "$format" \
Triangle 13 red 20 \
Oval 204449 "dark blue" 65.656 \
Square 3145 orange .7
# https://linuxconfig.org/bash-printf-syntax-basics-with-examples
String Manipulation
In bash, there are useful features to handle manipulating strings. These strings may be in any format, but the examples below will use strings that refer to directories and files as examples, since this is a common scenario.
#!/bin/bash
local teststring="/home/kapper/Code/"
echo "${teststring#/home/}" # Remove shortest subtring from left matching pattern `/home/` (outputs kapper/Code)
echo "${teststring##*kapper/}" # Remove longest subtring from left matching pattern `*/` (outputs Code/)
echo "${teststring%/*}" # Remove shortest subtring from right matching pattern `/*` (outputs /home/kapper/Code)
echo "${teststring%%kapper/*}" # Remove longest subtring from right matching pattern `kapper/*` (outputs /home/)
# Can be used to obtain file name
local file="/home/kapper/.vimrc"
echo ${file##*/} # (outputs .vimrc)
# Can be used to obtain or strip file extensions
local other_file="/home/kapper/image.jpg"
echo ${other_file##*/} # (outputs image.jpg)
echo ${other_file##*.} # (outputs .jpg)
# Can piggy-back string manipulation, though it gets hard to read quickly
echo ${${other_file##*/}%.*} # (outputs image)
# Can remove up to first appearance of a space character (or tab, newline, other whitespace)
local white_space="sometextbeforeaspace /system/path/"
echo ${white_space#*[[:space:]]} # (outputs /system/path)
Arrays
Arrays can be declared and initialized with the syntax below. This script will output the word collection
#!/bin/bash
local arr=(a collection of single words spearated by spaces will automatically be split into indexed array)
echo ${arr[1]}
Alternatively, arrays of strings that include spaces can be declared without splitting by simply using double-quotes. This script will output This array has two elements
#!/bin/bash
local arr=("This will not be split" "This array has two elements")
echo ${arr[1]}
Arrays can also be associative, if we also define names for each index when initializing. The script below will output example
#!/bin/bash
local arr=([zero]=some [one]=example [two]=array)
echo ${arr[one]}
In the script below, we use an array to search for the package coretemp sensor of our CPU.
#!/bin/bash
## Author: Shaun Reed | Contact: shaunrd0@gmail.com | URL: www.shaunreed.com ##
## ##
## A script to find and return the CPU package temp sensor ##
###############################################################################
# bash.sh
for i in /sys/class/hwmon/hwmon*/temp*_input; do
# Append each sensor to an array
sensors+=("$(<$(dirname $i)/name): $(cat ${i%_*}_label 2>/dev/null || echo $(basename ${i%_*})) $(readlink -f $i)");
done
# Loop through initialized array of hardware temp sensors
for i in "${sensors[@]}"
do
# If the sensor is for the CPU core package temp, export to env variable
if [[ $i =~ ^coretemp:.Package.* ]]
then
export CPU_SENSOR=${i#*0}
fi
done
# Convert from C to F using our exported CPU_SENSOR variable
echo "scale=2;((9/5) * $(cat $CPU_SENSOR)/1000) + 32"|bc
While Loops
While loop using conditionals within bash to automate cmake builds -
#!/bin/bash
## Author: Shaun Reed | Contact: shaunrd0@gmail.com | URL: www.shaunreed.com ##
## A custom bash script for building cmake projects. ##
## Intended to be ran in root directory of the project alongside CMakeLists ##
###############################################################################
# Infinite while loop - break on conditions
while true
do
printf "\nEnter 1 to build, 2 to cleanup previous build, 0 to exit.\n"
read bChoice
# Build loop
# If input read is == 1
if [ $bChoice -eq 1 ]
then
mkdir build
# Move to a different directory within a subshell and build the project
# The '(' and ')' here preserves our working directory
(cd build && cmake .. && cmake --build .)
fi
# Clean-up loop
# If input read is == 2
if [ $bChoice -eq 2 ]
then
printf "test\n"
rm -Rv build/*
fi
# Exit loops, all other input -
# If input read is >= 3, exit
if [ $bChoice -ge 3 ]
then
break
fi
# If input read is <= 0, exit
if [ $bChoice -le 0 ]
then
break
fi
# Bash will print an error if symbol or character input
done
Subshells
Sometimes, you may want to stay in your active directory but perform some action in another. To do this, we can do something in a subshell (a background shell) -
$ (cd /var/log && cp -- *.log ~/Desktop)
Examples
Check out my snippet repository for more up-to-date scripts, configurations - /shaunrd0/klips
Basic script example of adding a user to a Linux system. This script uses parameters, basic formatting, and can either be ran as root or as a user without sudo, depending on the need. If needed, see the Knoats Book Adding Linux Users for more explanation on the below.
#!/bin/bash
## Author: Shaun Reed | Contact: shaunrd0@gmail.com | URL: www.shaunreed.com ##
## A custom bash script for creating new linux users. ##
## Syntax: ./adduser.sh <username> <userID> ##
###############################################################################
if [ "$#" -ne 2 ]; then
printf "Illegal number of parameters."
printf "\nUsage: sudo ./adduser.sh <username> <groupid>"
printf "\n\nAvailable groupd IDs:"
printf "\n60001......61183 Unused | 65520...............65533 Unused"
printf "\n65536.....524287 Unused | 1879048191.....2147483647 Unused\n"
exit
fi
sudo adduser $1 --gecos "First Last,RoomNumber,WorkPhone,HomePhone" --disabled-password --uid $2
printf "\nEnter 1 if $1 should have sudo privileges. Any other value will continue and make no changes\n"
read choice
if [ $choice -eq 1 ] ; then
printf "\nConfiguring sudo for $1...\n"
sudo usermod -G sudo $1
fi
printf "\nEnter 1 to set a password for $1, any other value will exit with no password set\n"
read choice
if [ $choice -eq 1 ] ; then
printf "\nChanging password for $1...\n"
sudo passwd $1
fi
SSH Configuration
Configuring SSHD Authentication
Generating Private Keys
To generate a key with no password using the ed25519 algorithm, we can run the following command. This will output the generated private_key and private_key.pub withtin the directory specified after -f
If you intend to use a password for your private key, do not pass it as an option through the commandline! Your bash history should not contain passwords or other sensitive information. Use ssh-keygen -t ed25519 -f /home/username/.ssh/username_ed25519 and follow the secure prompts instead.
ssh-keygen -t ed25519 -p "" -f /home/username/.ssh/username_ed25519
Now you can cat out your public key with cat /home/username/.ssh/username_ed25519.pub and copy the output to the /home/remoteuser/.ssh/authorized_keys file on the remote host you want to access with this private key. Take note of which remoteuser you use on the host, as logging in with any other username will fail.
SSH Authentication Configuration
SSH will look for configurations passed to the commandline above all other configurations. Using a command like ssh user@host.com -p 1234 -i /path/to/private_key will override the Port and IdentityFile settings in all SSH configurations by using the commandline options -p and -i respectively.
User Configurations
If there are no relevant commandline options, SSH will then check for user configurations. Each user may define their own configuration within ~/.ssh/config. You could construct the entire ssh user@host.com -p 1234 -i /path/to/private_key command automatically by running ssh hostname if you add the following configurations to ~/.ssh/config
Host hostname
HostName host.com
User username
Port 1234
IdentityFile /path/to/private_key
Host ip-host
HostName 127.0.0.1 # Can also use IPs for HostName
User username
Port 1234
IdentityFile ~/.ssh/private_key # Can reference ~/ for user's home directory
If you created your ~/.ssh/config file manually, you may see the following error when attempting to SSH
Bad owner or permissions on /home/username/.ssh/config
SSH requires that this file is readable and writable only by the user it is relevant to. So to fix this, we run the following command
sudo chmod 600 ~/.ssh/config
Server Configurations
Finally, if no other configurations are provided either within the ssh command's arguments or within the relevant ~/.ssh/config file, SSH searches for any server configurations at /etc/ssh/ssh_config.
Pluggable Authentication Modules
The PAM configuration files are handled sequentially at the time of authentication. This means that the order in which these settings are place is crucial to how they are interpreted by PAM. Be careful to understand what each line does and where is should be placed, or you could end up being locked out from your server due to a configuration error.
Default SSHD PAM
Upon starting an Ubuntu 19.04 server, PAM comes configured for basic password authentication for SSH by using /etc/pam.d/common-auth within the /etc/pam.d/sshd configuration. Notice below on line 4 of the default /etc/pam.d/sshd configuration file packed with Ubuntu 19.04. PAM includes the /etc/pam.d/common-auth file and sequentially runs through the steps it requires.
This page will only cover to and including line 14 of /etc/pam.d/sshd - the rest of these files were provided for completeness.
# PAM configuration for the Secure Shell service
# Standard Un*x authentication.
@include common-auth
# Disallow non-root logins when /etc/nologin exists.
account required pam_nologin.so
# Uncomment and edit /etc/security/access.conf if you need to set complex
# access limits that are hard to express in sshd_config.
# account required pam_access.so
# Standard Un*x authorization.
@include common-account
# SELinux needs to be the first session rule. This ensures that any
# lingering context has been cleared. Without this it is possible that a
# module could execute code in the wrong domain.
session [success=ok ignore=ignore module_unknown=ignore default=bad] pam_selinux.so close
# Set the loginuid process attribute.
session required pam_loginuid.so
# Create a new session keyring.
session optional pam_keyinit.so force revoke
# Standard Un*x session setup and teardown.
@include common-session
# Print the message of the day upon successful login.
# This includes a dynamically generated part from /run/motd.dynamic
# and a static (admin-editable) part from /etc/motd.
session optional pam_motd.so motd=/run/motd.dynamic
session optional pam_motd.so noupdate
# Print the status of the user's mailbox upon successful login.
session optional pam_mail.so standard noenv # [1]
# Set up user limits from /etc/security/limits.conf.
session required pam_limits.so
# Read environment variables from /etc/environment and
# /etc/security/pam_env.conf.
session required pam_env.so # [1]
# In Debian 4.0 (etch), locale-related environment variables were moved to
# /etc/default/locale, so read that as well.
session required pam_env.so user_readenv=1 envfile=/etc/default/locale
# SELinux needs to intervene at login time to ensure that the process starts
# in the proper default security context. Only sessions which are intended
# to run in the user's context should be run after this.
session [success=ok ignore=ignore module_unknown=ignore default=bad] pam_selinux.so open
# Standard Un*x password updating.
Now, lets take a look at /etc/pam.d/common-auth -
#
# /etc/pam.d/common-auth - authentication settings common to all services
#
# This file is included from other service-specific PAM config files,
# and should contain a list of the authentication modules that define
# the central authentication scheme for use on the system
# (e.g., /etc/shadow, LDAP, Kerberos, etc.). The default is to use the
# traditional Unix authentication mechanisms.
#
# As of pam 1.0.1-6, this file is managed by pam-auth-update by default.
# To take advantage of this, it is recommended that you configure any
# local modules either before or after the default block, and use
# pam-auth-update to manage selection of other modules. See
# pam-auth-update(8) for details.
# here are the per-package modules (the "Primary" block)
auth [success=1 default=ignore] pam_unix.so nullok_secure
# here's the fallback if no module succeeds
auth requisite pam_deny.so
# prime the stack with a positive return value if there isn't one already;
# this avoids us returning an error just because nothing sets a success code
# since the modules above will each just jump around
auth required pam_permit.so
# and here are more per-package modules (the "Additional" block)
auth optional pam_cap.so
# end of pam-auth-update config
See on line 17 above, where we define an authentication method, what should be done on success, and what should be done otherwise ( The default is a failed attempt, since we assume the user is not who they say they are.) Upon successful authentication, we set the step=1, which simply tells PAM to skip one step in our authentication process. So, instead of the default path sending the user to line 19 where they are denied authentication, we move to the next valid line (23) and permit the attempt.
The example above is the basics of how configuring PAM will be handled. It can be tricky at first, but just mess with things a bit and you will have the hang of it in no time.
Custom SSHD Authentication
Surely, if we mean to secure our server we will need to define a more specific way to authenticate. Below is an example configuration of a custom /etc/pam.d/sshd that allows us to do a few things when a user attempts to login -
- Prompt for a YubiKey
- Prompt for Local Password
- Check for /etc/nologin file
# PAM configuration for the Secure Shell service
# Prompt for YubiKey first, to gate off all other auth methods
auth required pam_yubico.so id=<IDVALUE> id key=<KEYVALUE> key authfile=/etc/ssh/authorized_yubikeys
# Prompt for the local password associated with user attempting login
# nullok allows for empty passwords, though it is not recommended.
auth required pam_unix.so nullok
# If /etc/nologin exists, do not allow users to login
# Outputs content of /etc/nologin and denies auth attempt
auth required pam_nologin.so
# We comment this out, because we already handled pam_unix.so authentication above
# Standard Un*x authentication.
#@include common-auth
...
Excess config clipped off
All below lines remain the same as their corresponding in the default /etc/pam.d/sshd
...
This gives us a little more security, and a lot more control over who can access our server when we are doing impacting things that require data to remain untouched. This is a very touch configuration file so there are a few things to note, I'll go over how I implemented each step of authentication and then how to modify the default PAM SSHD settings to handle these changes appropriately.
Prompting For YubiKey
By prompting for a key first, we gate all other methods behind a hard to fake form of authentication utilizing Yubico's OTP API within their Yubicloud service. It is possible to host your own validation services, but for me I would rather leave that kind of security responsibility in the hands of the much more capable and prepared hands of Yubico. See the Page on Configuring YubiKey SSH Authentication for a complete guide on how to setup your key and a more in-depth explanation of the required Yubico PAM and SSHD configuration steps. Upon purchase of a key, we will need to register it with the Yubicloud and gather an ID and KEY. We pass this into a custom PAM within our /etc/pam.d/sshd configuration file, and this enables Yubico to generate OTPs for secure authentication.
# PAM configuration for the Secure Shell service
# Prompt for YubiKey first, to gate off all other auth methods
auth required pam_yubico.so id=<IDVALUE> id key=<KEYVALUE> key authfile=/etc/ssh/authorized_yubikeys
...
On line 5 above, we create an API request upon authentication using our information from Yubico, and check that the user attempting to login exists within the Authorized Yubikeys File, and that the correct 12-character public key is associated with their account.
If you do not create an Authorized Yubikey file, you will not be able to authenticate. SSH login will fail with errors that don't correspond with the issue - (ex.. Failue - Keyboard-interactive) If you are having issues, be sure that the file exists in the correct place as indicated within /etc/pam.d/sshd, and ensure the keys / users are correct as well.
Prompting For Local Password
We then prompt for a password, which provides protection in the event the key falls into the wrong hands. This way, we won't need to be scrambling our passwords every other week since they are gated behind another form of secure authentication.
It would be possible to setup a configuration capable of removing a compromised public key from all associated user accounts.
For example, should a public key be seen providing the incorrect password post-Yubikey authentication, we can assume either the key has been stolen, or the user has forgotten their password and will need to reset it. Send an email to the user notifying them of this activity, give them a chance to reset their password, and upon no response or verification of a stolen key kick off a script to remove the key from all accounts.
...
# Prompt for the local password associated with user attempting login
# nullok allows for empty passwords, though it is not recommended.
auth required pam_unix.so nullok
...
Above, we simply request basic pam_unix.so (PAM Unix Sign On module Authentication) with the argument nullok, which enables empty passwords. This is handled as expected, and just asks us for a password upon authentication, the password being set within the host - see Changing a User's Password for more information.
Nologin Check
The nologin check allows us to have full control over a system should we want to seal it off from any logins, even if they are permitted to be on the host normally. The /etc/nologin file simply needs to exist, and PAM will fail any authentication attempt and output the contents of the nologin file. This allows us to create a message indicating why there is no logins permitted and who to contact should there be an issue. This is a useful feature when attempting to protect data consistency in environments where many people are accessing the same servers. Below, we configure the pam_nologin.so module to handle this step in authenticating
...
# If /etc/nologin exists, do not allow any user to login
# Outputs content of /etc/nologin and denies auth attempt
auth required pam_nologin.so
...
Enabling Google 2FA
Overview
Two factor authentication is easy to configure and helps further secure your server. It requires a few extra packages -
sudo apt update && sude apt upgrade
sudo apt install libpam-google-authenticatorAlong with these packages, we will need to make some changes to our /etc/pam.d/sshd and /etc/ssh/sshd_config files. See below for the complete steps.
Setup Google Authenticator
Run google-authenticator and respond to the prompts appropriately. Below is an example of the prompts output along with my responses - you can change or modify your responses to these prompts as you see fit. I did exclude some information for security reasons, but nothing more than the output between the prompts setting things up specific to my system.
Do you want authentication tokens to be time-based (y/n) y
...
Do you want me to update your "/home/host/.google_authenticator" file (y/n) y
Do you want to disallow multiple uses of the same authentication
token? This restricts you to one login about every 30s, but it increases
your chances to notice or even prevent man-in-the-middle attacks (y/n) y
By default, tokens are good for 30 seconds and in order to compensate for
possible time-skew between the client and the server, we allow an extra
token before and after the current time. If you experience problems with poor
time synchronization, you can increase the window from its default
size of 1:30min to about 4min. Do you want to do so (y/n) n
If the computer that you are logging into isn't hardened against brute-force
login attempts, you can enable rate-limiting for the authentication module.
By default, this limits attackers to no more than 3 login attempts every 30s
Do you want to enable rate-limiting (y/n) yThe ... within the code block above is a placeholder for information similar to the below -
Your new secret key is: XXXXXXXXXXXXXXXX
Your verification code is 123456
Your emergency scratch codes are:
12345678
23456789
34567890
45678901
56789012Yes, you should save those scratch codes. They act as static keys that can be used for 2FA in the event that you are unable to use the linked device for any reason. Along with this, a QR code will be output to your terminal, which can be easily scanned using the Google Authenticator application from any device. Alternatively, you could input your secret key into the application when creating a new token. This will give you an auto-regenerating token that has strong security features, such as the rate-limiting feature I enabled during the final prompt of the google-authenticator setup above. This will enable a timeout period between multiple failed login attempts, which makes it more difficult to brute-force.
Pay attention to the output during the setup process, its important that this process is completed correctly. If it is not, you could face issues when attempting to SSH into your server. If you are not careful, this could result in a lockout.
Always have a secondary login method, until you have verified that these settings work.
SSHD Configuration
SSHD - Secure Shell Daemon
Daemon - A long-running background process that answers requests for services.
In the final steps of the 2FA configuration process, we need to tell SSHD and PAM that we want to use 2FA during the login process. To start, SSHD needs to know that we wish to use custom authentication methods when a connection attempt is made. Add the following to /etc/sshd/sshd_config, and keep in mind that comments prefixed with an asterix(*) are custom comments that I've added to explain what we are doing when we change these settings. The rest of the comments found in these files are there by default, and will be included with any installation of SSHD or PAM.
# *Default value is 22, change this to whatever you wish and adjust firewall / iptables accordingly
# *This is not required to be changed for 2FA, but it is recommended for all public-facing SSHD configurations
# What ports, IPs and protocols we listen for
Port 1234
# *You should be using keys to authenticate / provision logins
PubkeyAuthentication yes
# *Since we use the above, you should not need to use passwords when logging in
# *If desired, this can still be enabled as an extra-layer
# *Password-only auth is easy to brute-force if not secured well
# Change to no to disable tunnelled clear text passwords
PasswordAuthentication no
# *Required for SSHD to allow the response to Verification code prompt on login attempt
# *This allows you to input and pass your 2FA code to the SSHD when logging in
# Change to yes to enable challenge-response passwords (beware issues with
# some PAM modules and threads)
ChallengeResponseAuthentication yes
# *Since we will be configuring PAM, make sure it is enabled
# Set this to 'yes' to enable PAM authentication, account processing,
# and session processing. If this is enabled, PAM authentication will
# be allowed through the ChallengeResponseAuthentication and
# PasswordAuthentication. Depending on your PAM configuration,
# PAM authentication via ChallengeResponseAuthentication may bypass
# the setting of "PermitRootLogin yes
# If you just want the PAM account and session checks to run without
# PAM authentication, then enable this but set PasswordAuthentication
# and ChallengeResponseAuthentication to 'no'.
UsePAM yes
# *Specify to SSHD what methods you want to use when a connection attempt is made
# *If this is not configured correctly, our PAM configuration could be ignored.
AuthenticationMethods publickey,keyboard-interactive
PAM Configuration
PAM - Pluggable Authentication Modules
PAM allows us to add or configure our custom modules used during the authentication of various systems. For our needs, we will only be adding one line to the /etc/pam.d/sshd file. See the below for an example configuration, our change can be found within the first few lines prefixed by a custom comment that I've added.
# PAM configuration for the Secure Shell service
# Standard Un*x authentication.
# *Comment this line out to stop PAM from prompting for password on a connection attempt to SSHD
# *This should be configured according to your AllowPasswordAuthentication setting within /etc/ssh/sshd_config
#@include common-auth
# Disallow non-root logins when /etc/nologin exists.
account required pam_nologin.so
# *Add this line to require authetication via the google-authenticator module for PAM
auth required pam_google_authenticator.so
# Uncomment and edit /etc/security/access.conf if you need to set complex
# access limits that are hard to express in sshd_config.
# account required pam_access.so
# Standard Un*x authorization.
@include common-account
# SELinux needs to be the first session rule. This ensures that any
# lingering context has been cleared. Without this it is possible that a
# module could execute code in the wrong domain.
session [success=ok ignore=ignore module_unknown=ignore default=bad] pam_selinux.so close
# Set the loginuid process attribute.
session required pam_loginuid.so
# Create a new session keyring.
session optional pam_keyinit.so force revoke
# Standard Un*x session setup and teardown.
@include common-session
# Print the message of the day upon successful login.
# This includes a dynamically generated part from /run/motd.dynamic
# and a static (admin-editable) part from /etc/motd.
session optional pam_motd.so motd=/run/motd.dynamic
session optional pam_motd.so noupdate
# Print the status of the user's mailbox upon successful login.
session optional pam_mail.so standard noenv # [1]
# Set up user limits from /etc/security/limits.conf.
session required pam_limits.so
# Read environment variables from /etc/environment and
# /etc/security/pam_env.conf.
session required pam_env.so # [1]
# In Debian 4.0 (etch), locale-related environment variables were moved to
# /etc/default/locale, so read that as well.
session required pam_env.so user_readenv=1 envfile=/etc/default/locale
# SELinux needs to intervene at login time to ensure that the process starts
# in the proper default security context. Only sessions which are intended
# to run in the user's context should be run after this.
session [success=ok ignore=ignore module_unknown=ignore default=bad] pam_selinux.so open
# Standard Un*x password updating.
@include common-passwordThe majority of the above file should be left alone, and it is a sequential configuration - this means that the order in which these settings are defined is important to how they are interpreted by PAM. If you wish to rearrange things you can, but be sure that you know what you are doing. The above configuration is verified working on several servers, in my experience at the time of this writing.
Be sure when you are changing these settings, you are running sudo systemctl restart sshd.service ssh.service to apply your changes, then try to login from a new session. There is no need to terminate your active session, or reload it. If you disconnect your session and you are unable to authenticate due to your changed settings, you could be in for a bad time.
Notes
The /etc/pam.d/common-auth file does not need to be changed, but it is an interesting file to read if you have the time. I'll throw a snippet below since it is so short, but this file basically defines the authentication process used in common-auth, seen in the above /etc/pam.d/sshd configuration where we commented out the @include common-auth line.
Basically, this file defines how authentication is handled, and if you read below you can see that the common-auth module defaults to pam_deny.so, where the connection attempt is blocked by PAM.
On a success, PAM simply sets success=1, which sequentially skips the pam_deny.so step and moves on to pam_permit.so, allowing the connection to take place.
# /etc/pam.d/common-auth - authentication settings common to all services
#
# This file is included from other service-specific PAM config files,
# and should contain a list of the authentication modules that define
# the central authentication scheme for use on the system
# (e.g., /etc/shadow, LDAP, Kerberos, etc.). The default is to use the
# traditional Unix authentication mechanisms.
#
# As of pam 1.0.1-6, this file is managed by pam-auth-update by default.
# To take advantage of this, it is recommended that you configure any
# local modules either before or after the default block, and use
# pam-auth-update to manage selection of other modules. See
# pam-auth-update(8) for details.
# here are the per-package modules (the "Primary" block)
auth [success=1 default=ignore] pam_unix.so nullok_secure
# here's the fallback if no module succeeds
auth requisite pam_deny.so
# prime the stack with a positive return value if there isn't one already;
# this avoids us returning an error just because nothing sets a success code
# since the modules above will each just jump around
auth required pam_permit.so
# and here are more per-package modules (the "Additional" block)
auth optional pam_cap.so
# end of pam-auth-update config
User Administration
Managing passwords
Change current user password, prompt for current passwd - passwd
If you can sudo, run sudo passwd <user> to change a user password without prompt for current password, and with no security restrictions (min length, difficulty, etc)
Removing users
To remove a user, run sudo userdel username. To remove a user and their files within their /home/username/ directory, run sudo userdel -r username
Adding users
For a useful script to speed up this process when adding multiple users, skip to the end of this guide.
Run the following commands to create a new user on Linux -
These commands assume you are root, on a new host, so you do not need to prefix them with sudo, if you are not root you will need to run sudo adduser <username>, etc.
adduser username
Adding user `username' ...
Adding new group `username' (1000) ...
Adding new user `username' (1000) with group `username' ...
Creating home directory `/home/username' ...
Copying files from `/etc/skel' ...
New password:
Retype new password:
passwd: password updated successfully
Changing the user information for username
Enter the new value, or press ENTER for the default
Full Name []: # You can leave all of this blank, or not
Room Number []:# Your choice, really
Work Phone []:
Home Phone []:
Other []:
Is the information correct? [Y/n] y
Configuring Sudo
Now, we need to configure the user for sudo access, so we set our preferred text editor and use sudo -E to preserve our user's environment settings while running commands as sudo.
# Set vim as our preferred editor
export EDITOR=/bin/vim && export VISUAL=/bin/vim
# Edit the sudoers file, preserving our current user's environment settings
sudo -E visudo -f /etc/sudoers.d/mySudoers
It's considered better practice to override the /etc/sudoers file by running sudo visudo -f /etc/sudoers.d/mySudoers - This command will allow us to store our changes in a file independent from the default sudoer configuration, and also complies with the idea that /etc/sudoer is a sequential configuration, which means the order in which settings are applied is crucial to how they are interpreted by our system.
Run sudo -E visudo -f /etc/sudoers.d/mySudoers and enter the information below to configure sudo for your user. Save and exit the file when you are done.
username ALL=(ALL:ALL) ALL
If you feel your sudoer settings are being ignored, consider moving their location in /etc/sudoers to the end of the file, or use the command above to create a separate configuration, securing the default settings in the even that a mistake is made, we will still be able to authenticate using sudo. Save /etc/sudoers and quit, but note that you will need to logout and login again for your changes to take effect.
If you configured sudo access for your user, make sure you follow the next section to ensure they are added to the relevant sudo group
Configure Group Access
Looking to check current group members? sudo groupmems -l -g groupname
Want to add a single user to a single group? sudo usermod -aG groupname username will -a append the user to the given group. The -G option alone will remove the user from all groups other than the one provided.
Run vigr in the terminal and add your new username created to the sudo group, and any other groups you may want. This is the same thing as modifying the configuration file /etc/group with your preferred editor and saving it. (Docker is a common group that users will need added to - Don't run your containers as root by running sudo docker)
...
tape:x:26:
sudo:x:27:USERNAME,USERNAME2,USER3
audio:x:29:
docker:x:30:USERNAME,USER3
...
When saving /etc/group, you'll get some output warning you about consistency between a shadow configuration file. Go ahead and edit it to mirror your changes, and ignore the final warning about the /etc/group file consistency since we just came from modifying that file.
vigr
You have modified /etc/group.
You may need to modify /etc/gshadow for consistency.
Please use the command 'vigr -s' to do so.
vigr -s
You have modified /etc/gshadow.
You may need to modify /etc/group for consistency.
Please use the command 'vigr' to do so.
Securing User / Group IDs
You should change your user and group IDs from the default sequential values we can assume Linux has distributed for us. To do this, choose and valid ID and edit the following commands to suit your needs -
# Change user and group IDs
sudo usermod -u 1234 user
sudo groupmod -g 4321 usergroup
# Make sure you edit all the old permissions to reflect the above changes
# Use the old user and group IDs here
sudo find / -group 1000 -exec chgrp -h username {} \;
sudo find / -user 1000 -exec chown -h username {} \;
Not sure what UID and GID to choose? See the table below and choose a value that suits your needs - probably a value within an unused range. UID and GID do not need to be the same - This is only the case by default when adding a user via Linux Distributions such as Ubuntu, which is the one referenced / used in this guide. Feel free to specify unique values, and research more into sharing user groups for permissions in scenarios such as granting a list of employees or developers similar access.
UID/GID Purpose Defined By Listed in 0 `root` user Linux `/etc/passwd` + `nss-systemd` 1 ... 4 System users Distributions `/etc/passwd` 5 `tty` group `systemd` `/etc/passwd` 6 ... 999 System users Distributions `/etc/passwd` 1000 ... 60000 Regular users Distributions `/etc/passwd` + LDAP/NIS/… 60001 ... 61183 Unused 61184 ... 65519 Dynamic service users `systemd` `nss-systemd` 65520 ... 65533 Unused 65534 `nobody` user Linux `/etc/passwd` + `nss-systemd` 65535 16bit `(uid_t) -1` Linux 65536 ... 524287 Unused 524288 ... 1879048191 Container UID ranges `systemd` `nss-mymachines` 1879048191 ... 2147483647 Unused 2147483648 ... 4294967294 HIC SVNT LEONES 4294967295 32bit `(uid_t) -1` Linux
You should validate all the configuration done to secure your server - for example, this could be validated by running the following commands to check UID / GID after setting them and logging into our user.
Check UID / GID
id -u username
id -g username
If you plan to stop here, be sure to login to your new user before making further changes to your system.
sudo su username
# Or
sudo -iu username
Bash Add User Script
Using the information on this page, we can create a simple bash script to handle this process for us. If you plan to add a fair amount of users to a system, automating at least the general portion of that process might be valuable to you. See the script below to automate up to this point in these instructions. Simply save it into addusers.sh for example, and run sudo chmod a+x addusers.sh followed by sudo ./addusers.sh username 1005 where 1005 is the userID you wish to assign to your new user. Sudo is required here if you wish to assign sudo privileges to the new user.
Want to call this from the commandline as any other command? Assuming you have the script marked as an executable placed within your /opt/ directory, run echo "export PATH=$PATH:/opt/" >> ~/.bash_aliases && source ~/.bashrc You should now be able to run the script by its current name from any directory on the system - adduser.sh Feel free to rename it
#!/bin/bash
## Author: Shaun Reed | Contact: shaunrd0@gmail.com | URL: www.shaunreed.com ##
## A custom bash script for creating new linux users. ##
## Syntax: ./adduser.sh <username> <userID> ##
###############################################################################
if [ "$#" -ne 2 ]; then
printf "Illegal number of parameters."
printf "\nUsage: sudo ./adduser.sh <username> <groupid>"
printf "\n\nAvailable groupd IDs:"
printf "\n60001......61183 Unused | 65520...............65533 Unused"
printf "\n65536.....524287 Unused | 1879048191.....2147483647 Unused\n"
exit
fi
sudo adduser $1 --gecos "First Last,RoomNumber,WorkPhone,HomePhone" --disabled-password --uid $2
printf "\nEnter 1 if $1 should have sudo privileges. Any other value will continue and make no changes\n"
read choice
if [ $choice -eq 1 ] ; then
printf "\nConfiguring sudo for $1...\n"
sudo usermod -G sudo $1
fi
printf "\nEnter 1 to set a password for $1, any other value will exit with no password set\n"
read choice
if [ $choice -eq 1 ] ; then
printf "\nChanging password for $1...\n"
sudo passwd $1
fi
The script pasted above is not updated frequently, and only exists here so the code remains relevant to the information on this page. This script can be found at gitlab/shaunrd0/klips, but the version there may have changed slightly since writing the content on this page.
Now after creating this user and following the prompts in the script above, all you'll need to do is configure the user-specific settings you wish to apply in your case.
Creating SSH Keys
The steps in the section below are for generating a SSH key for the remote user you want to use to login to your server. After completing these steps, the next section will cover adding the public key we generate to the server's authorize_keys file, and logging into the box remotely.
To make things clear, I will refer to the machines we configure as A and B. The goal is to provide the necessary configurations on both A and B so that a user on A can use SSH to login to machine B. Presumably, machine B could be a VPS hosted by DigitalOcean or some other provider, and machine A could be your personal laptop that you plan to use to admin this server.
Remote User Configuration
SSH should never be authenticated using passwords alone, using public keys generated by ssh-keygen we can authenticate based on a key we generate and distribute manually to the remote server configuratioon files, allowing our user to login to the box. This should be done with care, as a combination of sloppy authorized_keys files and lost or stolen keys can lead to a compromised web server!
To generate an ed25519 key for our new user, first we should navigate to their ~/.ssh/ directory - on machine A.
sudo su username
cd ~/.ssh/
ssh-keygen -t ed25519
If you run the last above command as sudo, it will create a key for root@host, not the user you are logged in as.
If you are getting privelege errors, you are not in your home directory. If the ~/.ssh directory does not exist, create it and navigate within the new directory before running the ssh-keygen command.
You will be asked to answer a series of questions about the key you want to generate. The general format for filename is user_<keytype> so if our user is called username the file could be named username_ed25519. Once answering the questions this will create a public and private key and output them into your current directory (/home/username/.ssh), you should keep your private key safe and never share it with anyone. Your public key is what we give to the remote server so they can verify our identity when logging in.
Once the files are generated, ensure permissions are set approprately for .ssh/ and authorized_keys file (if it exists)
sudo chmod -R 700 ~/.ssh && sudo chmod 600 ~/.ssh/authorized_keys
Login Server Configuration
Now, on machine B, create a new user following the steps in the sections above, or feel free to use the adduser.sh script to handle this in one step. Login to this user, just as we did on machine A, and navigate to their ~/.ssh directory. Again, is this ~/.ssh directory does not exist, just create it and then navigate within.
./adduser otherusername 2000
sudo su otherusername
cd ~/.ssh
Note that the name of the user on machine B does not need to match the name of the user on machine A, since we can specify a username with ssh otherusername@0.0.0.0.
Now that we have the user created on machine B, create an /home/otherusername/.ssh/authorized_keys text file and open it for editing. Paste in the public key we generated on machine A found at /home/username/.ssh/username_ed25519.pub. This authorized_keys file is what will be checked for approved keys when logging into machine B with a certain username. If the user requesting to login uses any key within it's /home/otherusername/.ssh/authorized_keys file, login access is granted.
Once the files are generated, ensure permissions are set approprately for .ssh/ and authorized_keys file
sudo chmod -R 700 ~/.ssh && sudo chmod 600 ~/.ssh/authorized_keys
Using Putty with OpenSSH Keys
This section is outdated, as I no longer use Putty for SSH on Windows. When working on Windows, I tend to run a Linux VM on a seperate monitor, and I just use the VM to ssh around to boxes I own. I just find this to be easier for me personally. As an alternative, you could probably just download and use the Ubuntu application on the microsoft store, and configure SSH as you would on Linux. This would save system resources required to run the VM, if all you need is a terminal.
At some point when a password is used in key generation, ssh-keygen generates openssh private key which doesn't use cipher supported by puttygen.
ssh-keygen doesn't provide option to specify cipher name to encrypt the resulting openssh private key.
There is a workaround: remove the passphrase from the key before importing into puttygen.
Create a copy of the key to temporarily remove the password
cp ~/.ssh/id_ed25519 ~/.ssh/id_ed25519-for-putty
import the copied key, using the -p argument to specify a request to set a new password, and -f to specify the import keyfile.
ssh-keygen -p -f ~/.ssh/id_ed25519-for-putty
Enter old passphrase: <your passphrase>
Enter new passphrase (empty for no passphrase): <press Enter>
Enter same passphrase again: <press Enter>
using some command, view the text contents of the private key generated.
cat id_ed25519-for-putty
-----BEGIN OPENSSH PRIVATE KEY-----
b3BlbnNzaC1rZXktdjEAAAAABG5vbmUAAAAEbm9uZQAAAAAAAAABAAAAMwAAAAtzc2gtZWQyNTUxOQ
AAACCGyjniPP1oVCXqkdCeCKFp+5+5cI7L79rP5RYHJ5Y6fQAAAJh3QGp1d0BqdQAAAAtzc2gtZWQy
NTUxOQAAACCGyjniPP1oVCXqkdCeCKFp+5+5cI7L79rP5RYHJ5Y6fQAAAEBJr8PzmuEN6qNyrY07Lr
LAgZRjo9efYETKqFbS2jVTQobKOeI8/WhUJeqR0J4IoWn7n7lwjsvv2s/lFgcnljp9AAAADmthcHBl
ckBrYXB1bnR1AQIDBAUGBw==
-----END OPENSSH PRIVATE KEY-----
copy this output from your ssh session to the machine running Putty
On the windows machine, create a .ssh directory in the users folder who wishes to SSH into the server (C:\Users\Shaun.ssh)
Open puttygen, load convert->import keys.. select the text file we created in C:\Users\Shaun.ssh\ and set the passphrase from puttygen.
Don't forget to shred and remove ~/.ssh_id_ed25519-for-putty afterwards since it is not password protected.
The new password protected key will authorize the user based on the local password set in putty, using the remote PUBLIC key stored on the server.
Yubikey SSH Authentication
Overview
Yubikeys provide many different forms of secure authentication, for the sake of time this guide will only cover OTP (One Time Password) Authentication over SSH configured on an Ubuntu 19.04 box. This form of authentication allows you to consolidate all your 2FA passwords within one physical USB key. When plugged in and tapped, various configurations can be accessed and passed to be used for 2FA or primary auth, depending on your needs. In this guide, I will configure primary authentication using OTPs validated over Yubico's Authentication API via a collection of information such as time, ID, API Keys, and more. By cross referencing the information at the exact time of authentication / interaction with the associated physical Yubikey, we can login with a quick tap after some configuration on our services.
Yubikey Personalization Tool
To configure OTPs on our Yubikey, We'll need the Yubikey Personalization Tool - this will allow us to create a secondary configuration or overwrite the current running primary. Download the tool and select 'Yubico OTP' along the top bar, and click 'quick' configuration. You'll be greeted with the below window.
Writing OTP Configuration

Write the configuration, and you will be prompted if you would like to create a log file of your configuration. This file can be used to recover your key configuration should you lose it - if you choose to save a log of this configuration you should take care to store it in a very secure place, if someone were to obtain it they could use it maliciously. Save the log file, or click cancel to create no logs and store the configuration only on the Yubikey.
It's important to note that the Yubikey configurations are write-only, this means that if in the future you want to obtain the configuration from the key you will need to overwrite the running config and save the log at the time of configuration. This is a security feature to prevent an on-site attacker from duplicating keys and configurations freely.
The firmware on the key is also burned into the chip so no modifications can be made to the back-end of the key to alter these security settings. This means no updates can be provisioned to the key. For me, this is a fair trade for my security. Should I need a newer version key, I will simply purchase a new one.
Upload Configuration Credentials
By uploading your configuration, you provide Yubico with the information required to authenticate you key with your new configuration when an attempt is made. Click Upload configuration, and you'll be redirected to a web page that will automatically populate some fields in the screenshot below. For the sake of this guide, I have deleted the information as it should not be shared publicly. You could find and fill out this form manually, without the Personalization Tool - though it would take some more effort that I won't cover here. If you want to see the page or access it remotely, the URL is just https://upload.yubico.com/
The 'OTP from the Yubikey' should be passed into the associated field by accessing the configuration you just wrote to your key. So, for this guide, I have used the Yubikey 5 NFC - Which allows for two configurations, selected within the Personalization Tool prior to writing our configuration.
This is how you will authenticate when prompted by your services.
To use configuration 1, tap the key.
To use configuration 2, tap and hold the key for 2-3 seconds.
After completing this form, you'll be greeted with the one below - save it if you want to be able to restore your key settings should you lose this one.

Obtain Yubico API Key
To request an API key, fill out the Get API Key form from Yubico, note that this step must be completed after writing and uploading your configuration, and will be directly associated with the OTP authentication we have configured in the steps above. The form is simple, and provides a good test of our new configuration. Basically, we authenticate with our new OTP and Yubico provides us with an associated API key to use with our configuration files in the future.

Once filled out, Yubico will present you with your new keys -

Ubuntu Server Configuration
The following steps will be performed via command-line within your Ubuntu server. Note that these steps may vary if you are not using Ubuntu, but generally they should be very similar in concept.
Any time you are directly modifying SSH access to a remote server, you should be careful to validate your new settings before exiting the session you've configured them in. This ensures that if your settings are not correct, you will still be logged in and therefore can just continue to alter them until they suit your needs.
If you exit your session to validate your settings and are unable to reconnect - you could be locked out. Don't get locked out, just start an entirely new session to test your settings.
SSHD Configuration
Some basic modifications need to be made to the /etc/ssh/sshd_config - see that the lines below exist in some form within your configuration. It is possible to mix-and-match these options with many other forms of authentication, should you want the user to be prompted for various things such as Google-2FA, PIN, or a basic password. By gating the second form of authentication behind the Yubikey, you remove the opportunity for brute-forcing or guessing at these PINs or passwords, so the need to update them is far less frequent, but they should still be maintained / reset occasionally.
#/etc/ssh/sshd_config
AuthenticationMethods keyboard-interactive
ChallengeResponseAuthentication yes
UsePAM yes
Now, we'll need to vim /etc/ssh/authorized_yubikeys to populate a list of server-level authorized keys. Note that you can create user-specific keys stored within home directories much like the default .ssh/authorized_keys file works.
#/etc/ssh/authorized_yubikeys
shaun:vrnfgfebjiji
guests:vrnfgfebjiji:hhrefkikfcgr:dllcfndknkbf
newuser:hhrefkikfcgr:vrnfgfebjijiYubico PAM Configuration
Yubico Provides a custom PAM which allows them to pass your authentication through their API when connecting to the SSHD. Run the following commands to download it for Ubuntu.
sudo add-apt-repository ppa:yubico/stable
sudo apt-get update
sudo apt-get install libpam-yubicoYou may need to move pam_yubico.so to wherever PAM modules are stored on your system (usually lib/security). The Ubuntu package will automatically install the module in the appropriate location, but you can check to see whether it’s in the right location with ls /lib/security. It may also be stored in /usr/local/lib/security, in which case you will need to move it manually.
We'll need to modify the configuration for our new PAM for Yubikeys. Add auth required pam_yubico.so id=<clientid> id key=<SecretKey> key authfile=/etc/ssh/authorized_yubikeys to your /etc/pam.d/sshd configuration. Be sure to modify the <values> appropriately.
#/etc/pam.d/sshd
#Add the following line, modifying <values> appropriately.
auth required pam_yubico.so id=<clientid> id key=<SecretKey> key authfile=/etc/ssh/authorized_yubikeys
# Standard Un*x authentication. Uncomment this to use a password as well.
# @include common-auth
Note that the above file is a sequential configuration and the order of the lines added to this file is critical to the way it is read by your system.
It is possible to mix-and-match these options with many other forms of authentication, should you want the user to be prompted for various things such as Google-2FA, PIN, or a basic password. By gating other forms of authentication behind / after the Yubikey line we added above, you remove the opportunity for brute-forcing or guessing at these PINs or passwords, so the need to update them is far less frequent, but they should still be maintained / reset occasionally.
Tunneling
Reverse Tunneling
this is AKA Remote Port Forwarding, where we basically forward a remote server's port to direct requests to a local port on our machine. This is rather fun to play with, and only takes a few minutes to complete a working example if you're familiar with Linux and NGINX.
First we should keep in mind that if we want to forward any ports below 1024 on the remote server, we need to login as the root user. It doesn't matter if your user has sudo or not, it won't work unless you are root. You could maybe reconfigure things to make this not the case, but for the sake of this example we will just use the root user.
Start a local NGINX server and visit localhost in your web browser to see that it's working correctly. We will just use the default NGINX template.

Now login to your remote server and make sure the following line is withi /etc/sshd/sshd_config to allow public port forwarding.
# /etc/sshd/sshd_config
# By default, this is set to `no`; Make sure you change it to `yes`
# GatewayPorts no
GatewayPorts yes
Now, restart the sshd.service by running the following command, and make sure to stop the nginx.service if it is running on your remote server. Finally we exit the ssh session so we can relog as root and start our remote SSH tunnel
sudo systemctl restart sshd.service
sudo systemctl stop nginx.service
exit
To bind the remote server with the ssh command, the syntax is ssh -R <REMOTE_PORT>:<LOCAL_IP>:<LOCAL_PORT> root@<REMOTE_IP>. An example of this for my server is the command below. Note the remote IP is fake, since I don't want to share this IP publicly.
ssh -R 80:127.0.0.1:80 root@123.456.789.123
That's it! Once you've connected to your ssh session, you can visit your remote server's domain name or IP and it will redirect requests to port 80 to your local webserver.

Sources
goteleport - ssh tunneling explained
System Admin
Configure FTP
You can use scp instead, taking advantage of the added security and already-configured users on your system. It works a lot like ssh
Copy a file from a remote host to your local host -
scp -i ~/.ssh/some_key -P 22 username@123.123.123.12:/home/username/test .
If you still need or want FTP, you can follow the steps below to configure the FTP server and then connect with Filezilla.
Installing Very Secure FTP Daemon
I am using an Ubuntu 19.04 server in this guide, depending on your system your steps may vary slightly.
Assuming you have nothing installed, run sudo apt-get update && sudo apt install vsftpd to install vsftpd (Very Secure FTP Daemon). Navigate to the home directory of the user you wish to enable FTP access, and run the following.
# Login as your sudo user
sudo su USER
# Create FTP Directory
mkdir /home/USER/ftp
sudo chown nobody:nogroup /home/USER/ftp
sudo chmod a-w /home/USER/ftp
Create User FTP Directories
Create a directory where files can be uploaded, you can name this directory whatever you want. Give this directory permissions so you can upload files to it via FTP clients like FileZilla.
mkdir /home/USER/ftp/files
sudo chown USER:USER /home/USER/ftp/files
sudo chmod 777 /home/USER/ftp/files
Configure vsftpd Settings
If you have a firewall enabled, be sure you open the TCP ports 20, 21, 990, and 40000-50000 before you continue.
Add the following to /etc/vsftpd.conf
# FTP Initial Configuration Options
pasv_min_port=40000
pasv_max_port=50000
user_sub_token=$USER
local_root=/home/$USER/ftp
pasv_min_port=40000
pasv_max_port=40000
userlist_enable=YES
userlist_file=/etc/vsftpd.userlist
userlist_deny=NO
pasv_promiscuous=YES
allow_anon_ssl=NO
force_local_data_ssl=YES
force_local_logins_ssl=YES
ssl_tlsv1=YES
ssl_sslv2=NO
ssl_sslv3=NO
require_ssl_reuse=NO
ssl_ciphers=HIGH
Run echo "USER" | sudo tee -a /etc/vsftpd.userlist && sudo systemctl restart vsftpd to add your user to the userlist file we configured above and restart the service
tail -f /var/log/syslog in another console to see a live feed of service logs when restarting instead of checking the status with sudo systemctl status
Change or modify the following values, when editing these files I like to comment out the default value, and create a separate value in an organized list with my custom settings. This is useful later should I want to refer back to the default value I can just search it up in my file, and keeps things organized so when I can pick things back up quickly. You can do this however you see fit. The result of my modified values within vsftpd.conf is below.
# Values Modified During FTP Setup
chroot_local_user=YES
write_enable=YES
ssl_enable=YES
Run sudo systemctl restart vsftpd to restart the service and test your connection using Filezilla.
Debugging FTP Connections
If you're having issues with your FTP connection, check on the service with the following commands
sudo systemctl -l status vsftpd sudo tail -f /var/log/vsftpd.log
To test FTP connections via commandline, run the following
ftp -p IPADDRESS
You cannot connect to FTP via commandline using this method if you have enabled SSL/TLS because your connection will not be encrypted under TLS. Use Filezilla or another encrypted connection method instead.
Notes
Here's a working config file, with some comments on some extra settings I found on the manpages for vsftpd.conf
# *Example config file /etc/vsftpd.conf.bak
# *Don't forget to backup your default /etc/vsftpd.conf.bak
#
# Custom FTP configuration for basic server configuration
#
# These settings should be refined for security
# Firewall should be used and reflect the settings in this file
# For more security, use keys and disable password authentication
# +Restrict FTP access to a list of approved IP's with distributed keys
# FTP Custom Configuration Options
# Set chroot user options
chroot_local_user=YES
user_sub_token=$USER
# Set Directory FTP Will Default Into
local_root=/home/$USER/ftp
write_enable=YES
# If you can't write with Write_enable=YES, check directory permissions
# Create .../ftp/files and chmod 777 .../ftp/files
# Passive FTP Connection Settings
pasv_promiscuous=YES
pasv_min_port=40000
pasv_max_port=50000
# userlist_enable=YES tells vsftpd to read /etc/vsftpd.userlist
# /etc/vsftpd.userlist should contain one user per line
userlist_enable=YES
userlist_file=/etc/vsftpd.userlist
# Sets the userlist to be a whitelist or a blacklist
# userlist_deny=YES will deny FTP for any user on the list
userlist_deny=NO
# Enable logs for failed FTP connections due to userlist errors
# userlist_log=YES
# Enable dual logs fot vsftpd in /var/log/
# log/xferlog - stardard parsable log
# log/vsftpd.log - vsftpd formatted logs
dual_log_enable=YES
# This option specifies the location of the RSA certificate to use for SSL
# encrypted connections.
rsa_cert_file=/etc/ssl/certs/ssl-cert-snakeoil.pem
rsa_private_key_file=/etc/ssl/private/ssl-cert-snakeoil.key
# Other Settings For SSL
ssl_enable=YES
allow_anon_ssl=NO
force_local_data_ssl=YES
force_local_logins_ssl=YES
ssl_tlsv1=YES
ssl_sslv2=NO
ssl_sslv3=NO
require_ssl_reuse=NO
ssl_ciphers=HIGH
# Default vsftpd.conf Values
# READ THIS: This example file is NOT an exhaustive list of vsftpd options.
# Please read the vsftpd.conf.5 manual page to get a full idea of vsftpd's
# capabilities.
# The default compiled in settings are fairly paranoid. This sample file
# loosens things up a bit, to make the ftp daemon more usable.
# Please see vsftpd.conf.5 for all compiled in defaults.
secure_chroot_dir=/var/run/vsftpd/empty
pam_service_name=vsftpd
connect_from_port_20=YES
use_localtime=YES
dirmessage_enable=YES
local_enable=YES
anonymous_enable=NO
listen_ipv6=YES
listen=NO
Modifying the values below during setup of TLS encryption caused vsftpd to crash on startup..
These values were obtained following this tutorial. Just noting this in case I missed something here, so I can revisit it later.
# Working values, establishes TLS connection via Filezilla FTP
rsa_private_key_file=/etc/ssl/private/ssl-cert-snakeoil.key
rsa_cert_file=/etc/ssl/certs/ssl-cert-snakeoil.pem
# Modified values from generating ssl cert that are crashing vsftpd
# rsa_cert_file=/etc/ssl/private/vsftpd.pem
# rsa_private_key_file=/etc/ssl/private/vsftpd.pem
Configure Postfix
Postfix is a Mail Transfer Agent (MTA) that can act as an SMTP server or client to send or receive email. There are many reasons why you would want to configure Postfix to send email using Google Apps and Gmail. One reason is to avoid getting your mail flagged as spam if your current server’s IP has been added to a blacklist.
Install postfix and mailutils -
sudo apt install postfix mailutils
Create Google App Token
When attempting to send mail from a new host, you may encounter errors with Google blocking or filtering your mail as spam. To prevent this, simply create a GMail account you wish to send the mail under, Activate 2FA on the new account, then Generate App Tokens to distribute to the hosts / apps you wish to send mail on your behalf. See below for further instructions once you have a GMail account created, and have generated an app password / token.
Postfix App Token Authentication
Once you have the app token, we'll need to add it to /etc/postfix/sasl/sasl_passwd - If this file doesn't already exist, create it and include the following lines, modified with your information
sudo echo "[smtp.gmail.com]:587 username@gmail.com:password" > /etc/postfix/sasl/sasl_passwd;
Instead of using the password you usually input when logging into the GMail account, add the app token generated after enabling 2FA following the links in the first step above. Below, we notify postfix that we've made these changes by running sudo postmap /etc/postfix/sasl/sasl_passwd. This will create a sasl_passwd.db file in the /etc/postfix/sasl directory.
Run postmap, and restrict access to our new file containing this password
sudo postmap /etc/postfix/sasl/sasl_passwd;
sudo chown root:root /etc/postfix/sasl/sasl_passwd /etc/postfix/sasl/sasl_passwd.db;
sudo chmod 600 /etc/postfix/sasl/sasl_passwd /etc/postfix/sasl/sasl_passwd.db;
Configure Relay Server
Configure postfix to relay mail through GMail's server by making the below changes to /etc/postfix/main.cf -
# Change / modify this line..
relayhost = [smtp.gmail.com]:587
# Add these lines...
# Enable SASL authentication
smtp_sasl_auth_enable = yes
# Disallow methods that allow anonymous authentication
smtp_sasl_security_options = noanonymous
# Location of sasl_passwd
smtp_sasl_password_maps = hash:/etc/postfix/sasl/sasl_passwd
# Enable STARTTLS encryption
smtp_tls_security_level = encrypt
# Location of CA certificates
smtp_tls_CAfile = /etc/ssl/certs/ca-certificates.crt
Send Mail
That's it! Now restart postfix with sudo systemctl restart postfix and test sending mail using any of the commands below -
echo "This email confirms that Postfix is working" | mail -s "Testing Posfix" emailuser@example.com
or..
sendmail emailaddress@gmail.com
FROM: admin@sub.domain.com
SUBJECT: Hi
Body test text
.
Mailer Daemon
To change the email the system sends security alerts to, modify the /etc/aliases file to use your email address for the root field below. If this isn't already in the file, add it, and run sudo newaliases to update the system with the new information.
# See man 5 aliases for format
postmaster: root
root: someone@somedomain.com
Now to test that his works correctly, attempt to sudo somewhere on the system where you'll be required to enter a password, and botch it - all three times. You'll get an email from your server warning you of the security event! Missing a password on an attempt to sudo is a security event
Configuring Multi-boot Filesystems
When installing a fresh Linux Distribution, you might want to dual-boot, or even multi-boot, into different desktop environments. There are some pretty specific requirements we'll need to setup manually for our new partitions though, see below for details on the different partitions needed to setup an open ended multi-boot system alongside windows. This configuration will prompt for selection of OS on boot, and will allow for nearly any number of distributions to be tested alongside each other. These instructions vary slightly based on your specific scenario, so be sure to read and understand the need for each setting below.
Installation Media
When installing any operating system, we first need to create our installation media. Sometimes these are distributed as Installation CDs, but a simple USB can be turned into the same thing very easily.
Depending on your system, see the sections below.
Choosing a Distribution
Not sure what distribution to use, or searching for a legit ISO?
Distrowatch is your friend. They provide rankings, comment boards, forums, and (usually) working links to ISO downloads.
Linux ISO Tools
To burn an image using umount and dd on Linux, run the commands below.
lsblk
the command above will list all block storage devices connected to your system, find your device in the list, and take note of the name assigned to it within the /dev/ directory. Usually, this name is sd<?><?> or sd<?> for the primary partition. Usually, we would want to write to the primary on the USB to ensure that we boot from our ISO.
sudo dd if=/home/user/Downloads/inputfile.iso of=/dev/sd<?><?> && sync
Windows ISO Image Writer
Universal USB Installer handles almost every scenario for most if not all distros. Head over to UUI's Download Page, grab the tool and see that your settings are adjusted for your needs.
Your Drive letters, distro release, and persistent file size may be different depending on the requirements you have for your media. To format a drive and prepare for writing -
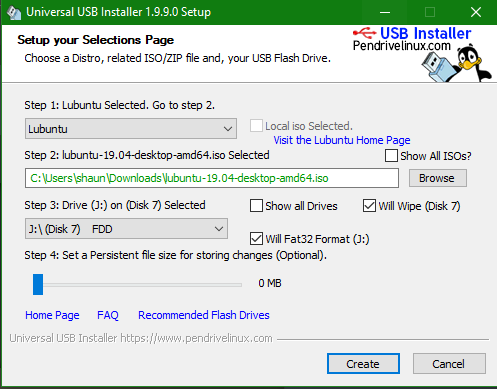
To create USB installation media -
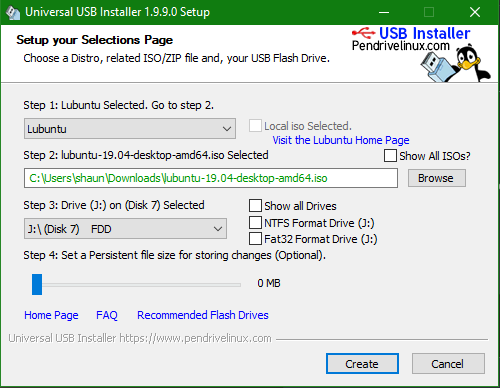
To create a persistant USB to boot wherever you like, adjust the slider on the bottom of the widows labeled Step 4: to your desired size.
When using this tool to create a persistent USB device, there is a temporary directory created in your C:\Users\shaun\AppData\Local\Temp\ directory! If there is not enough space on your drive, the process will not terminate itself, but it will not be able to complete. The temporary files tend to be named nsf9D50.tmp or similar, and will take up equal or slightly more space than is being written to your USB. So, if you create a persistent USB with 10GBs of storage ontop of writing a 2GB .iso, you can expect to need ~12GB on your C:\ drive in order for the process to complete successfully. Once completed, the temp files should be automatically deleted. If the process gets hung due to insufficient space on your drive, this may not happen and you may need to check your Temp directory to manually delete the files yourself.
Alternatively, you can check out the tools below if you have issues using Universal USB Installer.
If you've written to a USB and need to recreate the media for any reason, you'll need to clear the contents on the USB before you can attempt to reformat and reimage the storage device. To do this, ROSA can be used to clear the USB by selecting the device and clicking clear. After doing this you'll just need to format the drive using windows quick format tool via right click->format->FAT. Then, use win332diskimager to copy the new image to your device.
BIOS Configuration
When configuring a multi-boot system with specific partitions for different distributions, you'll need to enable the following settings within your BIOS -
- Disable Secure Boot
- Disable fast boot
- Set to UEFI mode only within boot options.
If you're unsure how to modify these settings, try running the setting in question through google along with the model of your motherboard. This will hopefully provide some more specific instructions on using the BIOS of your system.
Modifying these settings will allow us to create EFI files within a given EFI partition, created below, where the system defines the boot sequence for multiple operating systems. This allows us to leave our boot sequence open-ended, and easily append EFI system files to our partition / boot options during the installation of a new system. There are, unfortunately, a few discrepancies to how these steps will be performed - unless the system is to be configured exactly the same.
USB Boot / Install
Insert your USB installer you created above using ROSA Image Writer or dd command above, and reboot the system. Be sure to pay attention and press the required key to enter the BIOS during boot. For me, the key was delete or F2. Once in the BIOS, navigate to your boot sequence / options and there should be a list of connected storage devices, including all HDD, SSD, USBs, etc. Find your USB installer in the list and select it, this will boot into the installer for your distribution. The installer is usually found on the desktop as an executable application. These installers are usually usable systems, but be aware that there will be no persistent data between reboots until the installation is completed.
When selecting your installation media to boot from within BIOS, be sure to select the media that corresponds with how your system is configured to boot. In this example, the media should start similar to UEFI: USB .... If you were not using a UEFI configuration, simply select the same media without the UEFI: prefix.
Partitioning
Once booted into the USB created above, you will likely se an installation prompt. When given the choice, select 'custom installation or 'custom partition configuration option, and continue with the guide below.
Bootloader Partition
If you are already using Grub on an existing EFI partition, you won't need to create a new one. Skip this step, but make note of where this partition is, we will need it during installation.
This is the partition where we will create and store new bootloaders during installation of different distributions. You will not directly edit or view this partitions contents, but it is the backbone of the system-selection prompt (grub) that you will receive when booting after completing this configuration. There may be a need to step into this partition if you decide to customize your grub configuration, but we won't get into that here.
Size: 1GB (this is generous)
Type: FAT32
Location: Beginning of Space (Volume we are partitioning)
Mount: (Leave empty / blank)
Flags: boot, efi (also called ESP or EFISYS)
You should always choose to install the bootloader on the same disk the EFI filesystem exists, whether your case required the creation of a new EFI volume or if you are installing alongside a previous one. Failing to do so can could cause issues during installation.
The only exception to this is when initially installing a Linux / Grub Bootloader - you will have to create a new EFI partition for the Grub Bootloader. Grub will pick up the windows partition automatically, but if it doesn't, you can always run sup grub-update to search for new EFI partitions or configurations and update your Grub Bootloader appropriately.
Root Partition
This partition will store the Linux system files for your distribution, and unless otherwise partitioned separately, your user's home directory and all of its content. This should be set according to both your distributions total installation size, and if you are not partitioning dedicated space - you should figure in any extra space your user(s) might require for new packages, updates, and applications. Running out of space is a lot worse than having too much, so try to be a little generous here.
Size: Adjust according to installed size of distribution we are using.
Type: exf4 (Logical)
Location: Beginning of Space (Volume we are partitioning)
Mount: /
Flags: root
Swap Partition (Optional)
This is the space your system will use if you run out of memory. If you max out your RAM, this will prevent your system from freezing up. Be cautious of low RAM systems with little or no swap, the downfall to swap space is that once it is used it cannot be reallocated until the system reboots.
Size: 2GB-Preference (Ideally 50-100% of system RAM)
Type: linuxswap (Logical)
Location: Beginning of Space (Volume we are partitioning)
Mount: (Leave empty / blank)
Home Partition (Optional)
This is optional. I would recommend having a separate storage device (Massive HDDs are getting cheaper..) to mount your home directories in, so if you ever need to reinstall the root directory of your distributions you'll be able to do so without having to worry about backing up or losing data.
I would not advise taking the gamble, you will probably need to reinstall at some point - and it's good insurance to have.
Size: Preference
Type: exf4 (Primary)
Location: Beginning of Space (Volume we are partitioning)
Mount: /home
Installing
Now all we need to do is specify where to install the bootloader. This is easy since we just created that partition above, the EFI Partition. Select the partition from the dropdown and click 'continue' or 'install' at the bottom corner. After this is complete, you'll just need to reboot and witness the grub! From now on, you'll have an option of which system to boot into when starting your PC.
Adding New Systems
During installation of additional systems, we have two requirements, selecting a location for booting the system, and selecting a location for configuring the root filesystem.
Create a new /root (and /home, if you choose) partition(s), then select the EFI partition we created above for the bootloader install location (For me, this was sdb1 - the first partition of /dev/sdb) The basic requirements of both can be seen below
Bootloader
Size: 1GB (this is generous)
Type: FAT32
Location: Beginning of Space (Volume we are partitioning)
Mount: (Leave empty / blank)
Flags: boot, efi
Root
Size: Adjust according to installed size of distribution we are using.
Type: exf4 (Logical)
Location: Beginning of Space (Volume we are partitioning)
Mount: /
Flags: root
Grub Issues
If you're having issues with system options not appearing in grub, be sure to load into a previous system and run sudo update-grub - this command will search for new entries in the EFI partition and automatically add them to your grub configuration / system prompt. You can manually step through the EFI partition using the grub command-line to bail yourself out, but this shouldn't be needed as returning to an already configured system and running this command will pick up all new systems for next reboot.
grub rescue> set prefix=(hd0,1)/boot/grub
grub rescue> set root=(hd0,1)
grub rescue> insmod normal
grub rescue> normal
grub rescue> insmod linux
grub rescue> linux /boot/vmlinuz-3.13.0-29-generic root=/dev/sda1
grub rescue> initrd /boot/initrd.img-3.13.0-29-generic
grub rescue> boot
sudo apt install efibootmgr
sudo modprobe efivars
sudo efibootmgr
sudo efibootmgr -b 4 -B
test -d /sys/firmware/efi && echo UEFI || echo BIOS
sudo blkid
sudo parted -l
cat /proc/cmdline
Crontab
Using crontab to schedule tasks for the system to perform is fairly straight forward, once you get familiar with the syntax used within the configuration. Run crontab -e to open the file for editing, and modify to your needs using the examples below
Tell crontab where to send email alerts to by adding the following lines to any crontab
MAILTO=someuser@somedomain.com
MAILFROM=someuser@somedomain.com
Alternatively, to silence all emails, just provide no email with MAILTO=''.
# Schedule our system to run the test.sh script once a day -
0 0 * * * /path/to/test.sh
# Syntax used for time -
* * * * * command to be executed
- - - - -
| | | | |
| | | | ----- Day of week (0 - 7) (Sunday=0 or 7)
| | | ------- Month (1 - 12)
| | --------- Day of month (1 - 31)
| ----------- Hour (0 - 23)
------------- Minute (0 - 59)
# Operators used in scheduling -
(*) : This operator specifies all possible values for a field. For example, an asterisk in the hour time field would be equivalent to every hour or an asterisk in the month field would be equivalent to every month.
(,) : This operator specifies a list of values, for example: “1,5,10,15,20, 25”.
(-) : This operator specifies a range of values, for example: “5-15” days , which is equivalent to typing “5,6,7,8,9,….,13,14,15” using the comma operator.
(/) : This operator specifies a step value, for example: “0-23/” can be used in the hours field to specify command execution every other hour. Steps are also permitted after an asterisk, so if you want to say every two hours, just use */2.
So, some example for various schedules -
# To run a command once a day at midnight
0 0 * * * /path/to/unixcommand
# To run /path/to/command every five minutes, every day, enter:
5 0 * * * /path/to/command
# To run /path/to/command five minutes after midnight, every day, enter:
5 0 * * * /path/to/command
# Run /path/to/script.sh at 2:15pm on the first of every month, enter:
15 14 1 * * /path/to/script.sh
# Run /scripts/phpscript.php at 10 pm on weekdays, enter:
0 22 * * 1-5 /scripts/phpscript.php
# Run /root/scripts/perl/perlscript.pl at 23 minutes after midnight, 2am, 4am …, everyday, enter:
23 0-23/2 * * * /root/scripts/perl/perlscript.pl
# Run /path/to/unixcommand at 5 after 4 every Sunday, enter:
5 4 * * sun /path/to/unixcommand
Alternative, more readable but less customizable syntax for scheduling common times -
@reboot Run once, at startup.
@yearly Run once a year, “0 0 1 1 *”.
@annually (same as @yearly)
@monthly Run once a month, “0 0 1 * *”.
@weekly Run once a week, “0 0 * * 0”.
@daily Run once a day, “0 0 * * *”.
@midnight (same as @daily)
@hourly Run once an hour, “0 * * * *”.
Useful crontab commands
# Edit crontab configuration
crontab -e
# List crontab jobs
crontab -l
# Check status of cron
sudo systemctl status cron
sudo journalctl -u cron
sudo journalctl -u cron | grep backup-script.sh
# Cron logs
cat /var/log/cron
tail -f /var/log/cron
grep "my-script.sh"
tail -f /var/log/cron
# Backup cron
crontab -l > /nas01/backup/cron/users.root.bakup
crontab -u userName -l > /nas01/backup/cron/users.userName.bakup
Much of this and more information was found at CyberCiti
Server Hostname
Renaming An Ubuntu Linux Host
Renaming a host on Ubuntu is simple, just need to make some very small changes to both /etc/hosts and /etc/hostname. See the comments within the files below for more information. Once these changes are made, simply reboot the host and the changes will be applied.
# '/etc/hosts' should contain a line similar to the below
127.0.0.1 localhost
# Change it to the following to name the host 'alvin'
127.0.0.1 alvin
Similarly, the /etc/hostname file will contain just the name of the host. So, if we actually wanted to name our host 'alvin', we would change its content to reflect that.
alvinDon't forget to reboot the host to apply the changes. Also, if you are hosting any content or running applications, be sure to save your data and stop the processes if necessary in order to avoid creating issues.
Swap Allocation
Creating swap memory for your host could prevent system or services from crashing when under heavy loads. To do this, run the following commands.
Creating Swap Files
# To createa 512MiB swap file -
sudo dd if=/dev/zero of=/swapfile bs=1M count=512 status=progress
# To create a 1GiB swap file -
sudo dd if=/dev/zero of=/swapfile bs=1GB count=1
# To create a 10GiB swap file -
sudo dd if=/dev/zero of=/swapfile bs=1GB count=10
Enabling Swap
After creating the swap file of the desired size, in the desired directory, we'll need to set some permissions and prepare our file to be used for swap space -
# Set permissions
sudo chmod 600 /swapfile
# Format file to be used for swap allocation
sudo mkswap /swapfile
# Tell our system to mount this file for swap usage
sudo swapon /swapfile
Adding Default Swap Entry - fstab
In short, an fstab entry for mounting the swap partition we created above -
# <device> <dir> <type> <options> <dump> <fsck>
/swapfile none swap defaults 0 0
Add this line to your /etc/fstab to mount and use this partition for swap automatically on system reboots.
For more information, see Mounting Default Filesystems or ArchWiki - Fstab
Verifying Swap Configuration
To check available system swap space, run free -h to see output similar to the below -
root@host:~# free -h
total used free shared buff/cache available
Mem: 983Mi 260Mi 62Mi 0.0Ki 660Mi 560Mi
Swap: 1.0Gi 15Mi 1.0Gi
Alternatively, we could run 'sudo swapon --show' to see the below output
sudo swapon --show
NAME TYPE SIZE USED PRIO
/swapfile file 1024M 15.8M -2
Swappiness Values
The default swappiness value is set to 60, but to check, change, or verify your system swappiness, see the commands below
# Check system swappiness setting
cat /proc/sys/vm/swappiness
60
# Set a new swappiness value
sudo sysctl vm.swappiness=10
# Check the setting was applied
cat /proc/sys/vm/swappiness
10
Swappiness Persistance
Upon setting a custom swappiness value and rebooting, your custom configuration will be lost. Edit /etc/sysctl.conf to contain the line below to ensure this value is kept between system reboots
vm.swappiness=10
Removing Swap Files
First, turn off the swap file -
sudo swapoff -v /swapfile
Remove the swap file entry from your /etc/fstab if you previously created one. If present, remove the line similar to the below
/swapfile swap swap defaults 0 0
Last, delete the swap file using rm -
sudo rm /swapfile
Synchronizing Time Using NTP
Check out NTP-Pool for a list of pools available to different regions.
Configuration
Network Time Protocol (NTP) allows us to easily synchronize our servers with the indicated NTP host. The settings stored in /etc/systemd/timesyncd.conf allow us to specify which NTP server we would prefer to sync with, as well as which server(s) to use should our preferred option fail for whatever reason.
# This file is part of systemd.
#
# systemd is free software; you can redistribute it and/or modify it
# under the terms of the GNU Lesser General Public License as published by
# the Free Software Foundation; either version 2.1 of the License, or
# (at your option) any later version.
#
# Entries in this file show the compile time defaults.
# You can change settings by editing this file.
# Defaults can be restored by simply deleting this file.
#
# See timesyncd.conf(5) for details.
[Time]
#NTP=
#FallbackNTP=ntp.ubuntu.com
#RootDistanceMaxSec=5
#PollIntervalMinSec=32
#PollIntervalMaxSec=2048
The configuration above is an example of the default settings, which are commented out since these same default settings are assumed by the Ubuntu system. If you want to change them, just remove the comment and modify their values. Below, we have modified the settings to use various servers based on our preferences.
# This file is part of systemd.
#
# systemd is free software; you can redistribute it and/or modify it
# under the terms of the GNU Lesser General Public License as published by
# the Free Software Foundation; either version 2.1 of the License, or
# (at your option) any later version.
#
# Entries in this file show the compile time defaults.
# You can change settings by editing this file.
# Defaults can be restored by simply deleting this file.
#
# See timesyncd.conf(5) for details.
[Time]
NTP=0.north-america.pool.ntp.org 1.north-america.pool.ntp.org
FallbackNTP=ntp.ubuntu.com 0.arch.pool.ntp.org
#RootDistanceMaxSec=5
#PollIntervalMinSec=32
#PollIntervalMaxSec=2048
Above, we tell systemd that we would prefer to connect to NTP servers in the following order
- 0.north-america.pool.ntp.org
- 1.north-america.pool.ntp.org
- ntp.ubuntu.com
- 0.arch.pool.ntp.org
Synchronization
If your server is for any reason out of sync, this could cause various issues down the line with services or applications. To correct this, simply synchronize with your configured NTP servers by running sudo timedatectl set-ntp true && timedatectl status - These commands will synchronize and then print the status of your NTP connection. Be sure to verify the information is correct, and double-check by running date within your bash terminal.
Systemd Services
To define our own service with systemd, we need to create a daemon.service file. This is easily done within a few quick lines using vim, and should only take a few minutes.
First, we need to locate the binary for the command we want to be executed as a service. This is just good to have on-hand when defining a new service. Check where exactly your binary is using which <command>, seen below
which hexo
/home/hexouser/.nvm/versions/node/v20.9.9/bin/hexo
Now we know exactly where the binary that we execute is when we run the hexo command, and we will use it within the hexo.service file we create below, so be sure to have it handy.
To create a user service, place the hexo.service file within the $HOME/.config/systemd/hexouser/ directory. This will allow the user to manage the service without sudo by running systemd --user start name.service
Create a service file like the one below for hexo by running sudo vim /etc/systemd/system/hexo.service. If you are defining a service for something else, just rename this file accordingly.
[Unit]
Description=Personal hexo blog service
After=network.target
[Service]
Type=simple
# Another Type: forking
User=hexouser
WorkingDirectory=/home/hexouser/hexosite
ExecStart=/home/hexouser/.nvm/versions/node/v29.9.9/bin/hexo server --cwd /home/hexoroot/hexosite
ExecStop=/bin/kill -TERM $MAINPID
ExecReload=/bin/kill -HUP $MAINPID
Restart=on-failure
# Other restart options: always, on-abort, etc
# The install section is needed to use
# `systemctl enable` to start on boot
# For a user service that you want to enable
# and start automatically, use `default.target`
# For system level services, use `multi-user.target`
[Install]
WantedBy=multi-user.target
WantedBy=graphical.target
When making changes to a service, you need to run sudo systemctl daemon-reload between edits to apply your changes before restarting your service. Once the above file is created within /etc/systemd/system/hexo.service we can start our hexo blog using systemd by running the usual commands
# Start your new service
sudo systemctl start hexo.service
# Enable your service to start automatically on reboot or crashing
sudo systemctl enable hexo.service
# Check on your service
sudo systemctl status hexo.service
We can even check on our logs using journalctl
sudo journalctl -u hexo
journalctl --user-unit hexo
Unattended Upgrades
To configure linux hosts to automatically install updates and upgrades, add or edit the following lines in /etc/apt/apt.conf.d/50unattended-upgrades. Feel free to change the settings as you see fit.
Unattended-Upgrade::Mail "user@example.com";
Unattended-Upgrade::MailOnlyOnError "true";
Unattended-Upgrade::Remove-Unused-Kernel-Packages "true";
Unattended-Upgrade::Remove-Unused-Dependencies "true";
Unattended-Upgrade::Automatic-Reboot "true";
Unattended-Upgrade::Automatic-Reboot-Time "02:38";
At the top of /etc/apt/apt.conf.d/50unattended-upgrades, you'll notice the block below, be sure to follow my comments and make the changes needed
Unattended-Upgrade::Allowed-Origins {
"${distro_id}:${distro_codename}";
"${distro_id}:${distro_codename}-security";
// Extended Security Maintenance; doesn't necessarily exist for
// every release and this system may not have it installed, but if
// available, the policy for updates is such that unattended-upgrades
// should also install from here by default.
"${distro_id}ESM:${distro_codename}";
"${distro_id}:${distro_codename}-updates"; // <-- Uncomment this line.
// "${distro_id}:${distro_codename}-proposed";
// "${distro_id}:${distro_codename}-backports";
};
Add the following lines to sudo vim /etc/apt/apt.conf.d/20auto-upgrades.
APT::Periodic::Update-Package-Lists "1";
APT::Periodic::Unattended-Upgrade "1";
# Add these two lines...
APT::Periodic::Download-Upgradeable-Packages "1";
APT::Periodic::AutocleanInterval "7";
Test that you can run a dy-run update using unattended-upgrades -
sudo unattended-upgrades --dry-run --debug
Also, check the logs for unattended-upgrades below
less /var/log/unattended-upgrades/unattended-upgrades.log
Interfaces
Audio Devices
When using various Linux Distributions, you may (or may not) run into some issues with audio devices. See some of the configs, logs, and commands below for helpful output in troubleshooting these issues.
GUI Tools / Applications
If looking for a GUI Tool to select or view output / input audio devices, check out pavucontrol -
sudo pacman -Syu pavucontrol
pavucontrol
will install and open the application, which provides a simple interface for selecting audio devices, and even provides application-level audio control, which enables you to easily specify the devices for individual applications instead of forcing a system-wide audio setting for all running apps.
Commands
:)
Sound Card / Devices
Search for all connected audio cards, and output the result.
aplay -L | grep :CARD
List all connected PCI devices (Sound cards are a PCI device)
lspci
Audible Sound Test
The command below will send static to each speaker connected to the device, sequentially, one at a time. Running this will continually test all speakers on a loop, until the user exits with CTRL+C.
speaker-test -D default:PCH -c 8
The output from the above test will look similar to the below, depending on your system and devices.
The -D argument specifies the audio device you want to test. This is useful when not entirely sure which device is valid, you can test quickly with this cmd and make changes later in alsamixer or another config tool with the results of your findings.
The -c argument specifies the number of audio channels you want to test, for my setup I only have a front left and right speaker, so 2 will suffice. If I had a surround sound with Left / Right speakers in the back and an additional center speaker, we would test over 5 channels.
[kapper@kapper-pc ~]$ speaker-test -D default:PCH -c 2
speaker-test 1.1.9
Playback device is default:PCH
Stream parameters are 48000Hz, S16_LE, 2 channels
Using 16 octaves of pink noise
Rate set to 48000Hz (requested 48000Hz)
Buffer size range from 2048 to 16384
Period size range from 1024 to 1024
Using max buffer size 16384
Periods = 4
was set period_size = 1024
was set buffer_size = 16384
0 - Front Left
1 - Front Right
Time per period = 5.648263
0 - Front Left
1 - Front Right
Time per period = 5.973649
0 - Front Left
^CWrite error: -4,Interrupted system call
xrun_recovery failed: -4,Interrupted system call
Transfer failed: Interrupted system call
Sound Mixer / Settings
To open alsa mixer, run the below and use the F6 key to ensure the proper device is selected. This tool can also be used to change volume levels, be careful messing with settings you are unfamiliar with, you could easily blow a speaker. At the least, connect a cheaper pair.
alsamixer
To check device audio settings / levels via CMD -
amixer to list devices and settings
amixer sset Master unmute to mute the Master device. Master can be changed to any valid device name given from the output of amixer
Also, see Advanced Linux Sound Architecture for more information on various documented issues encountered.
Disk Management
Show all disks, usage, and format type
sudo df -T -h
Filesystem Type Size Used Avail Use% Mounted on
udev devtmpfs 930M 4.0K 930M 1% /dev
tmpfs tmpfs 191M 1.5M 190M 1% /run
/dev/sda1 fuseblk 29G 25G 4.5G 85% /isodevice
/dev/loop0 iso9660 1.6G 1.6G 0 100% /cdrom
/dev/loop1 squashfs 1.5G 1.5G 0 100% /rofs
/cow overlay 22G 17G 4.1G 81% /
tmpfs tmpfs 954M 5.2M 949M 1% /dev/shm
tmpfs tmpfs 5.0M 4.0K 5.0M 1% /run/lock
tmpfs tmpfs 954M 0 954M 0% /sys/fs/cgroup
tmpfs tmpfs 954M 56K 954M 1% /tmp
tmpfs tmpfs 191M 8.0K 191M 1% /run/user/999
tmpfs tmpfs 191M 20K 191M 1% /run/user/70000
google-drive-ocamlfuse fuse.google-drive-ocamlfuse 15G 9.1G 6.0G 61% /home/kapper/gdrive
Check /var directories for disk usage, sort and limit results to 10
sudo du -ah /var | sort -nr | head -n 10
924K /var/lib/apt/lists/archive.ubuntu.com_ubuntu_dists_disco-updates_universe_i18n_Translation-en
924K /var/cache/apparmor/26b63962.0/usr.lib.libreoffice.program.soffice.bin
912K /var/lib/texmf/web2c/pdftex/pdflatex.fmt
912K /var/lib/texmf/web2c/pdftex/latex.fmt
888K /var/cache/apt/archives/libgtkmm-3.0-1v5_3.24.0-2_amd64.deb
852K /var/lib/apt/lists/security.ubuntu.com_ubuntu_dists_disco-security_main_i18n_Translation-en
828K /var/lib/app-info/icons/ubuntu-disco-multiverse
824K /var/lib/dpkg/info/linux-headers-5.0.0-38-generic.md5sums
817K /var/lib/dpkg/info/linux-headers-5.0.0-13-generic.md5sums
804K /var/log/syslog.3.gz
Scan this disk for usage, sort the results by directories > 1.0GB, show largest 5 results
sudo du -xh / | grep '^\S*[0-9\.]\+G' | sort -rn | head -n 5
19G /
9.8G /home/kapper
9.8G /home
6.7G /usr
5.7G /home/kapper/.cache
Show the largest 5 files on the system (greater-than 100MB), using block size of 1MB.
sudo find / -xdev -type f -size +100M -exec ls -l --block-size=M {} \; | sort -nk 5 -r | head -n 5
-rw-r--r-- 1 kapper kapper 174M Nov 30 06:13 /home/kapper/.local/share/JetBrains/Toolbox/apps/CLion/ch-0/213.5744.254/lib/platform-impl.jar
-rw-r--r-- 1 kapper kapper 174M Nov 30 03:14 /home/kapper/.local/share/JetBrains/Toolbox/apps/PyCharm-P/ch-0/213.5744.248/lib/platform-impl.jar
-rw-r--r-- 1 kapper kapper 174M Nov 27 05:41 /home/kapper/.local/share/JetBrains/Toolbox/apps/WebStorm/ch-0/213.5744.224/lib/platform-impl.jar
-rw-r--r-- 1 kapper kapper 174M Nov 23 11:21 /home/kapper/.local/share/JetBrains/Toolbox/apps/datagrip/ch-0/213.5744.178/lib/platform-impl.jar
-rw-r--r-- 1 kapper kapper 174M Dec 1 08:26 /home/kapper/.local/share/JetBrains/Toolbox/apps/Goland/ch-0/213.5744.269/lib/platform-impl.jar
Show the 10 files consuming the most data on this system
sudo find / -printf '%s %p\n'| sort -nr | head -10
140737477885952 /proc/kcore
24244125696 /isodevice/casper-rw
3296907264 /media/lubuntu/37aba99c-8b85-4ddc-92eb-6f50251041e8/encrypted.block
1890263040 /media/lubuntu/37aba99c-8b85-4ddc-92eb-6f50251041e8/home/.shadow/362074638d2508061facd43743c9f08ff66866b8/mount/ASTjdxE5eNzc0F3lkW870B/4HICtmqSNBNCh4oi+U7116prbiG
1657700352 /isodevice/lubuntu-19.04-desktop-amd64.iso
1589342208 /cdrom/casper/filesystem.squashfs
471728128 /media/lubuntu/37aba99c-8b85-4ddc-92eb-6f50251041e8/home/.shadow/362074638d2508061facd43743c9f08ff66866b8/mount/ASTjdxE5eNzc0F3lkW870B/MK3nlrbwT+ZzY8n1fczEqB/Yqt2q,akFt0uJ7WDNJaHdNA0GbkTnhX7kza2zeVnGMI/E1hEyvd6NZ1+JT6hgxI2zA/JekSpYOtLWQPV0kgorVJuFbCcIG/LRriMSOWaunntY7RsNUiUC/x+gYqqpRFtEjXG+JzztvwlQ4LDeq82QY
268435456 /sys/devices/pci0000:00/0000:00:02.0/resource2_wc
268435456 /sys/devices/pci0000:00/0000:00:02.0/resource2
137797651 /home/kapper/.local/share/Steam/ubuntu12_64/libcef.so
Print information on all connected block devices
sudo lsblk
sda 8:0 0 931.5G 0 disk
├─sda1 8:1 0 128M 0 part
├─sda2 8:2 0 925.5G 0 part
└─sda3 8:3 0 5.9G 0 part
Print the UUIDs of all connected block devices, along with some other hardware information
sudo blkid
/dev/sdb2: UUID="436b3ae3-4301-4b8a-80d3-fdf52c7d7059" TYPE="swap" PARTUUID="590670f6-3b89-41b5-b474-fcd6c048628d"
Print information on partitions one all connected block devices
sudo parted -l
Model: HDD A12345678-B3210 (scsi)
Disk /dev/sdb: 2000GB
Sector size (logical/physical): 512B/4096B
Partition Table: gpt
Disk Flags:
Number Start End Size File system Name Flags
1 1049kB 1000MB 999MB fat32 boot, esp
2 1000MB 17.0GB 16.0GB linux-swap(v1)
3 17.0GB 117GB 100GB ext4
4 117GB 217GB 100GB ext4
5 217GB 427GB 210GB ext4
Print information given a specific block device (partitions)
sudo tune2fs -l /dev/sdb3
tune2fs 1.45.4 (23-Sep-2019)
Filesystem volume name: <none>
Last mounted on: /
Filesystem UUID: fagbraetd325t9-6gafdee7-4d2344agdd-93d2-6f4safsafsa5d6
Filesystem magic number: 0xEF53
Filesystem revision #: 1 (dynamic)
Filesystem features: has_journal ext_attr resize_inode dir_index filetype needs_recovery extent 64bit flex_bg sparse_super large_file huge_file dir_nlink extra_isize metadata_csum
Filesystem flags: signed_directory_hash
Default mount options: user_xattr acl
Filesystem state: clean
Errors behavior: Continue
Filesystem OS type: Linux
Filesystem created: Mon Oct 14 12:34:48 2019
Last mount time: Thu Oct 24 12:27:30 2019
Last write time: Thu Oct 24 12:27:30 2019
Mount count: 50
Maximum mount count: -1
Lifetime writes: 50 GB
Default directory hash: half_md4
Directory Hash Seed: 4e7gds499c3-8532e0-452356c-432890c-d0fds43e2be81ee
Journal backup: inode blocks
Checksum type: crc32c
Checksum: 0xb054235dk
Wireless
I didn't end up having luck with iw, but I'm sure it is very useful. It seems I just wasn't able to interactively enter a password, so in the end I couldn't connect to WiFi. Worth looking at iw though.
sudo iw dev wlp0s20f3 scan
sudo iw dev wlp0s20f3 scan | grep SSI
sudo iw dev
sudo iw list
sudo iw wlp0s20f3 connect "Reed WIFI-2G"
See examples in man nmcli-examples. A lot of good information between this page and the SEE ALSO section at the bottom.
Network configurations
tree /etc/NetworkManager/
.
├── conf.d
│ └── default-wifi-powersave-on.conf
├── dispatcher.d
│ ├── 01-ifupdown
│ ├── 99tlp-rdw-nm
│ ├── no-wait.d
│ ├── pre-down.d
│ └── pre-up.d
├── dnsmasq.d
├── dnsmasq-shared.d
├── NetworkManager.conf
└── system-connections
├── Mi Casa.nmconnection
├── FAKE WIFI-2G.nmconnection
└── FAKE WIFI-5G.nmconnection
8 directories, 7 files
Terminal NetworkManager UI made using curses library can be installed and ran with the following commands
sudo apt install network-manager
nmtui
Gnome NetworkManager GUI for editing wireless and bluetooth connections using a GUI application build for Gnome desktops
sudo apt install network-manager-gnome
nm-connection-editor
Wifi can be toggled with wifi on and wifi off
wifi on
wifi = on
rfkill
ID TYPE DEVICE SOFT HARD
0 wlan phy0 unblocked unblocked
1 bluetooth hci0 unblocked unblocked
Connecting to WiFi
nmcli device wifi list
IN-USE BSSID SSID MODE CHAN RATE SIGNAL BARS SECURITY
* 40:B8:9A:D7:EC:AF FAKE WIFI-2G Infra 1 195 Mbit/s 100 ▂▄▆█ WPA2
40:B8:9A:D7:EC:B0 FAKE WIFI-5G Infra 149 405 Mbit/s 94 ▂▄▆█ WPA2
FA:8F:CA:95:43:9B Living Room Infra 6 65 Mbit/s 75 ▂▄▆_ --
FA:8F:CA:82:9D:D4 Family Room TV.b Infra 6 65 Mbit/s 57 ▂▄▆_ --
14:ED:BB:1F:44:6D Hi Infra 8 130 Mbit/s 57 ▂▄▆_ WPA2
14:ED:BB:1F:44:76 ATT9eu7M6L Infra 149 540 Mbit/s 44 ▂▄__ WPA2
4C:ED:FB:AD:D8:08 Fluffymarshmellow Infra 1 540 Mbit/s 30 ▂___ WPA2
70:77:81:DE:43:59 WIFIDE4355 Infra 1 195 Mbit/s 24 ▂___ WPA2
70:5A:9E:6C:D4:29 TC8717T23 Infra 6 195 Mbit/s 19 ▂___ WPA2
A8:A7:95:E8:68:82 Wildflower-2G Infra 1 195 Mbit/s 14 ▂___ WPA2
CC:2D:21:57:E0:71 Rudy Infra 6 130 Mbit/s 14 ▂___ WPA1 WPA2
CE:A5:11:3C:E4:C2 Orbi_setup Infra 9 130 Mbit/s 14 ▂___ --
A8:6B:AD:EB:B4:56 Gypsy-2 Infra 6 195 Mbit/s 12 ▂___ WPA1 WPA2
CE:A5:11:3C:EF:8E Orbi_setup Infra 9 130 Mbit/s 12 ▂___ --
Now bring up a connection with the access point we want, and pass the --ask flag to enter a password for authentication.
nmcli c up "FAKE WIFI-2G" --ask
Passwords or encryption keys are required to access the wireless network 'FAKE WIFI-2G'.
Password (802-11-wireless-security.psk): •••••••••••••••••••
Connection successfully activated (D-Bus active path: /org/freedesktop/NetworkManager/ActiveConnection/9)
Disable transmission devices with rfctl
rfkill list
0: phy0: Wireless LAN
Soft blocked: no
Hard blocked: no
1: hci0: Bluetooth
Soft blocked: yes
Hard blocked: no
Block WiFi
rfkill block wlan
Block Bluetooth
rfkill block bluetooth
Bluetooth
You can use bluetoothctl and bluetooth to control bluetooth devices
To check the status of bluetooth
rfkill
ID TYPE DEVICE SOFT HARD
0 wlan phy0 unblocked unblocked
1 bluetooth hci0 blocked unblocked
To turn bluetooth on (replace on with off to turn bluetooth off)
bluetooth on
bluetooth = on
kapper@xps:~/dot$ rfkill
ID TYPE DEVICE SOFT HARD
0 wlan phy0 unblocked unblocked
1 bluetooth hci0 unblocked unblocked
rfkill
ID TYPE DEVICE SOFT HARD
0 wlan phy0 unblocked unblocked
1 bluetooth hci0 unblocked unblocked
To scan and connect to devices, run bluetoothctl to enter a bluetooth shell
bluetoothctl
Agent registered
[bluetooth]#
Now, we can start a scan with scan on
[bluetooth]# scan on
Discovery started
[CHG] Controller AC:74:B1:85:27:98 Discovering: yes
[NEW] Device 6A:0C:07:6A:09:EC Inspire HR
[NEW] Device 48:FE:3D:EB:C8:C3 48-FE-3D-EB-C8-C3
[NEW] Device EB:28:A2:3E:99:3F One
After scanning for some time, type devices to see the devices discovered in a list. While doing this, we can stop the scan so our output isn't messed with.
[bluetooth]# scan off
Discovery stopped
[CHG] Controller AC:74:B1:85:27:98 Discovering: no
[CHG] Device 6B:98:C9:C1:86:6C RSSI is nil
[CHG] Device 59:A5:50:BA:7E:4E RSSI is nil
[CHG] Device 66:05:2D:A4:AF:D2 RSSI is nil
[CHG] Device 50:32:37:84:CB:D4 TxPower is nil
[CHG] Device 50:32:37:84:CB:D4 RSSI is nil
[CHG] Device 03:0D:0F:0F:E9:51 RSSI is nil
[CHG] Device 6A:81:34:01:76:C0 RSSI is nil
[CHG] Device EB:28:A2:3E:99:3F TxPower is nil
[CHG] Device EB:28:A2:3E:99:3F RSSI is nil
[CHG] Device 48:FE:3D:EB:C8:C3 RSSI is nil
[CHG] Device 6A:0C:07:6A:09:EC RSSI is nil
[bluetooth]# devices
Device 50:32:37:84:CB:D4 50-32-37-84-CB-D4
Device 90:DD:5D:98:3A:E7 90-DD-5D-98-3A-E7
Device F9:EB:78:07:17:4B Dell Keybd KB7221W
Device 28:11:A5:34:08:2C Dumbo
Device 34:82:C5:F8:04:F3 Sam
Device E6:4E:7A:3F:FD:E7 Dell Mouse MS5320W
Device F9:EB:78:08:17:4B Dell Keybd KB7221W
Device E6:4E:7A:57:FD:E7 Dell Mouse MS5320W
Device F9:EB:78:04:17:4B Dell Keybd
Device 6A:0C:07:6A:09:EC Inspire HR
Device 48:FE:3D:EB:C8:C3 48-FE-3D-EB-C8-C3
Device EB:28:A2:3E:99:3F One
Device 6A:81:34:01:76:C0 Family Room TV
Now, if we want to pair, simply type pair followed by the ID for the device
[bluetooth]# pair F9:07:78:DA:17:4B
Attempting to pair with F9:07:78:DA:17:4B
[CHG] Device F9:07:78:DA:17:4B Connected: yes
[agent] Passkey: 221692
[NEW] Primary Service (Handle 0x4461)
/org/bluez/hci0/dev_F9_07_78_DA_17_4B/service000a
00001801-0000-1000-8000-00805f9b34fb
Generic Attribute Profile
[NEW] Primary Service (Handle 0x4461)
/org/bluez/hci0/dev_F9_07_78_DA_17_4B/service000b
0000180a-0000-1000-8000-00805f9b34fb
Device Information
[NEW] Characteristic (Handle 0x4461)
/org/bluez/hci0/dev_F9_07_78_DA_17_4B/service000b/char000c
00002a29-0000-1000-8000-00805f9b34fb
Manufacturer Name String
[NEW] Characteristic (Handle 0x4461)
/org/bluez/hci0/dev_F9_07_78_DA_17_4B/service000b/char000e
00002a50-0000-1000-8000-00805f9b34fb
PnP ID
[CHG] Device F9:07:78:DA:17:4B UUIDs: 00001800-0000-1000-8000-00805f9b34fb
[CHG] Device F9:07:78:DA:17:4B UUIDs: 00001801-0000-1000-8000-00805f9b34fb
[CHG] Device F9:07:78:DA:17:4B UUIDs: 0000180a-0000-1000-8000-00805f9b34fb
[CHG] Device F9:07:78:DA:17:4B UUIDs: 0000180f-0000-1000-8000-00805f9b34fb
[CHG] Device F9:07:78:DA:17:4B UUIDs: 00001812-0000-1000-8000-00805f9b34fb
[CHG] Device F9:07:78:DA:17:4B ServicesResolved: yes
[CHG] Device F9:07:78:DA:17:4B Paired: yes
Pairing successful
[CHG] Device F9:07:78:DA:17:4B Name: Dell Keybd KB7221W
[CHG] Device F9:07:78:DA:17:4B Alias: Dell Keybd KB7221W
[CHG] Device F9:07:78:DA:17:4B Modalias: usb:v413Cp2511d0001
[Dell Keybd ]#
This device just happens to be a keyboard, so I'm asked to type the pascode 221692 on the keyboard, then press enter. Once I do this, the pair is completed and the devices are paired.
Next time you enable bluetooth with bluetooth on, and then you turn on this keyboard, the devices will automatically attempt to connect.
System Sensors
Your system likely has many sensors built in for displaying useful information on internal hardware status. For example, the commands below will help in finding the path to system temperature sensors.
user@host ~ $:sensors -f
coretemp-isa-0000
Adapter: ISA adapter
Package id 0: +80.6°F (high = +176.0°F, crit = +212.0°F)
Core 0: +73.4°F (high = +176.0°F, crit = +212.0°F)
Core 1: +73.4°F (high = +176.0°F, crit = +212.0°F)
Core 2: +69.8°F (high = +176.0°F, crit = +212.0°F)
Core 3: +68.0°F (high = +176.0°F, crit = +212.0°F)
acpitz-acpi-0
Adapter: ACPI interface
temp1: +82.0°F (crit = +221.0°F)
temp2: +85.6°F (crit = +221.0°F)
nouveau-pci-0100
Adapter: PCI adapter
GPU core: +0.97 V (min = +0.60 V, max = +1.27 V)
fan1: 691 RPM
temp1: +89.6°F (high = +203.0°F, hyst = +37.4°F)
(crit = +221.0°F, hyst = +41.0°F)
(emerg = +275.0°F, hyst = +41.0°F)
power1: 36.13 W (crit = 275.00 mW)
asus-isa-0000
Adapter: ISA adapter
cpu_fan: 0 RPM
We can see that the CPU and GPU temperature sensors are known to our system as coretemp-isa-0000 and nouveau-pci-0100, respectively. Run the command below to list the system path to all connected temperature devices by name, and cross-check these two outputs to gather the needed information for your sensors.
user@host ~ $:for i in /sys/class/hwmon/hwmon*/temp*_input; do echo "$(<$(dirname $i)/name): $(cat ${i%_*}_label 2>/dev/n
ull || echo $(basename ${i%_*})) $(readlink -f $i)"; done
acpitz: temp1 /sys/devices/virtual/thermal/thermal_zone0/hwmon0/temp1_input
acpitz: temp2 /sys/devices/virtual/thermal/thermal_zone0/hwmon0/temp2_input
coretemp: Package id 0 /sys/devices/platform/coretemp.0/hwmon/hwmon2/temp1_input
coretemp: Core 0 /sys/devices/platform/coretemp.0/hwmon/hwmon2/temp2_input
coretemp: Core 1 /sys/devices/platform/coretemp.0/hwmon/hwmon2/temp3_input
coretemp: Core 2 /sys/devices/platform/coretemp.0/hwmon/hwmon2/temp4_input
coretemp: Core 3 /sys/devices/platform/coretemp.0/hwmon/hwmon2/temp5_input
nouveau: temp1 /sys/devices/pci0000:00/0000:00:01.0/0000:01:00.0/hwmon/hwmon3/temp1_input
Displays
When attempting to manage displays, whether its the orientation or enabling / disabling, look to the man pages for xrandr. See the commands below for some examples.
# Output information on displays
xrandr
# List the output names for displays
xrandr --output
# Move DP-2 to the right of HDMI-1
xrandr --output DP-2 --right-of HDMI-1
``
#### Timezone
To see date / time, run `date`
To adjust local TZ settings, run `tzselect`. Pay attention to the final output of this tool as it will explain how to make your change permenant. For me, I had to add the following to the end of my `~/.profile` :
```bash
TZ='America/New_York'; export TZ
Memory
Some useful commands to find information on memory usage -
# Output various memory details
cat /proc/meminfo
#Can be used with grep, awk, etc for more specific output..
# ex) Show MiB of memory available
grep -w MemAvailable: /proc/meminfo | awk '{print $2 / 1024 "MiB"}'
Input Devices
Run the following to get information on input devices attached to the machine -
# In the output shown below, my keyboard is AT Translated Set 2 keyboard
xinput list
# Example output:
⎡ Virtual core pointer id=2 [master pointer (3)]
⎜ ↳ Virtual core XTEST pointer id=4 [slave pointer (2)]
⎜ ↳ Elan Touchpad id=10 [slave pointer (2)]
⎣ Virtual core keyboard id=3 [master keyboard (2)]
↳ Virtual core XTEST keyboard id=5 [slave keyboard (3)]
↳ Power Button id=6 [slave keyboard (3)]
↳ Power Button id=7 [slave keyboard (3)]
↳ Sleep Button id=8 [slave keyboard (3)]
↳ TOSHIBA Web Camera - HD: TOSHIB id=9 [slave keyboard (3)]
↳ AT Translated Set 2 keyboard id=11 [slave keyboard (3)]
# Test the device..
xinput test "AT Translated Set 2 keyboard"
# Example output:
key release 36
key press 40
dkey release 40
key press 50
key release 50
# The output above shows me pressing / releasing keys in real time.
# Exit with CTRL-C
Power Supplies / AC Adapters
# List power supplies, AC adapters -
ls -l /sys/class/power_supply/
# Example output...
lrwxrwxrwx 1 root root 0 Mar 23 23:02 AC -> ../../devices/LNXSYSTM:00/LNXSYBUS:00/PNP0A08:00/device:00/PNP0C09:00/ACPI0003:00/power_supply/AC
lrwxrwxrwx 1 root root 0 Mar 23 23:02 BAT0 -> ../../devices/LNXSYSTM:00/LNXSYBUS:00/PNP0A08:00/device:00/PNP0C09:00/PNP0C0A:00/power_supply/BAT0
# Above, my battery is seen as BAT0, my AC port for charging is AC
Distributions
Arch
Package Management
Pacman
First, you should check to verify your pacman-mirrors are configured to the nearest location. Do this manually by editing /etc/pacman.d/mirrorlist, or run sudo pacman-mirrors -g -
[kapper@kanjaro ~ ]$ sudo pacman-mirrors -g
INFO Downloading mirrors from repo.manjaro.org
::INFO User generated mirror list
::------------------------------------------------------------
::INFO Custom mirror file saved: /var/lib/pacman-mirrors/custom-mirrors.json
::INFO Using default mirror file
::INFO Querying mirrors - This may take some time
0.772 United_States : https://repo.ialab.dsu.edu/manjaro/
0.756 United_States : http://repo.ialab.dsu.edu/manjaro/
::INFO Writing mirror list
::United_States : https://repo.ialab.dsu.edu/manjaro/testing
::INFO Mirror list generated and saved to: /etc/pacman.d/mirrorlist
Now, you should have much faster download speeds when updating or grabbing packages.
To install a package, run sudo packman -Syu <package>. For example, to install htop, run sudo pacman -Syu htop. This will not only install htop, but first it will check that your package list and installed packages are up to date to ensure you get the latest version.
If you are used to the apt package manager, this is basically like running sudo apt update && sudo apt upgrade, pacman can run these updates alongside every new package installation with the -Syu parameters.
Partial Upgrade Cleanup
Sometimes a run of pacman -Syu will complete normally, but later you may notice that certain packages were either upgraded incorrectly or not upgraded at all. One reason this may happen is a hiccup in PGP key validation by pacman during the upgrade. The commands below may help in fixing such a problem -
# Refresh all PGP keys installed on the system
sudo pacman-key --refresh-keys
# Reinstall all packages on the system
sudo pacman -Qqn | sudo pacman -S
These two commands will either print errors providing further information on the broken packages or complete and fix the broken packages. After running, you may need to reboot.
AUR Packages
AUR = arch user repository
Sometimes a package may exist within the community but not in any official repository. To manage these, we have AUR helpers.
This list of AUR helpers, AKA community / AUR packages, is useful in selecting the best tool to suit your needs.
Using yay, some basic commands are seen below -
# Search foreign package db for package
yay -q pycharm
# Will prompt for install with list of results and descriptions
# To upgrade yay alongside pacman, run the following
yay -S yay-bin
sudo pacman -Syu
yay -S yay
After installation, the /opt/<PackageName> will contain the new files created for the installed package.
Debian
Release cycles
The Ubuntu release cycle is at a glance pretty straight forward, but when on the 18.04 release and running sudo do-release-upgrade produces unexpected results like the below, it raises some questions.
Checking for a new Ubuntu release
There is no development version of an LTS available.
To upgrade to the latest non-LTS develoment release
set Prompt=normal in /etc/update-manager/release-upgrades.
Below, running lsb_release -a verifies our version, and looking at the release cycles on the Ubuntu website we appear to be behind on the LTS release upgrade..
No LSB modules are available.
Distributor ID: Ubuntu
Description: Ubuntu 18.04.4 LTS
Release: 18.04
Codename: bionic
Why wouldn't Ubuntu pick the 20.04 upgrade to install on our system? This is not by mistake, but due to the planning of Ubuntu releases. While 20.04 is a LTS release, and we are on the previous LTS release, do-release-upgrade will not detect an upgrade until Ubuntu 20.04.1 is released. This is by design, but can be overidden with sudo do-release-upgrade -d, which switches you to the next development release.
As the output states from do-release-upgrade above, we can specify within /etc/update-manager/release-upgrades how we want to handle the upgrades on our system, and this setting should always be considered before attempting a system upgrade. An example of the file's contents can be seen below
# Default behavior for the release upgrader.
[DEFAULT]
# Default prompting and upgrade behavior, valid options:
#
# never - Never check for, or allow upgrading to, a new release.
# normal - Check to see if a new release is available. If more than one new
# release is found, the release upgrader will attempt to upgrade to
# the supported release that immediately succeeds the
# currently-running release.
# lts - Check to see if a new LTS release is available. The upgrader
# will attempt to upgrade to the first LTS release available after
# the currently-running one. Note that if this option is used and
# the currently-running release is not itself an LTS release the
# upgrader will assume prompt was meant to be normal.
Prompt=lts
Apt
The apt package manager is fairly straightforward to work with in terms of its usage and help text, so I'll leave the basics up to apt -h -
apt 1.6.12 (amd64)
Usage: apt [options] command
apt is a commandline package manager and provides commands for
searching and managing as well as querying information about packages.
It provides the same functionality as the specialized APT tools,
like apt-get and apt-cache, but enables options more suitable for
interactive use by default.
Most used commands:
list - list packages based on package names
search - search in package descriptions
show - show package details
install - install packages
remove - remove packages
autoremove - Remove automatically all unused packages
update - update list of available packages
upgrade - upgrade the system by installing/upgrading packages
full-upgrade - upgrade the system by removing/installing/upgrading packages
edit-sources - edit the source information file
See apt(8) for more information about the available commands.
Configuration options and syntax is detailed in apt.conf(5).
Information about how to configure sources can be found in sources.list(5).
Package and version choices can be expressed via apt_preferences(5).
Security details are available in apt-secure(8).
This APT has Super Cow Powers.
If any of the above confuses you, see man apt
For most, the default repositories that come with ubuntu or the distro of your choice would be enough, but some may choose to add more trusted sources who may have packages or drivers that would otherwise be unsupported. These sources are gneerally stored in /etc/apt/sources.list.d/ and we'll see how to back them up later.
Adding PPAs
Managing adding and removing ppas to your sources is seen below
# Add ppa
sudo add-apt-repository -y ppa:user/ppa
# Remove ppa
sudo add-apt-repository -r ppa:user/ppa
If you want to remove a ppa and all its related packages to ensure you don't create a conflic between dependencies, run the below commands
# Remove a ppa and its associated software
sudo ppa-purge user/ppa
# Alternatively we can use -o and -p to specify owner and ppa respectively
sudo ppa-purge -o user -p ppa
PPA Release Discrepancies
Sometimes, you may add a ppa and realize it is not using the same release as you, so to continue using it we will need to make some changes, below we see a 404 from adding a bionic ppa using Ubuntu focal
Kapper@kubuntu:~$ sudo add-apt-repository ppa:kgilmer/speed-ricer
Vanilla packages for fast ricing.
More info: https://launchpad.net/~kgilmer/+archive/ubuntu/speed-ricer
Press [ENTER] to continue or Ctrl-c to cancel adding it.
Hit:1 http://us.archive.ubuntu.com/ubuntu focal InRelease
Ign:2 http://dl.google.com/linux/chrome/deb stable InRelease
Get:3 http://us.archive.ubuntu.com/ubuntu focal-updates InRelease [107 kB]
Get:8 http://security.ubuntu.com/ubuntu focal-security InRelease [107 kB]
Hit:9 http://archive.canonical.com/ubuntu focal InRelease
Get:10 http://us.archive.ubuntu.com/ubuntu focal-backports InRelease [98.3 kB]
Ign:11 http://ppa.launchpad.net/kgilmer/speed-ricer/ubuntu focal InRelease
Err:14 http://ppa.launchpad.net/kgilmer/speed-ricer/ubuntu focal Release
404 Not Found [IP: 91.189.95.83 80]
Reading package lists... Done
E: The repository 'http://ppa.launchpad.net/kgilmer/speed-ricer/ubuntu focal Release' does not have a Release file.
N: Updating from such a repository can't be done securely, and is therefore disabled by default.
N: See apt-secure(8) manpage for repository creation and user configuration details.
To fix this, we simply run sudo vim /etc/apt/sources.list.d/kgilmer-ubuntu-speed-ricer-focal.list and change focal to bionic in the line below
# Commented line below is what Ubuntu created using add-apt-repository
#deb http://ppa.launchpad.net/kgilmer/speed-ricer/ubuntu bionic main
# Change it to our release (focal) to fix the release file error described above
deb http://ppa.launchpad.net/kgilmer/speed-ricer/ubuntu focal main
Now, running sudo apt-get update should result in no 404's and you'll be able to grab and packages you were after
within the ppa with sudo apt install.
To see your current release, run lsb_release -a -
kapper@kubuntu:~$ lsb_release -a
No LSB modules are available.
Distributor ID: Ubuntu
Description: Ubuntu 20.04 LTS
Release: 20.04
Codename: focal
Installing from another release
Even more, you could face an issue like the below, where I upgraded to focal, which at the time was a very new and fresh lts.
kapper@kubuntu:~$ sudo apt install polybar [0/0]
[sudo] password for kapper:
Reading package lists... Done
Building dependency tree
Reading state information... Done
Some packages could not be installed. This may mean that you have
requested an impossible situation or if you are using the unstable
distribution that some required packages have not yet been created
or been moved out of Incoming.
The following information may help to resolve the situation:
The following packages have unmet dependencies:
polybar : Depends: python-xcbgen but it is not installable
E: Unable to correct problems, you have held broken packages.
kapper@kubuntu:~$ sudo apt install python-xcbgen
Reading package lists... Done
Building dependency tree
Reading state information... Done
Package python-xcbgen is not available, but is referred to by another package.
This may mean that the package is missing, has been obsoleted, or
is only available from another source
E: Package 'python-xcbgen' has no installation candidate
kapper@kubuntu:~$
A package I use, polybar, required some dependency that no longer exists on focal. So, since I've used this package just fine previously on bionic, I simply add the following line to my /etc/apt/sources.list
deb http://cz.archive.ubuntu.com/ubuntu bionic main universe
Then, we run the following
sudo apt update
sudo apt install -t bionic python-xcbgen
# Just to be sure, I don't want to install anything outside of focal if I don't have to. I'd rather not use polybar
sudo apt install -t focal polybar
To backup all current sources
To restore a backup of previous sources
Mess something up or lose your sources.list? See below for the default settings on various ubuntu releases
Ubuntu bionic 18.04
#deb cdrom:[Ubuntu 18.04 _Bionic_ - Build amd64 LIVE Binary 20190418-12:10]/ bionic main
# See http://help.ubuntu.com/community/UpgradeNotes for how to upgrade to
# newer versions of the distribution.
deb http://us.archive.ubuntu.com/ubuntu/ bionic main restricted
# deb-src http://us.archive.ubuntu.com/ubuntu/ bionic main restricted
## Major bug fix updates produced after the final release of the
## distribution.
deb http://us.archive.ubuntu.com/ubuntu/ bionic-updates main restricted
# deb-src http://us.archive.ubuntu.com/ubuntu/ bionic-updates main restricted
## N.B. software from this repository is ENTIRELY UNSUPPORTED by the Ubuntu
## team. Also, please note that software in universe WILL NOT receive any
## review or updates from the Ubuntu security team.
deb http://us.archive.ubuntu.com/ubuntu/ bionic universe
# deb-src http://us.archive.ubuntu.com/ubuntu/ bionic universe
deb http://us.archive.ubuntu.com/ubuntu/ bionic-updates universe
# deb-src http://us.archive.ubuntu.com/ubuntu/ bionic-updates universe
## N.B. software from this repository is ENTIRELY UNSUPPORTED by the Ubuntu
## team, and may not be under a free licence. Please satisfy yourself as to
## your rights to use the software. Also, please note that software in
## multiverse WILL NOT receive any review or updates from the Ubuntu
## security team.
deb http://us.archive.ubuntu.com/ubuntu/ bionic multiverse
# deb-src http://us.archive.ubuntu.com/ubuntu/ bionic multiverse
deb http://us.archive.ubuntu.com/ubuntu/ bionic-updates multiverse
# deb-src http://us.archive.ubuntu.com/ubuntu/ bionic-updates multiverse
## N.B. software from this repository may not have been tested as
## extensively as that contained in the main release, although it includes
## newer versions of some applications which may provide useful features.
## Also, please note that software in backports WILL NOT receive any review
## or updates from the Ubuntu security team.
deb http://us.archive.ubuntu.com/ubuntu/ bionic-backports main restricted universe multiverse
# deb-src http://us.archive.ubuntu.com/ubuntu/ bionic-backports main restricted universe multiverse
## Uncomment the following two lines to add software from Canonical's
## 'partner' repository.
## This software is not part of Ubuntu, but is offered by Canonical and the
## respective vendors as a service to Ubuntu users.
deb http://archive.canonical.com/ubuntu bionic partner
# deb-src http://archive.canonical.com/ubuntu bionic partner
deb http://security.ubuntu.com/ubuntu bionic-security main restricted
# deb-src http://security.ubuntu.com/ubuntu bionic-security main restricted
deb http://security.ubuntu.com/ubuntu bionic-security universe
# deb-src http://security.ubuntu.com/ubuntu bionic-security universe
deb http://security.ubuntu.com/ubuntu bionic-security multiverse
# deb-src http://security.ubuntu.com/ubuntu bionic-security multiverse
Ubuntu Focal Fossa 20.04
Following a sudo do-release-upgrade -d -f DistUpgradeViewGtk3 on Ubuntu 18.04 with the option Prompt=lts set within /etc/update-manager/release-upgrades the sources are the following
# deb cdrom:[Ubuntu 18.04 _Bionic_ - Build amd64 LIVE Binary 20190418-12:10]/ bionic main
# See http://help.ubuntu.com/community/UpgradeNotes for how to upgrade to
# newer versions of the distribution.
deb http://us.archive.ubuntu.com/ubuntu/ focal main restricted
# deb-src http://us.archive.ubuntu.com/ubuntu/ bionic main restricted
## Major bug fix updates produced after the final release of the
## distribution.
deb http://us.archive.ubuntu.com/ubuntu/ focal-updates main restricted
# deb-src http://us.archive.ubuntu.com/ubuntu/ bionic-updates main restricted
## N.B. software from this repository is ENTIRELY UNSUPPORTED by the Ubuntu
## team. Also, please note that software in universe WILL NOT receive any
## review or updates from the Ubuntu security team.
deb http://us.archive.ubuntu.com/ubuntu/ focal universe
# deb-src http://us.archive.ubuntu.com/ubuntu/ bionic universe
deb http://us.archive.ubuntu.com/ubuntu/ focal-updates universe
# deb-src http://us.archive.ubuntu.com/ubuntu/ bionic-updates universe
## N.B. software from this repository is ENTIRELY UNSUPPORTED by the Ubuntu
## team, and may not be under a free licence. Please satisfy yourself as to
## your rights to use the software. Also, please note that software in
## multiverse WILL NOT receive any review or updates from the Ubuntu
## security team.
deb http://us.archive.ubuntu.com/ubuntu/ focal multiverse
# deb-src http://us.archive.ubuntu.com/ubuntu/ bionic multiverse
deb http://us.archive.ubuntu.com/ubuntu/ focal-updates multiverse
# deb-src http://us.archive.ubuntu.com/ubuntu/ bionic-updates multiverse
## N.B. software from this repository may not have been tested as
## extensively as that contained in the main release, although it includes
## newer versions of some applications which may provide useful features.
## Also, please note that software in backports WILL NOT receive any review
## or updates from the Ubuntu security team.
deb http://us.archive.ubuntu.com/ubuntu/ focal-backports main restricted universe multiverse
# deb-src http://us.archive.ubuntu.com/ubuntu/ bionic-backports main restricted universe multiverse
## Uncomment the following two lines to add software from Canonical's
## 'partner' repository.
## This software is not part of Ubuntu, but is offered by Canonical and the
## respective vendors as a service to Ubuntu users.
deb http://archive.canonical.com/ubuntu focal partner
# deb-src http://archive.canonical.com/ubuntu bionic partner
deb http://security.ubuntu.com/ubuntu focal-security main restricted
# deb-src http://security.ubuntu.com/ubuntu bionic-security main restricted
deb http://security.ubuntu.com/ubuntu focal-security universe
# deb-src http://security.ubuntu.com/ubuntu bionic-security universe
deb http://security.ubuntu.com/ubuntu focal-security multiverse
# deb-src http://security.ubuntu.com/ubuntu bionic-security multiverse
To change default terminal emulator
sudo update-alternatives --config x-terminal-emulator
# Backup gnome tweaks and settings
cd ~
dconf dump / > saved_settings.dconf
# Restore your gnome settings
cd ~
dconf load / < saved_settings.dconf
Customization
i3
i3 is a tiling window manager. See i3 User Guide for official documentation.
Also see my notes below on various settings, modules, etc
Because this is such a broad topic, I'll put some links here for the sources I used to configure my own Manjaro Linux system running the i3wm and polybar.
Alsa / Volume Mixers - Cannot find simple element
Inserting Unicode Characters Into Vim
i3-gaps
i3 has been altered for various reasons and you may want a different version, i3-gaps is a popular choice right now as it leaves a configurable amount of space between your windows that gives some visual relief to your workspace. It looks nice, depending on your opinion. To check it out, you'll need to REMOVE i3 and reinstall using an alternate version. Run the following commands -
sudo apt-get install software-properties-common
# Head over to https://launchpad.net/ubuntu/+ppas?name_filter=i3-gaps and pick one.
# I chose https://launchpad.net/~kgilmer/+archive/ubuntu/speed-ricer as it was recommended by the owner / maintainer of i3 on GitHub.
# Run the following command to add the PPA to your system (DEBIAN ONLY)
#+ If you are on arch, just use yay AUR manager.
sudo add-apt-repository ppa:kgilmer/speed-rice
sudo apt update
sudo apt install i3-gaps
Some basic i3-gaps configurations / settings taken from My Dotfiles Repo -
#################################################################
### Settings for i3-gaps #######################################
#################################################################
# Set inner/outer gaps default values
gaps inner 14
gaps outer -2
# Additionally, you can issue commands with the following syntax. This is useful to bind keys to changing the gap size.
# gaps inner|outer current|all set|plus|minus <px>
# gaps inner all set 10
# gaps outer all plus 5
# Smart gaps (gaps used if only more than one container on the workspace)
smart_gaps on
# Smart borders (draw borders around container only if it is not the only container on this workspace)
# on|no_gaps (on=always activate and no_gaps=only activate if the gap size to the edge of the screen is 0)
smart_borders on
# Press $mod+Shift+g to enter the gap mode. Choose o or i for modifying outer/inner gaps. Press one of + / - (in-/decrement for current workspace) or 0 (remove gaps for current workspace). If you also press Shift with these keys, the change will be global for all workspaces.
set $mode_gaps Gaps: (o) outer, (i) inner
set $mode_gaps_outer Outer Gaps: +|-|0 (local), Shift + +|-|0 (global)
set $mode_gaps_inner Inner Gaps: +|-|0 (local), Shift + +|-|0 (global)
bindsym $mod+Shift+g mode "$mode_gaps"
mode "$mode_gaps" {
bindsym o mode "$mode_gaps_outer"
bindsym i mode "$mode_gaps_inner"
bindsym Return mode "default"
bindsym Escape mode "default"
}
mode "$mode_gaps_inner" {
bindsym plus gaps inner current plus 5
bindsym minus gaps inner current minus 5
bindsym 0 gaps inner current set 0
bindsym Shift+plus gaps inner all plus 5
bindsym Shift+minus gaps inner all minus 5
bindsym Shift+0 gaps inner all set 0
bindsym Return mode "default"
bindsym Escape mode "default"
}
mode "$mode_gaps_outer" {
bindsym plus gaps outer current plus 5
bindsym minus gaps outer current minus 5
bindsym 0 gaps outer current set 0
bindsym Shift+plus gaps outer all plus 5
bindsym Shift+minus gaps outer all minus 5
bindsym Shift+0 gaps outer all set 0
bindsym Return mode "default"
bindsym Escape mode "default"
}
Xkeybinds
X11 can help configure media keys on laptops and aftermarket keyboards to pair with their intended use by running a command or action when pressed. This can seem confusing to configure, and may be time consuming at first but once you get the hang of it and know where to look it isn't all that bad. There is a GUI tool if you'd prefer to use it, but Ill still show how to do this via a terminal below.
# Install and use GUI xbindkeys-config tool on debian
sudo apt install xbindkeys-config
xbindkeys-config
# Use the GUI to set an action (command) to be performed for each key in the list
Through a terminal -
# Capture next keypress and output keycode information to console
xbindkeys --key
Press combination of keys or/and click under the window.
You can use one of the two lines after "NoCommand"
in $HOME/.xbindkeysrc to bind a key.
"(Scheme function)"
m:0x0 + c:75
F9
# OR
# Capture next multi-keypress and output keycode information to console
xbindkeys --multikey
Press combination of keys or/and click under the window.
You can use one of the two lines after "NoCommand"
in $HOME/.xbindkeysrc to bind a key.
Press combination of keys or/and click under the window.
You can use one of the two lines after "NoCommand"
in $HOME/.xbindkeysrc to bind a key.
--- Press "q" to stop. ---
"(Scheme function)"
m:0x1 + c:75
Shift + F9
# This will continue to capture until you press Q.
Take the above output into your clipboard and vim ~/.xbindkeysrc to add the commands needed. Below, I configure media keys for volume functionality -
#~/.xbindkeysrc
#
#Volume Up
"pactl set-sink-volume @DEFAULT_SINK@ +10%"
m:0x0 + c:76
F10
#Volume Down
"pactl set-sink-volume @DEFAULT_SINK@ -10%"
m:0x0 + c:75
F9
#Toggle Audio
"pactl set-sink-mute @DEFAULT_SINK@ toggle"
m:0x0 + c:74
F8
Thats it! Above, you could change the pactl set-sink-mute commands to anything youd like to happen when the F8-10 keys are pressed. After you're done, apply your changes by running xbindkeys --poll-rc
If you're having issues using certain keys, try the xev command. There will be a lot more output than what xbindkeys --key provides, but if pushing the key doesn't send output to xev then your system is handling the button independent from your OS.
Additionally, you can run xbindkeys_show to show the current settings applied with xbindkeys. This is useful when debugging to verify you have applied settings correctly and none are being overwritten or modified.
Backlight
run sudo ls /sys/class/backlight - if you see intel_backlight there you are in luck, follow the steps below to configure xbacklight to adjust your display brightness.
sudo apt install xbacklight
sudo vim /etc/X11/xorg.conf
# If the above file doesnt exisit, make it.
# If it does, append the lines below
Section "Device"
Identifier "Intel Graphics"
Driver "intel"
Option "Backlight" "intel_backlight"
EndSection
# Save and exit, reboot your PC or logout of your xsession and login again.
# Now the below commands should work and can be bound to any key the same way we bound volume keys in the section above
# Decrease brightness by 10%
xbacklight -dec 10
# Increase brightness by 10%
xbacklight -inc 10
Alternately, brightnessctl can be used to control the backlight. Run the following commands, replacing <YOUR_USERNAME> with the user on your system that you want to use to control backlight. For me, this was just my primary user, kapper.
git clone https://github.com/Hummer12007/brightnessctl
cd brightnessctl
sudo ./configure && sudo make install
sudo usermod -aG video <YOUR_USERNAME>
Then after a reboot we can run the following command to decrese brightness by 10%
brightnessctl s 10%-
Updated device 'intel_backlight':
Device 'intel_backlight' of class 'backlight':
Current brightness: 14400 (15%)
Max brightness: 96000
Or to increase brightness by 10%
brightnessctl s +10%
Updated device 'intel_backlight':
Device 'intel_backlight' of class 'backlight':
Current brightness: 24000 (25%)
Max brightness: 96000
Notification Systems
Useful commands / tools for handling desktop notification dialogs -
# Install, use notify-send
sudo apt install libnotify-bin
notify-send "Test Notification"
# Install kdeconnect for connecting mobile devices on the same network which have been paired using kdeconnect-cli
sudo apt install kdeconnect
# Be sure to download the KDEconnect app on your mobile device in your respective app store and connect to the same Wi-Fi network as your PC
# list devices with KDEconnect on your network
kdeconnect-cli -l --id-name-only
13b9d56df4c8815b KapperDroid
kdeconnect-cli -l --id-only
13b9d56df4c8815b
# Given the ID corresponding with the name you chose for your device within the KDEconmnect app...
kdeconnect-cli --pair -d 13b9d56df4c8815b
Pair requested
# Check the KDEconnect app on your phone for the prompt, you may have to open the app and navigate to the side panel -> 'Add new device'
# See help text
kdeconnect-cli -h
Polybar
Polybar is a simple community driven solution to configuring custom status bars. Generally, configurations are handled within the ~/.config/polybar/config file, but some specific cases may require editing other files.
The general requirements of using Polybar is installation via your package manager, for me, this is pacman. After installing, we need to define our polybars, then configure i3 to handle these settings for us.
sudo pacman -Syu polybar
Optionally, polybar can be built from source by running the following commands. This was tested and worked for me on Ubuntu 20.04.
sudo apt install build-essential git cmake cmake-data pkg-config python3-sphinx python3-packaging libuv1-dev libcairo2-dev libxcb1-dev libxcb-util0-dev libxcb-randr0-dev libxcb-composite0-dev python3-xcbgen xcb-proto libxcb-image0-dev libxcb-ewmh-dev libxcb-icccm4-dev libxcb-xkb-dev libxcb-xrm-dev libxcb-cursor-dev libasound2-dev libpulse-dev i3-wm libjsoncpp-dev libmpdclient-dev libcurl4-openssl-dev libnl-genl-3-dev
git clone git@github.com:polybar/polybar.git
cd polybar
./build.sh
After installing, we need to configure our bars within ~/.config/polybar/config, then we can simply run polybar top to run a polybar titled top within said config file.
Configure i3 for Polybar
To start, a default ~/.config/i3/config will contain a block defining the i3status and its settings
bar {
i3bar_command i3bar
status_command i3status
position bottom
# please set your primary output first. Example: 'xrandr --output eDP1 --primary'
tray_output primary
tray_output eDP1
bindsym button4 nop
bindsym button5 nop
font xft:URWGothic-Book 11
strip_workspace_numbers yes
colors {
background #222D31
statusline #F9FAF9
separator #454947
border backgr. text
focused_workspace #F9FAF9 #16a085 #292F34
active_workspace #595B5B #353836 #FDF6E3
inactive_workspace #595B5B #222D31 #EEE8D5
binding_mode #16a085 #2C2C2C #F9FAF9
urgent_workspace #16a085 #FDF6E3 #E5201D
}
}
We are going to remove this, or comment it all out, and replace it with the exec_always line below. Now copy the start-polybar.sh script to ~/.config/polybar/ for use with i3 startup configuration below. This is just telling i3 that we are starting Polybar from a script we've written and stored within the ~/.config/polybar/ directory on initial startup.
My bar { ... } define within ~/.config/i3/config -
# Custom startup apps
exec_always --no-startup-id $HOME/.config/polybar/start-polybar.sh
# Don't use i3 status bar, comment out this block or remove it entirely
#bar { }
Now just press the <Mod><Shift><R> (i3 default setting) to reload i3 and your Polybars should start up instead of the default i3status
Define Polybars / Modules
For example, my ~/.config/polybar/config -
[bar/top]
monitor = ${env:MONITOR}
width = 100%
height = 34
background = #00000000
foreground = #ccffffff
line-color = ${bar/bottom.background}
line-size = 16
spacing = 2
padding-right = 5
module-margin = 4
font-0 = NotoSans-Regular:size=8;-1
font-1 = MaterialIcons:size=10;0
font-2 = Termsynu:size=8:antialias=false;-2
font-3 = FontAwesome:size=10;0
font-4 = Unifont:size=8;0
modules-left = powermenu
modules-center = ki3
modules-right = volume wired-network clock
[bar/bottom]
monitor = ${env:MONITOR}
bottom = true
width = 100%
height = 27
background = ${bar/top.background}
foreground = ${bar/top.foreground}
line-color = ${bar/top.background}
line-size = 2
spacing = 3
padding-right = 4
module-margin-left = 0
module-margin-right = 6
font-0 = NotoSans-Regular:size=8;0
font-1 = unifont:size=6;-3
font-2 = FontAwesome:size=8;-2
font-3 = NotoSans-Regular:size=8;-1
font-4 = MaterialIcons:size=10;-1
font-5 = Termsynu:size=8:antialias=false;0
These first two blocks define our top and bottom status bars. Continuing on in the ~/.config/polybar/config file, we see the defines for the modules -
[module/powermenu]
type = custom/menu
format-padding = 5
label-open = ䷡
label-close = X
menu-0-0 = Terminate WM
menu-0-0-foreground = #fba922
menu-0-0-exec = bspc quit -1
menu-0-1 = Reboot
menu-0-1-foreground = #fba922
menu-0-1-exec = menu_open-1
menu-0-2 = Power off
menu-0-2-foreground = #fba922
menu-0-2-exec = menu_open-2
menu-1-0 = Cancel
menu-1-0-foreground = #fba922
menu-1-0-exec = menu_open-0
menu-1-1 = Reboot
menu-1-1-foreground = #fba922
menu-1-1-exec = sudo reboot
menu-2-0 = Power off
menu-2-0-foreground = #fba922
menu-2-0-exec = sudo poweroff
menu-2-1 = Cancel
menu-2-1-foreground = #fba922
menu-2-1-exec = menu_open-0
[module/cpu]
type = internal/cpu
interval = 0.5
format = <label> <ramp-coreload>
label = CPU
ramp-coreload-0 = ▁
ramp-coreload-0-font = 2
ramp-coreload-0-foreground = #aaff77
ramp-coreload-1 = ▂
ramp-coreload-1-font = 2
ramp-coreload-1-foreground = #aaff77
ramp-coreload-2 = ▃
ramp-coreload-2-font = 2
ramp-coreload-2-foreground = #aaff77
ramp-coreload-3 = ▄
ramp-coreload-3-font = 2
ramp-coreload-3-foreground = #aaff77
ramp-coreload-4 = ▅
ramp-coreload-4-font = 2
ramp-coreload-4-foreground = #fba922
ramp-coreload-5 = ▆
ramp-coreload-5-font = 2
ramp-coreload-5-foreground = #fba922
ramp-coreload-6 = ▇
ramp-coreload-6-font = 2
ramp-coreload-6-foreground = #ff5555
ramp-coreload-7 = █
ramp-coreload-7-font = 2
ramp-coreload-7-foreground = #ff5555
[module/clock]
type = internal/date
interval = 2
date = %%{F#999}%Y-%m-%d%%{F-} %%{F#fff}%H:%M%%{F-}
[module/date]
type = internal/date
date = %%{F#99}%Y-%m-%d%%{F-} %%{F#fff}%H:%M%%{F-}
date-alt = %%{F#fff}%A, %d %B %Y %%{F#fff}%H:%M%%{F#666}:%%{F#fba922}%S%%{F-}
[module/memory]
type = internal/memory
format = <label> <bar-used>
label = RAM
bar-used-width = 30
bar-used-foreground-0 = #aaff77
bar-used-foreground-1 = #aaff77
bar-used-foreground-2 = #fba922
bar-used-foreground-3 = #ff5555
bar-used-indicator = |
bar-used-indicator-font = 6
bar-used-indicator-foreground = #ff
bar-used-fill = ─
bar-used-fill-font = 6
bar-used-empty = -
bar-used-empty-font = 6
bar-used-empty-foreground = #444444
[module/ki3]
type = internal/i3
; Only show workspaces defined on the same output as the bar
;
; Useful if you want to show monitor specific workspaces
; on different bars
;
; Default: false
pin-workspaces = true
; This will split the workspace name on ':'
; Default: false
strip-wsnumbers = true
; Sort the workspaces by index instead of the default
; sorting that groups the workspaces by output
; Default: false
index-sort = true
; Create click handler used to focus workspace
; Default: true
enable-click = false
; Create scroll handlers used to cycle workspaces
; Default: true
enable-scroll = true
; Wrap around when reaching the first/last workspace
; Default: true
wrapping-scroll = true
; Set the scroll cycle direction
; Default: true
reverse-scroll = false
; Use fuzzy (partial) matching on labels when assigning
; icons to workspaces
; Example: code;♚ will apply the icon to all workspaces
; containing 'code' in the label
; Default: false
fuzzy-match = true
[module/volume]
type = internal/alsa
speaker-mixer = IEC958
headphone-mixer = Headphone
headphone-id = 9
format-volume = <ramp-volume> <label-volume>
label-muted = muted
label-muted-foreground = #66
ramp-volume-0 =
ramp-volume-1 =
ramp-volume-2 =
ramp-volume-3 =
[module/wired-network]
type = internal/network
interface = net0
interval = 3.0
label-connected = %{T3}%local_ip%%{T-}
label-disconnected-foreground = #66
[module/wireless-network]
type = internal/network
interface = net1
interval = 3.0
ping-interval = 10
format-connected = <ramp-signal> <label-connected>
label-connected = %essid%
label-disconnected = not connected
label-disconnected-foreground = #66
ramp-signal-0 =
ramp-signal-1 =
ramp-signal-2 =
ramp-signal-3 =
ramp-signal-4 =
animation-packetloss-0 =
animation-packetloss-0-foreground = #ffa64c
animation-packetloss-1 =
animation-packetloss-1-foreground = ${bar/top.foreground}
animation-packetloss-framerate = 500
Now that we have our status bars and Polybar Modules defined, we need to configure i3 to use Polybar instead of the default i3status that comes configured within the bar { ... } block of the i3 config file. See the beginning of this Polybar section for details on adding polybar to i3 instead, if you haven't already.
Starting Polybar
If you have one monitor, you can simply run polybar top to start the top status bar created above, and creating a start script should be straight-forward. If you are using multiple monitors and want to replicate the status bars across all displays, create the below script within ~/.config/polybar/, name it what you wish, but be sure it corresponds with how you choose to exec_always in your i3 config later on.
#!/bin/bash
## Author: Shaun Reed | Contact: shaunrd0@gmail.com | URL: www.shaunreed.com ##
## A script placed in ~/.config/polybar/ - Uses ${env:MONITOR} ##
## Starts polybars top and bottom on multiple displays ##
###############################################################################
# start-polybar.sh
# Kill any previous polybars
pkill -f polybar
# For each monitor in list up to ':'
for m in $(polybar --list-monitors | cut -d":" -f1); do
# Reload polybars with monitor device name
MONITOR=$m polybar --reload top &
MONITOR=$m polybar --reload bottom &
done
Now, in your ~/.config/polybar/config file, ensure the ${env:MONITOR} environment variable is used to define the monitors -
[bar/top]
monitor = ${env:MONITOR}
width = 100%
height = 34
background = #00000000
foreground = #ccffffff
# Reduced..
Make the script executable and run it, polybar will start with your custom configs -
sudo chmod a+x start-polybar.sh
./start-polybar.sh
You may see errors for symbols used in fonts you do not have installed, see below for troubleshooting information.
To kill all Polybars, run pkill -f polybar
Verify / Install Fonts
You may run into issues with Unicode characters used in these configurations, see the links / commands below for help troubleshooting. The goal is usually to track down the font you are missing and install it, preferably via your system package manager. If you see an error like the below when starting your Polybars, this is likely the issue
warn: Dropping unmatched character ▁ (U+2581)
It is important to note that not defining the relevant font in the Polybar definition within ~/.config/polybar/config will result in the same error.
Cross-check that you have the supported fonts installed by searching up your character in a Unicode Character Search and checking that a relevant font is installed with the below command
fc-match -s monospace:charset=04de1
This matches the Great Power Hexagram, which I use for my system power options / context menu.
The fc-match command above will output all fonts compatible with that symbol, if there is no output, see the Supporting Fonts link from the character's search result, and install it via your package manager.
If it is not installed, search fonts available to install via pacman package manager
sudo pacman -Ss ttf- |grep unicode
sudo pacman -Ss otf- |grep unicode
If it is installed an the error is still present, see that the corresponding font for the character is included in the define for the status bar it is used in. For example, to use the Hexagram above, I added the Unifont:size=8;0 line to my top Polybar definition in ~/.config/polybar/config -
[bar/top]
monitor = ${env:MONITOR}
font-0 = NotoSans-Regular:size=8;-1
font-1 = MaterialIcons:size=10;0
font-2 = Termsynu:size=8:antialias=false;-2
font-3 = FontAwesome:size=10;0
font-4 = Unifont:size=8;0
If still having issues, check the following commands for more info / useful output
# Search for installed fonts
fc-list | grep fontname
Installing Fonts
See the Arch wiki on Fonts for much more information. Some of this information has been copied from there for my own reference / notes.
List Installed Fonts
These commands will list installed fonts, see the subcategories below for sorting through installed fonts.
# List all installed fonts
fc-list
# List verbose information on a font
# Shows us font family, full-name, and postscriptname
# If this isn't grepped, we will list ALL fonts verbosely
fc-list -v | grep Weather
# List fonts for specified lang
fc-list -f '%{file}\n' :lang=ar
#+ list all japanese font families
fc-list -f "%{family}\n" :lang=ja
Aliases
Font aliases such as serif, sans-serif, monospace, and others can be used to list fonts with the below command -
fc-match monospace
Unicode Character Support
This is useful when trying to verify that the proper font is installed for displaying a unicode character.
For example, the below is matching a font for the character for a pile of poo, or U+1F4A9 -
# Match unicode character with supported font
fc-match -s monospace:charset=1F4A9
Input this character into vim by running :UnicodeSearch! U+1F4A9 or enter <Ctrl><V>U1F4A9 while in insert mode within vim.
Installed by Package Manager
To list fonts installed by Pacman -
## list font packages installed by pacman
fc-list -f "%{file} " | xargs pacman -Qqo | sort -u
Manual Installation
To install fonts manually, see the ~/.local/share/fonts directory and copy the correct font file format within. For example, to install Weather Icons simply clone the repository and copy the needed Font File to the ~/.local/share/fonts directory.
For me, the file I needed was weathericons-regular-webfont.ttf, which installed the font with the full-name Weather Icons, seen by the output below -
fc-list -v | grep Weather
family: "Weather Icons"(s)
fullname: "Weather Icons Regular"(s)
postscriptname: "WeatherIcons-Regular"(s)
Sometimes it may be necessary to then run fc-cache to update the font configuration cache on our system, but generally this will be handled automatically. Nevertheless, it is a simple step to perform and ensures the font is fully recognized by our system.
If the font is not appearing in a terminal or application, ensure that the app or terminal is configured to use the newly installed font.
Misc
The below, and some of the other commands here, from user thisoldman on Arch discussions -
## list all fonts and styles known to fontconfig
fc-list : | sort
## list monospace fonts by family and file
fc-list -f "%{family} : %{file}\n" :spacing=100 | sort
## all bold fonts
fc-list :style=Bold | sort
Mount Google Drive
To mount your google drive as a network storage location on Linux, check out google-drive-ocamlfuse. It's a very useful cli tool to quickly mount your google drive to a local directory.
I don't see why I should duplicate the official installation instructions, see there for instructions to setup the utility on Ubuntu. Once that's done, you can mount your Google Drive with a simple command
mkdir /path/to/mount/directory
google-drive-ocamlfuse /path/to/mount/directory
Usually, I do something like this
mkdir /path/to/mount/directory
google-drive-ocamlfuse ~/GDrive
Once running this command, a browser will open and you can select the google account to authenticate with. The Drive associated with this account is the one that will mount to the directory.
User configurations are in ~/.gdfuse/default/ by default. Setting download_docs=false in ~/.gdfuse/default/config can sometimes help for mounting drives with a large number of Google Docs files.
I have had the following issue randomly appear when hopping between i3 and plasma desktop sessions. For now I'm just documenting it, I'll report findings on the GitHub soon.
kapper@xps:~$ ls GDrive
ls: cannot access 'GDrive': Transport endpoint is not connected
kapper@xps:~$ ls .config/autostart-scripts/
kapper@xps:~$ rm -r GDrive
rm: cannot remove 'GDrive': Transport endpoint is not connected
kapper@xps:~$ sudo rm -r GDrive
[sudo] password for kapper:
rm: cannot remove 'GDrive': Is a directory
kapper@xps:~$ ll
ls: cannot access 'GDrive': Input/output error
total 772
drwxr-xr-x 39 kapper kapper 4096 Dec 20 12:33 ./
drwxr-xr-x 3 root root 4096 Dec 6 09:28 ../
lrwxrwxrwx 1 kapper kapper 17 Dec 6 17:44 .bash_aliases -> dot/.bash_aliases
-rw------- 1 kapper kapper 29382 Dec 20 12:29 .bash_history
-rw-r--r-- 1 kapper kapper 220 Dec 6 09:28 .bash_logout
lrwxrwxrwx 1 kapper kapper 11 Dec 6 17:44 .bashrc -> dot/.bashrc
-rw-rw-r-- 1 kapper kapper 172 Dec 18 14:39 .bash_secrets
drwx------ 3 kapper kapper 4096 Dec 20 01:00 .gdfuse/
d????????? ? ? ? ? ? GDrive/
-rw-rw-r-- 1 kapper kapper 54 Dec 13 15:15 .gitconfig
To fix this, we first need to get the ~/GDrive directory in a workable state again. The mountdrive.sh script in the command below is a script I wrote to mount my drive automatically. This file will not exist on your system, but for this first step you should make sure you have no script or automation that mounts your Google Drive on reboot or login, then reboot the system. Optionally, you can try to run sudo umount --force /path/to/mount/directory instead of rebooting.
rm ~/.config/autostart-scripts/mountdrive.sh
sudo reboot now
When logging back in, we can see the directory is fine, so we made some progress
kapper@xps:~$ ls GDrive/
kapper@xps:~$ ll
total 772
drwxr-xr-x 39 kapper kapper 4096 Dec 20 12:33 ./
drwxr-xr-x 3 root root 4096 Dec 6 09:28 ../
lrwxrwxrwx 1 kapper kapper 17 Dec 6 17:44 .bash_aliases -> dot/.bash_aliases
-rw------- 1 kapper kapper 29382 Dec 20 12:29 .bash_history
-rw-r--r-- 1 kapper kapper 220 Dec 6 09:28 .bash_logout
lrwxrwxrwx 1 kapper kapper 11 Dec 6 17:44 .bashrc -> dot/.bashrc
-rw-rw-r-- 1 kapper kapper 172 Dec 18 14:39 .bash_secrets
drwx------ 3 kapper kapper 4096 Dec 20 01:00 .gdfuse/
drwxrwxr-x 2 kapper kapper 4096 Dec 19 23:52 GDrive/
-rw-rw-r-- 1 kapper kapper 54 Dec 13 15:15 .gitconfig
Next, we remove all configurations for google-drive-ocamlfuse that are stored in our home directory. To do this, run the command below. Note that this will remove all authentication with your google accounts.
sudo rm -r ~/.gdfuse/default/*
Now we can just reauthenticate and the drive will mount successfully. This is the only workaround I have found so far, and I'm not sure how I can reproduce the bug. I tried clearing the cache with the -cc flag, and that did not fix the problem.
google-drive-ocamlfuse ~/GDrive
tmux
Multiplexers can be used to reattach to previous sessions and manage clipboard content / session history. This means that when you close a terminal, the session still exists in the background and can be called to the foreground using your choice of tmux commands.
To reload you tmux config, press Ctrl+B and then : to bring up a command prompt, and type the following command in the prompt -
:source-file ~/.tmux.conf
This will reload the changes made in your configuration and apply them to all active tmux sessions
Start tmux with the -u flag to enable utf8 support -
tmux -u
alias tmux='tmux -u'
Session / Server Management
# Start the tmux server
# If ran while a tmux server is active, Tmux will not allow you to nest servers within eachother
tmux
tmux list-commands
# List active tty sessions tracked by the local tmux server
tmux list-sessions
# Interactive terminal to choose from previous sessions. Shows a thumbnail of the session in its last known state
tmux choose-session
# If you are running on a potato, you might need to use the following commands periodically to clean up your server as it will consume significant RAM.
# Kills all sessions, without killing the server.
# This command can confuse the interface / tmux status if you utilize session ID within your tmux status bar.
# ie.) If you run this on an active server within session ID 25, all sessions will be killed but your new session IDs will not reset to 1..2.. etc
# To fix this, restart your tmux server
tmux kill-session -a
# Kill tmux server, this will close ALL terminals and any WIP will be lost if it has not been saved.
tmux kill-server
Configuration / Status
Tmux has a very nice interface which can be customized to suit your needs and display the information relevant to your environment. This can be found in the ~/.tmux.conf file but is recommended to be customized within the ~/.tmux.conf.local file.
Some useful settings can be found below, taken from my Dotfiles Repository
# .tmux.conf
#
# If symbols or powerline layout fail to appear...
#+ Check your terminal emulator font settings include these fonts
#+ Check that required fonts are installed
#
# Note: The use of 256colours in this file allows for portable color definitions between platforms and applications
#+ Changing to a different color interpretation may result in some apps displaying colors differently than others
#+ Vim plugin 'Colorizer' does not reflect the actual 256colour values
#+ See https://jonasjacek.github.io/colors/ for a full list of 256colours
# Mouse interaction
set -g mouse on
# Status bar location
set-option -g status-position top
# Status update interval
set -g status-interval 1
# Basic status bar colors
set -g status-style fg=colour240,bg=colour233
# Left side contents of status bar
set -g status-left-style bg=colour233,fg=colour243
set -g status-left-length 40
# Note: No bold required, no BG reveal produced by symbol gaps on left side
#+ Font: Powerline Consolas
#+ Some unicode characters may not appear when viewing this code via web browser
#+ Symbols below are 'left_hard_divider' and can be seen here (https://www.nerdfonts.com/cheat-sheet)
set -g status-left "#[fg=colour233,bg=colour100,bold] #S #[fg=colour100,bg=colour240,nobold]#[fg=colour233,bg=colour240] #(uname -m)#F #[fg=colour240,bg=colour235]#[fg=colour240,bg=colour235] #I:#P #[fg=colour235,bg=colour233]#[fg=colour240,bg=colour233] #(uname -r)"
# Above, we use the #(COMMAND) syntax to print the output of COMMAND to the tmux status bar.
# #I, #P, #F above are all tmux custom variables which can be found in the tmux manpage.
# Right side of status bar
set -g status-right-style bg=colour233,fg=colour243
set -g status-right-length 150
# Hide right bar entirely
#set -g status-right ""
# Note: Powerline font requires alternate of bold on right side
# Corrects gap on right of character that reveals BG color
#+ Font: Powerline Consolas
#+ Some unicode characters may not appear when viewing this code via web browser
#+ Symbols below are 'right_hard_divider' and can be seen here (https://www.nerdfonts.com/cheat-sheet)
set -g status-right "#[fg=colour235,bg=colour233,bold]#[fg=colour240,bg=colour235,nobold] %H:%M:%S #[fg=colour240,bg=colour235,bold]#[fg=colour233,bg=colour240,nobold] %d-%b-%y #[fg=colour100,bg=colour240,bold]#[fg=colour233,bg=colour100,bold] #H "
# Window status (Centered)
set -g window-status-current-format "#[fg=colour255,bg=colour233]#[fg=colour100,nobold] #(whoami)@#H #[fg=colour255,bg=colour233,nobold]"
# Current window status
set -g window-status-current-style bg=colour100,fg=colour235
# Window with activity status
set -g window-status-activity-style bg=colour233,fg=colour245
# Window separator
set -g window-status-separator ""
# Window status alignment
set -g status-justify centre
# NOTE
# These are just SOME useful settings and not a complete configuration. See https://gitlab.com/shaunrd0/dot/blob/master/.tmux.conf for a full configuration that I use / edit frequently. It may look very different then the above, but uses the same ideas.
Want your current working directory to show some git repository information in your status bar? Gitmux
#(date) # Run a shell command in status bar
#I # Window index
#S # Session name
#W # window name
#F # window flags
#H # Hostname
#h # Hostname, short
#D # pane id
#P # pane index
#T # pane title
C-b [ # Enter scroll mode then press up and down
C-b ? # Show help
Yakuake
Yakuake is a drop-down terminal application that i've used for years and may one day consider contributing to. This page is a collection of notes for the application.
sudo apt install yakuake
I set yakuake as a startup application so it's always available when I reboot my computer. It's just nice to have a terminal readily available.
yakuakerc
User configuration is in ~/.config/yakuakerc, an example file is below. This file is all of the settings outlined on the yakuake repository, with the default setting applied. It's just meant to put all the available configurations in front of you so you can pick and choose which you want.
[Animation]
AutoOpen=false
Frames=17
PollInterval=500
UseVMAssist=true
[Appearance]
BackgroundColor=#000000
BackgroundColorOpacity=0.4
Blur=false
KeyboardInputBlockIndicatorColor=#FF0000
KeyboardInputBlockIndicatorDuration=250
Skin=default
SkinInstallWithKns=false
TerminalHighlightDuration=250
Translucency=false
[Behavior]
FocusFollowMouse=false
OpenAfterStart=false
RememberFullscreen=false
[Dialogs]
ConfirmQuit=true
FirstRun=false
Note that yakuake will automatically alphabetize this file and all configurations within. I've only noticed this happening when stopping yakuake completely with pkill yakuake and then starting the application again. This is the same process required to reload a ~/.config/yakuakerc after making some changes.
Shortcuts
I think the yakuakerc file also supports shortcuts and keybinds, but I've not had much luck yet. Using the keybind scheme exporter and importer is simple, it just would be nice to have my keybinds automatically loaded and save the clicking around. But you really will only have to do this when you're migrating user configurations to a new system, which isn't often.
Go to the configure keyboard shotcuts screen in yakuake settings, then click ManageSchemes->MoreActions->ExportScheme
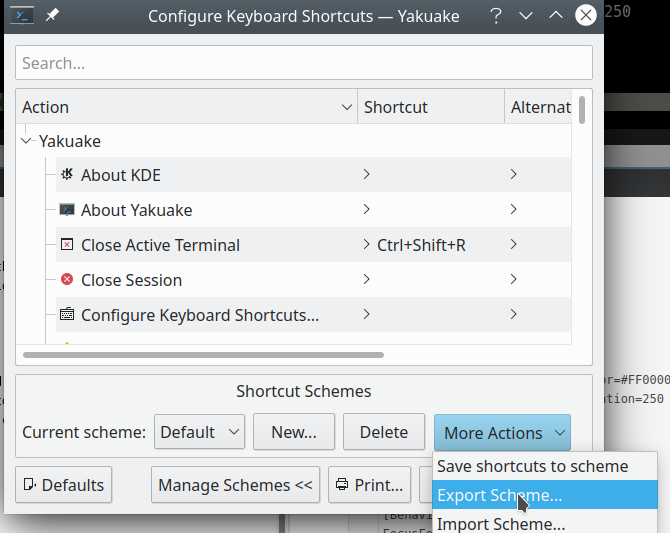
This will ask you where to place a yakuake.shortcuts file - you can put this file wherever you want, because you will be manaually loading it using the Import option in the screenshot above. The contents of this file is seen below. You can edit the file or use the GUI tool. toggle-window-state global shortcut is the one used for open / retracting the terminal.
[Global Shortcuts]
toggle-window-state=Meta+`
[Shortcuts]
close-active-terminal=Ctrl+Shift+R
close-session=none
decrease-window-height=Alt+Shift+Up
decrease-window-width=Alt+Shift+Left
edit-profile=none
file_quit=Ctrl+Shift+Q
grow-terminal-bottom=Ctrl+Alt+Down
grow-terminal-left=Ctrl+Alt+Left
grow-terminal-right=Ctrl+Alt+Right
grow-terminal-top=Ctrl+Alt+Up
help_about_app=none
help_about_kde=none
help_report_bug=none
help_whats_this=Shift+F1
increase-window-height=Alt+Shift+Down
increase-window-width=Alt+Shift+Right
keep-open=none
manage-profiles=none
move-session-left=Ctrl+Shift+Left
move-session-right=Ctrl+Shift+Right
new-session=Ctrl+Shift+T
new-session-quad=none
new-session-two-horizontal=none
new-session-two-vertical=none
next-session=Shift+Right
next-terminal=Ctrl+Tab; Shift+Tab
options_configure=Ctrl+Shift+,
options_configure_keybinding=none
options_configure_notifications=none
previous-session=Shift+Left
previous-terminal=Ctrl+Shift+Tab
rename-session=none
split-left-right=Ctrl+(
split-top-bottom=Ctrl+)
switch-to-session-1=none
switch-to-session-12=none
switch-to-session-2=none
switch-to-session-3=none
switch-to-session-4=none
switch-to-session-5=none
switch-to-session-6=none
switch-to-session-7=none
switch-to-session-8=none
switch-to-session-9=none
toggle-session-keyboard-input=none
toggle-session-monitor-activity=Ctrl+Shift+A
toggle-session-monitor-silence=Ctrl+Shift+I
toggle-session-prevent-closing=none
toggle-window-state=none
view-full-screen=Ctrl+Shift+F11
Kernel Management
I encountered this bug While running 5.13.0-25-generic. The bug for me was related to the 5.11.0-46-generic Linux kernel. I have unfortunately lost the exact error message I recieved on my system due to a reboot, but in general the error message was the following, which I encountered during an upgrade. (taken from the comment on the bug linked above)
sudo apt upgrade
Error! The /var/lib/dkms/backport-iwlwifi/8324/5.4.0-77-generic/aarch64/dkms.conf for module backport-iwlwifi includes a BUILD_EXCLUSIVE directive which
does not match this kernel/arch. This indicates that it should not be built.
Skipped.
After some searching, I found a topic on Linux Mint Forums that led me to reinstalling my 5.11.0-46-generic kernel.
First, be sure that you have any kernel installed that isn't producing errors. For me, 5.11.0-46-generic was giving errors but I was actually on 5.13.0-25-generic so no issue there. If you are on the faulty kernel, just run the following commands to install a different kernel version.
For the sake of the example, I will install 5.11.0-44-generic in the following commands.
# Search for all Linux kernel images >= 5.10.0
apt search linux-image-5.1 generic
# Install 5.11.0-44-generic image and headers
sudo apt install linux-image-5.11.0-44-generic linux-headers-5.11.0-44-generic
# Important! This updates grub entries with the new kernel
# + In the next step, we use this new entry to boot into a different kernel
sudo update-grub
Run the following command to edit your GRUB config.
sudoedit /etc/default/grub
Now, read the header comment and notice the recommendation to run the command info -f grub -n 'Simple configuration'. This is useful, and can provide more information on these settings if needed. For swapping a kernel, we don't need to get too crazy. We just need to make sure that GRUB is displayed, and that the timeout is not set to 0.
For me, this was the default configuration. This results in GRUB not being displayed with no timeout. Makes for quick reboots, but does not allow us to boot from a different kernel.
GRUB_DEFAULT=0
GRUB_TIMEOUT_STYLE=hidden
GRUB_TIMEOUT=0
GRUB_DISTRIBUTOR=`lsb_release -i -s 2> /dev/null || echo Debian`
GRUB_CMDLINE_LINUX_DEFAULT="quiet splash"
GRUB_CMDLINE_LINUX=""
Change the settings to something like the below. The lines to node are GRUB_TIMEOUT_STYLE and GRUB_TIMEOUT.
GRUB_DEFAULT=0
GRUB_TIMEOUT_STYLE=menu
GRUB_TIMEOUT=5
GRUB_DISTRIBUTOR=`lsb_release -i -s 2> /dev/null || echo Debian`
GRUB_CMDLINE_LINUX_DEFAULT="quiet splash"
GRUB_CMDLINE_LINUX=""
This will show the GRUB menu for 5 seconds on boot. If you don't press a key in 5 seconds, the system will boot. Save and exit this file with the new changes applied, then again run the following commands to updat GRUB and reboot.
sudo update-grub
reboot
When GRUB is displayed, you can select Ubuntu or Advanced Options for Ubuntu. Select Advanced Options for Ubuntu and then select any kernel version (NOT safe mode). This will boot Ubuntu with that Linux kernel, and now we've detached ourselves from the faulty kernel.
Once you're at a terminal in your desktop again, you can run the following commands to remove the kernel and reinstall it.
sudo apt remove linux-image-5.11.0-46-generic linux-headers-5.11.0-46-generic
sudo apt install linux-image-5.11.0-46-generic linux-headers-5.11.0-46-generic
sudo update-grub
That's it! For me, this fixed the specific issue I noted at the top of the page, but you could want to do this for various reasons so I thought it was useful to document it. After the install is complete and you've updated GRUB, you can reboot back into the default Ubuntu selection in the GRUB menu.
Notes
Also noteworthy, I encountered this issue on an XPS 9310 using dell PPAs for some drivers. These PPAs just happened to target the kernel I removed, and at some point while debugging this I ran an update with --autoremove, so I also removed the oem-somerville-melisa-meta package in the process. This meant that I removed the keys for the PPA that was still in my apt sources. I was getting warnings about unable to update the PPA during apt update. I solved by reinstalling the oem-somerville-melisa-meta package. After this, everything was good!
sudo apt remove oem-somerville-melisa-meta
sudo apt install oem-somerville-melisa-meta
GRUB
Notes on grub, because it's grand :)
To apply any of these changes, make sure to run the following command after saving the configurations.
sudo update-grub
When you open the /etc/defaults/grub file for editing in the next section, the header comment will remind you of this. Don't overlook it!
sudo head /etc/default/grub
# If you change this file, run 'update-grub' afterwards to update
# /boot/grub/grub.cfg.
# For full documentation of the options in this file, see:
# info -f grub -n 'Simple configuration'
You can run the info -f grub -n 'Simple configuration' command to view the GRUB manual, starting at the Simple configuration section, or you can view the same manual from your web browser - it's up to you.
/etc/defaults/grub
Create a backup of your configuration before making any edits, so you can restore the original configuration if things get out of hand.
sudo cp /etc/defaults/grub /etc/defaults/grub.bak
The settings below will save last selected boot option as the default for next boot. To override it, simply reboot and select a different option.
GRUB_DEFAULT=saved
GRUB_SAVEDEFAULT=true
GRUB_TIMEOUT_STYLE=menu
GRUB_TIMEOUT=5
GRUB Console
You may one day need to boot from a GRUB console, and to do this you'll need to select your kernel and initrd (Initialize Ram Disk) image manually. This might sound intimidating, but it really is not that bad and if you know where your MBR is located you should be able to accomplish this in just a few commands.
The file we want to use for our linux kernel on this machine is vmlinuz-5.15.0-kali3-amd64 - yours might have a slightly different name, but it should begin with vmlinuz
The file we want to use for our initrd image is named initrd.img-5.15.0-kali3-amd64, and again yours should be similar and begin with initrd.
Both of these files should exist in the /boot/ directory of the MBR
On a Kali VM GRUB looks like this during boot. Simply interrupt the boot by pressing the up or down arrow on your keyboard to prevent the timeout from triggering and the system will not automatically proceed, it will wait for your input.
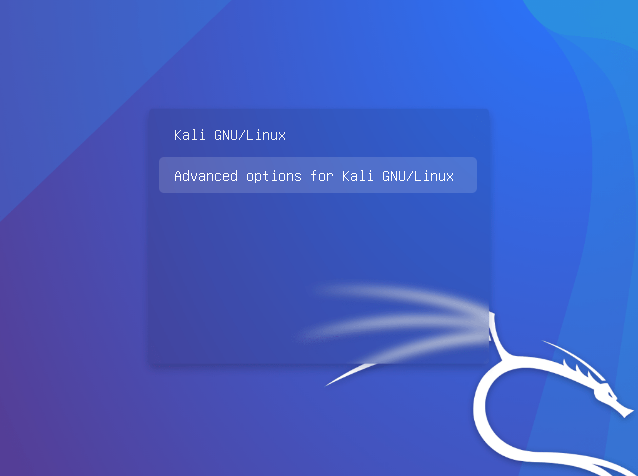
Now we can press c to enter the GRUB console, and you can practice booting from GRUB manually. You will see the console below.

In the next image, we ran the ls command, and seen the available filesystems output to the console. Since we are in a GRUB console, we have not yet set our root filesystem. If you have a lot of storage devices attached to your machine, this list might be much longer. In any case, the MBR should exist on the first sector of the drive that has your OS installed on it. First find the drive you want to boot from, then we can check the /boot/ directory within the first partiton of this drive for the kernel and image file we need to boot the system.
For this output, it's clearly the (hd0) device since it is the only device available. Note that (hd0) is the device itself, and not the first sector. To view the contents in the first sector of the (hd0) device before we set it to be our root filesystem, we can run ls (hd0,1)/. You can leave out the mdos section, or you can type it out - both will have the same result. On some systems mdos will be replaced with gpt, but the steps will be the same.
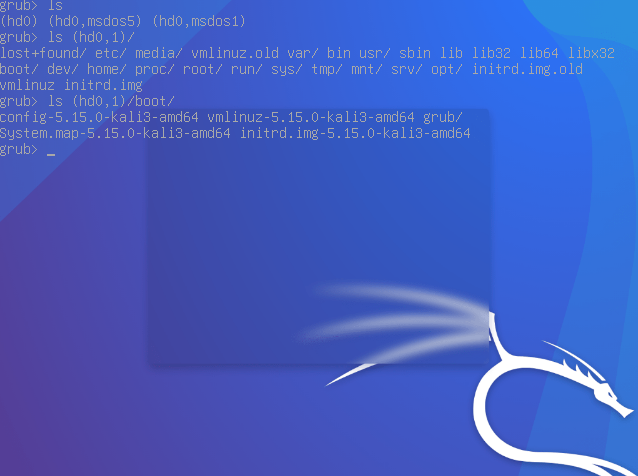
Notice when we ran ls (hd0,1)/boot/ we can see the two files we need! Both vmlinuz-5.15.0-kali3-amd64 and initrd.img-5.15.0-kali3-amd64 exist in the (hd0,1)/boot/ directory.
You may have noticed that the ls / command output the files vmlinuz and initrd.img - that's because some systems create symlinks to the last used kernel and initrd images in the root directory of the filesystem. You can use these if you're sure they're what you want, or you can just use the full path to the files under the /boot/ directory.
We continue by setting the root filesystem to the (hd0,1) device with the following commands
grub> set root=(hd0,1)
Now you'll notice that running ls /boot/ points us to the directory with the files we need, and at this point we are almost ready to boot the system.

Next, we run the following commands to set the linux kernel and initrd image, then we boot the system by running the boot command. The system will boot normally and you'll be asked to login.
grub> linux /boot/vmlinuz-5.15.0-kali3-amd64 root=/dev/sda1
grub> initrd /boot/initrd.img-5.15.0-kali3-amd64
grub> boot


VirtualBox
This page contains my personal notes on various issues and solutions for VirtualBox. These were mostly written while working on Kubuntu 20.04, but any Ubuntu derivative should be fine.
Download your VirtualBox version from VirtualBox Linux Downloads
cd ~/Downloads
sudo apt install ./virtualbox-6.1_6.1.32-149290~Ubuntu~eoan_amd64.deb
Guest Additions
VirtualBox Guest Additions allow you to do things like drag-and-drop files between host and guest machines, share clipboard content, and mount shared directories or devices.
First, boot the VM and navigate to Devices->Insert Guest Additions CD Image.
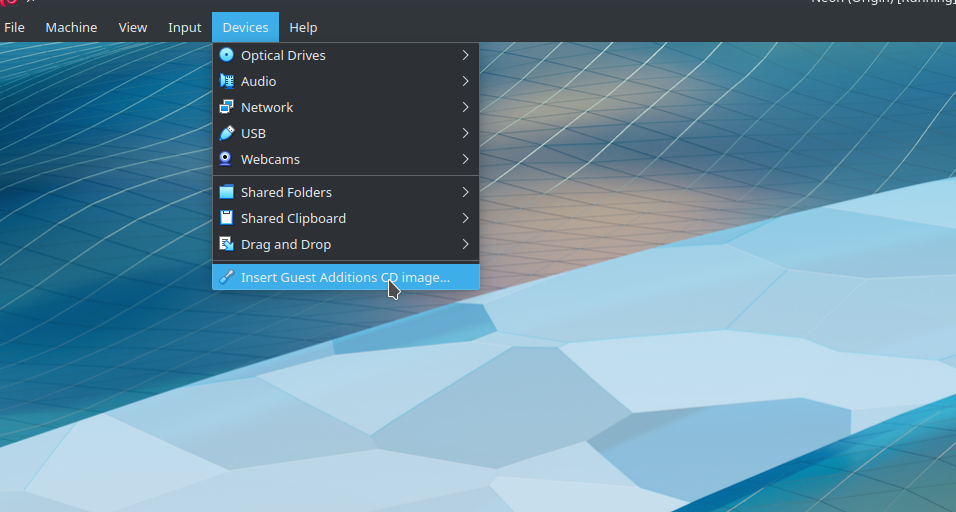
This will automatically mount the Guest Additions CD at /media/<YOUR_USERNAME>/VBox_GAs_6.1.32/. Run the following commands to complete the setup. In these commands, kapper is my username and should be replaced with your username instead`
cd /media/kapper/VBox_GAs_6.1.32/
sudo ./autostart.sh
After following the prompts, the installation will finish and you should reboot your VM. Consider powering off the VM and taking a look at the VM settings at this time, since many of the settings we gained by installing Guest Additions cannot be adjusted while the VM is running. An example of one such setting is mounting Shared Folders between your host and guest.
USB Devices
This section covers requied setup for sharing USB devices between host and guests when running VirtualBox VMs.
LinuxBabe - USB Devices on VirtualBox Guest
VirtualBox Extensions
Download VirtualBox Extensions and be sure the version matches with your VirtualBox version.
You can then install the VirtualBox Extensions with a command
sudo vboxmanage extpack install --replace ~/Downloads/Oracle_VM_VirtualBox_Extension_Pack-6.1.32.vbox-extpack
Or you can optionally do the same through the VirtualBox GUI if you'd prefer-
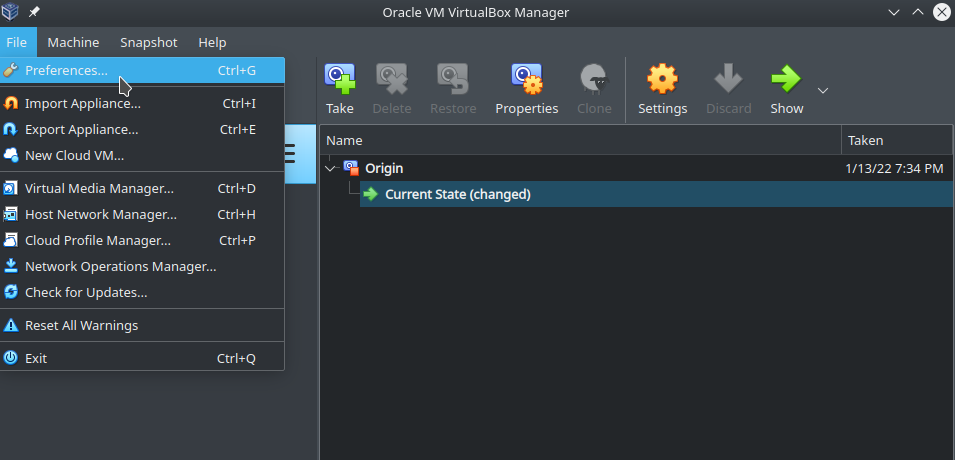
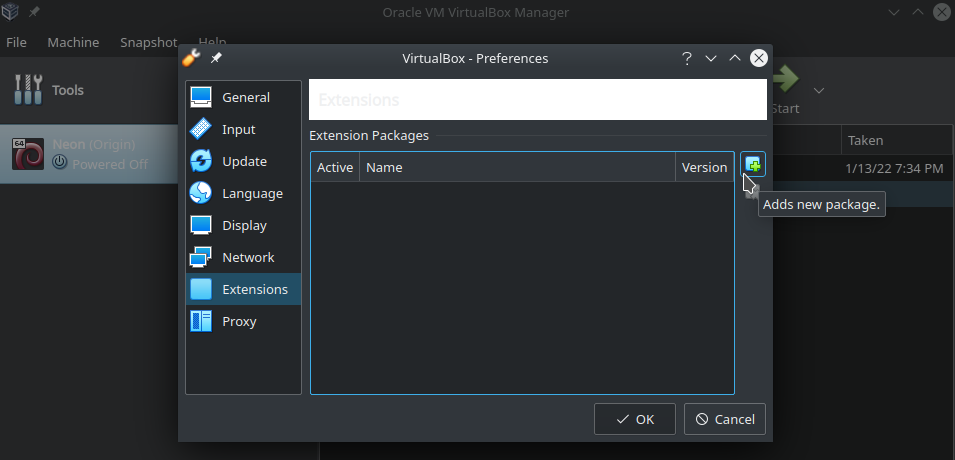
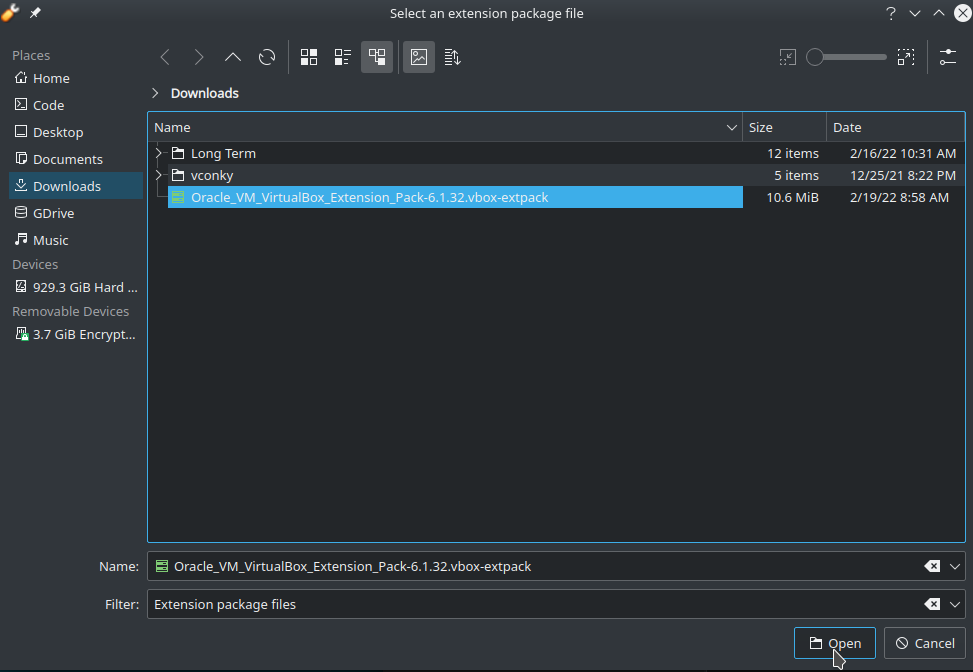
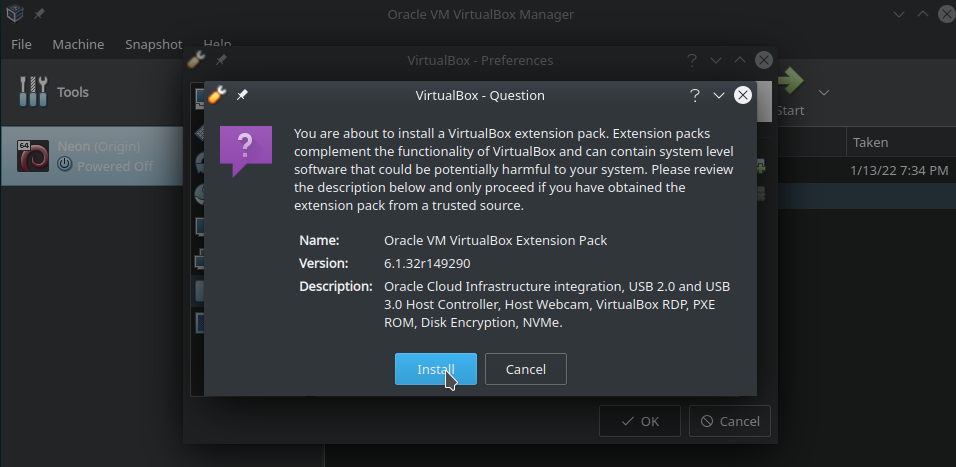

Input your sudo password, and the installation should complete. If installation fails, check that the verision of the VirtualBox Extensions matches the version of VirtualBox exactly.
Once finished, the extension should appear as installed in the list -

VirtualBox User Group
For VirtualBox to detect USB devices, we also need to add our user to the vboxusers group. To do this, run the following commands. In the following command, my username is kapper and you should replace this with your username.
sudo usermod -aG vboxusers kapper
To verify your user has been added to the group, run the following command and check that the output produced shows you're in vboxusers group.
groups kapper
kapper : kapper adm cdrom sudo dip video plugdev lpadmin lxd sambashare wireshark docker vboxusers
Then you will need to log out and back in to your system for the changes to be applied. I usually just run the reboot command.
Accessing USB Devices
Accessing the devices should be as simple as starting the VM and navigating to the toolbar and selecing Devices->USB-><Your device>

Be careful, if you attach a USB 3.0 device when USB 2.0 controller is activated, you will get Failed to create a proxy device for the USB device. (Error: VERR_PDM_NO_USB_PORTS). error when you try to attach the device. Make sure this setting reflects the devices you're using.

Boot Process
When you boot a Linux system, the following steps will be completed before you're greeted with your usual OS
1. BIOS
Basic Input Output System (BIOS) performs a Power On Self Test (POST) to ensure all required hardware is available and functional. If a problem is detected you will see an error message and you will need to attempt to fix the issue and reboot before the system can proceed to the next step in the boot process.
Once the BIOS POST check passes, the BIOS searches for the boolloader program using the MBR. There is a short delay before executing the bootloader where you have a chance to press a key (usually F12) to select the location for the BIOS to search for the MBR.
2. MBR
The Master Boot Record is located on the first sector of the bootable disk. On Linux you can see this sector by running lsblk, and for me this partition is labeled nvme0n1p1 because I'm using an M.2 NVME SSD. This SSD is encrypted so the structure might slightly differ from a non-encrypted system. For a normal SSD, the sector would probably appear as sda, and for a HDD it would appear as hda.
lsblk
nvme0n1 259:0 0 931.5G 0 disk
├─nvme0n1p1 259:1 0 c512M 0 part /boot/efi
├─nvme0n1p2 259:2 0 732M 0 part /boot
└─nvme0n1p3 259:3 0 930.3G 0 part
└─nvme0n1p3_crypt 253:0 0 930.3G 0 crypt
├─vgkubuntu-root 253:1 0 929.3G 0 lvm /
└─vgkubuntu-swap_1 253:2 0 976M 0 lvm [SWAP]
Note that regardless of which type of storage device you're bootloader is on, you will be able to find the device under the /dev/ directory. That means my bootloader is at /dev/nvme0n1p1
ls /dev/nvme0*
/dev/nvme0 /dev/nvme0n1 /dev/nvme0n1p1 /dev/nvme0n1p2 /dev/nvme0n1p3
The MBR will launch the bootloader which in my case is GRUB2. Your system might use GRUB, or possibly even LILO.
3. GRUB
GRand Unified Bootloader is responsible for loading the kernel for your system. If you want to try out different Linux kernels, see my notes on Linux kernel management On some systems GRUB will not appear by default, so you may need to modify the contents of /etc/default/grub to ensure your system will show the GRUB splash screen. To do this, you can run the sudoedit /etc/default/grub command and read the header comment, then proceed to make your changes in the configuration file. The link to my notes on kernel management will cover this process in more detail since it is required to switch Linux kernels, check it out for more detailed information.
After you make changes to GRUB or install new kernels, you will always need to run sudo update-grub in order to apply the changes to your system.
Each valid entry for a kernel in grub will contain full system paths to two files - vmlinuz and initrd. The z in vminuz stands for zip, since this is the compressed version of your kernel. The system will decompress the kernel and boot into it, and then used initrd to initialize required software.
For more information on GRUB, check out the official GRUB Manual - Simple Configuration documentation. This should provide you with all or most of the information you need, but you can feel free to check out the more advanced sections of the guide if needed.
4. Kernel
Once the kernel is decompressed and the file system is mounted, the kernel will execute the /sbin/init program, which performs software initialization up to the runlevel specified for your system within your local configurations. This can be modified but each distribution may handle this differently, so you should check the relevant documentation on how to do this if you are interested.
5. Init
This section has changed a good bit over the years and I noticed some differences in guides I found online, so this information is just what I collected after a few minutes of checking manpages and searching around my system.
Some useful manpages to checkout -
man inittab
man init
man runlevel
man utmp
The process is still the same for booting. This part of the boot process will initialize the software required to run the environment specified up to the current runlevel setting. Each runlevel will start different groups of software to support different environment features.
6. Runlevel
If you aren't sure what your runlevel setting is, just run the command to find out -
runlevel
N 5
Our current runlevel is set to 5. When we run man runlevel, we can see a table describing what the different runlevels mean.
OVERVIEW
"Runlevels" are an obsolete way to start and stop groups of services used in SysV
init. systemd provides a compatibility layer that maps runlevels to targets, and
associated binaries like runlevel. Nevertheless, only one runlevel can be "active"
at a given time, while systemd can activate multiple targets concurrently, so the
mapping to runlevels is confusing and only approximate. Runlevels should not be used
in new code, and are mostly useful as a shorthand way to refer the matching systemd
targets in kernel boot parameters.
Table 1. Mapping between runlevels and systemd targets
┌─────────┬───────────────────┐
│Runlevel │ Target │
├─────────┼───────────────────┤
│0 │ poweroff.target │
├─────────┼───────────────────┤
│1 │ rescue.target │
├─────────┼───────────────────┤
│2, 3, 4 │ multi-user.target │
├─────────┼───────────────────┤
│5 │ graphical.target │
├─────────┼───────────────────┤
│6 │ reboot.target │
└─────────┴───────────────────┘
But what software is initialized during boot? Check your /etc/ directory for subdirectories named /etc/rc0.d, /etc/rc1.d, etc. There is one directory named /etc/rcS.d which is always initialized during Startup.
ls /etc/rc*
rc0.d/ rc1.d/ rc2.d/ rc3.d/ rc4.d/ rc5.d/ rc6.d/ rcS.d/
Some binaries in these subdirectories start with K and others start with S. This just means that the K binaries are ran when the system is shutdown, and the S binaries are ran when the system is started.
ls /etc/rc5.d/
K01gdomap S01cups S01lvm2-lvmpolld S01sddm
S01acpid S01cups-browsed S01nginx S01spice-vdagent
S01anacron S01dbus S01osspd S01sysstat
S01apport S01gdm3 S01plymouth S01tlp
S01avahi-daemon S01grub-common S01postfix S01trousers
S01binfmt-support S01haveged S01pulseaudio-enable-autospawn S01ubuntu-fan
S01bluetooth S01hddtemp S01rsync S01unattended-upgrades
S01console-setup.sh S01irqbalance S01rsyslog S01uuidd
S01cron S01kerneloops S01saned S01whoopsie
You might noticed that all of these binaries are just named symlinks that point to binaries in different directories. This is just one example of how symlinks can be used to organize processes and files on your system.
ls /etc/rc5.d/ -l
total 0
lrwxrwxrwx 1 root root 16 Dec 6 09:27 K01gdomap -> ../init.d/gdomap
lrwxrwxrwx 1 root root 15 Dec 6 09:27 S01acpid -> ../init.d/acpid
lrwxrwxrwx 1 root root 17 Dec 6 09:27 S01anacron -> ../init.d/anacron
lrwxrwxrwx 1 root root 16 Dec 6 09:27 S01apport -> ../init.d/apport
lrwxrwxrwx 1 root root 22 Dec 6 09:27 S01avahi-daemon -> ../init.d/avah
...