Self-Hosted Applications
MAME Web Application
Emscripten Javascript and HTML will help to run this emulator within a web application
Overview
To run mame as a web application, we need a few things..
- ROMs to run
- MAME Source Code
- Clone & Install Emscripten
- Compile MAME with Emscripten
- Clone Emularity Loader
- Copy required configurations to the root of our webserver
- Modify the javascript within Emularity's provided
.htmlexamples to reflect the ROMs and emulators we want to run
- Configure NGINX to point to our Emularity configs
MAME is the emulator
Emscripten is the compiler
Emularity is the loader ( We need this to serve the compiled .js files generated by Emscripten )
ROM Requirements
To run a specific ROM within this webserver, we need a few specific files
- A MAME driver for the ROM we want to run
- Compiled from
.cppto.jsusing Emscripten
- Compiled from
- A
.ziparchive containing the ROM itself
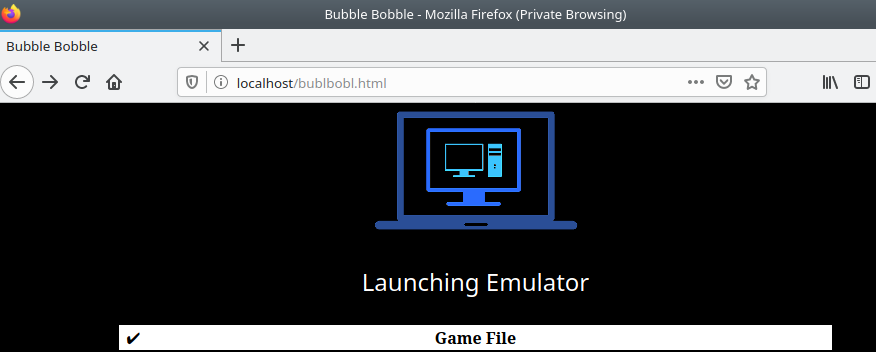
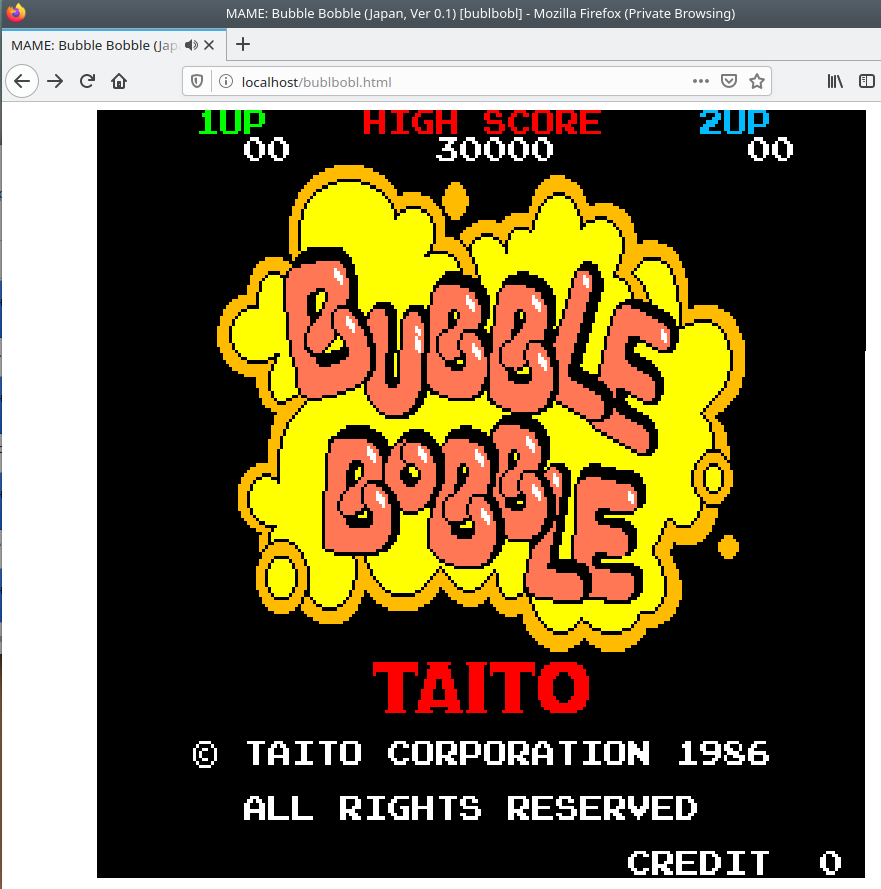
End Result
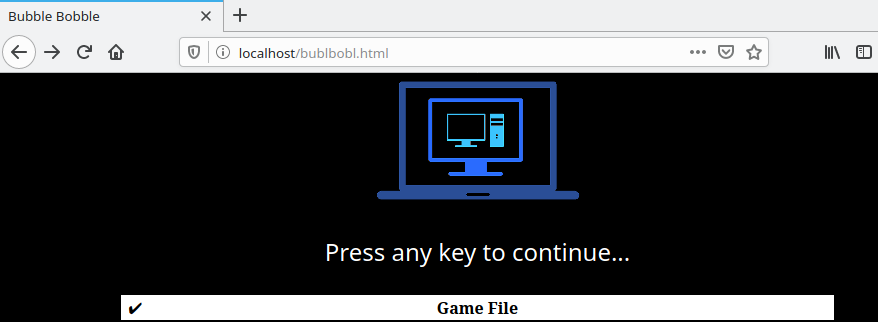
Pressing TAB brings up an options menu, allowing for the user to modify this session's keybinds and other various settings. I have not found a way to make these persist either on the backend or frontend of Emularity.

Local MAME Installation
This step is intended to build and run mame on a local machine, and not technically required to host MAME within a webserver. It can be a nice way to verify ROMS by checking if you are able to run them locally, though. If not interested in this testing feature, you can skil to the section below on Emscripten.
git clone https://github.com/mamedev/mame
cd mame && make
If you have access to multiple cores, be sure to pass the -j5 flag in the command above to take advantage of the extra processing power. Generally, the rule of thumb is to pass the number of cores in your processor + 1 to the -j flag.
Depends
To compile MAME, you need a C++14 compiler and runtime library. We support building with GCC version 7.2 or later and clang version 5 or later. MAME should run with GNU libstdc++ version 5.1 or later. - MAME All Platform Docs
GCC 7.2 or later
gcc -v
Using built-in specs.
COLLECT_GCC=gcc
COLLECT_LTO_WRAPPER=/usr/lib/gcc/x86_64-linux-gnu/9/lto-wrapper
OFFLOAD_TARGET_NAMES=nvptx-none:hsa
OFFLOAD_TARGET_DEFAULT=1
Target: x86_64-linux-gnu
Configured with: ../src/configure -v --with-pkgversion='Ubuntu 9.3.0-10ubuntu2' --with-bugurl=file:///usr/share/doc/gcc-9/README.Bugs --enable-languages=c,ada,c++,go,brig,d,fortran,objc,obj-c++,gm2 --prefix=/usr --with-gcc-major-version-only --program-suffix=-9 --program-prefix=x86_64-linux-gnu- --enable-shared --enable-linker-build-id --libexecdir=/usr/lib --without-included-gettext --enable-threads=posix --libdir=/usr/lib --enable-nls --enable-clocale=gnu --enable-libstdcxx-debug --enable-libstdcxx-time=yes --with-default-libstdcxx-abi=new --enable-gnu-unique-object --disable-vtable-verify --enable-plugin --enable-default-pie --with-system-zlib --with-target-system-zlib=auto --enable-objc-gc=auto --enable-multiarch --disable-werror --with-arch-32=i686 --with-abi=m64 --with-multilib-list=m32,m64,mx32 --enable-multilib --with-tune=generic --enable-offload-targets=nvptx-none,hsa --without-cuda-driver --enable-checking=release --build=x86_64-linux-gnu --host=x86_64-linux-gnu --target=x86_64-linux-gnu
Thread model: posix
gcc version 9.3.0 (Ubuntu 9.3.0-10ubuntu2)
Clang 5 or later
clang --version
clang version 10.0.0-4ubuntu1
Target: x86_64-pc-linux-gnu
Thread model: posix
InstalledDir: /usr/bin
libstdc++ 5.1 or later
ldconfig -p | grep libstdc
        libstdc++.so.6 (libc6,x86-64) => /lib/x86_64-linux-gnu/libstdc++.so.6
        libstdc++.so.6 (libc6) => /lib32/libstdc++.so.6
Emscripten
Depends
Python, CMake, and Java are not provided by emsdk. The user is expected to install these beforehand with the system package manager - Emscripten Linux Install Docs
# Install Python
sudo apt-get install python2.7

# Install CMake (optional, only needed for tests and building Binaryen)
sudo apt-get install cmake

# Install Java (optional, only needed for Closure Compiler minification)
sudo apt-get install default-jre
Installation
This is very well documentated at EMscripten.org
# Get the emsdk repo
git clone https://github.com/emscripten-core/emsdk.git

# Enter that directory
cd emsdk

# Fetch the latest version of the emsdk (not needed the first time you clone)
git pull

# Download and install the latest SDK tools.
./emsdk install latest

# Make the "latest" SDK "active" for the current user. (writes .emscripten file)
./emsdk activate latest

# Activate PATH and other environment variables in the current terminal
source ./emsdk_env.sh
Errors
Had this issue as well at a few different points during installation, running Kubuntu 20.04 in a virtualbox VM. I was able to manually wget the files returning 104's with no problems, though. After reading the previous comment, I just kept rerunning the command to install and eventually each error resolved itself. Errors I encountered are below
First 104
Installing SDK 'sdk-releases-upstream-1914a1543f08cd8e41f44c2bb05f7a90d1920275-64bit'..
Installing tool 'node-12.18.1-64bit'..
Downloading: /home/kapper/mame-ems/emsdk/zips/node-v12.18.1-linux-x64.tar.xz from https://storage.googleapis.com/webassembly/emscripten-releases-builds/deps/node-v12.18.1-linux-x64.tar.xz, 14695604 Bytes
Error: Downloading URL 'https://storage.googleapis.com/webassembly/emscripten-releases-builds/deps/node-v12.18.1-linux-x64.tar.xz': [Errno 104] Connection reset by peer
Installation failed!
So at this point, I try wget to grab the errored URL above. It errors once, retries and continues ¯_(ツ)_/¯
--2020-07-01 11:45:47--  https://storage.googleapis.com/webassembly/emscripten-releases-builds/deps/node-v12.18.1-linux-x64.tar.xz
Resolving storage.googleapis.com (storage.googleapis.com)... 172.217.4.208, 172.217.6.112, 172.217.1.48, ...
Connecting to storage.googleapis.com (storage.googleapis.com)|172.217.4.208|:443... connected.
HTTP request sent, awaiting response... 200 OK
Length: 14695604 (14M) [application/x-tar]
Saving to: ‘node-v12.18.1-linux-x64.tar.xz’

node-v12.18.1-linux-x64.tar.xz      4%[=>                                                         ] 690.86K  3.53MB/s    in 0.2s

2020-07-01 11:45:48 (3.53 MB/s) - Read error at byte 707444/14695604 (Connection reset by peer). Retrying.

--2020-07-01 11:45:49--  (try: 2)  https://storage.googleapis.com/webassembly/emscripten-releases-builds/deps/node-v12.18.1-linux-x64.tar.xz
Connecting to storage.googleapis.com (storage.googleapis.com)|172.217.4.208|:443... connected.
HTTP request sent, awaiting response... 206 Partial Content
Length: 14695604 (14M), 13988160 (13M) remaining [application/x-tar]
Saving to: ‘node-v12.18.1-linux-x64.tar.xz’

node-v12.18.1-linux-x64.tar.xz    100%[++========================================================>]  14.01M  10.2MB/s    in 1.3s

2020-07-01 11:45:50 (10.2 MB/s) - ‘node-v12.18.1-linux-x64.tar.xz’ saved [14695604/14695604]
Ran it again, and it completes below..
Installing SDK 'sdk-releases-upstream-1914a1543f08cd8e41f44c2bb05f7a90d1920275-64bit'..
Installing tool 'node-12.18.1-64bit'..
Downloading: /home/kapper/mame-ems/emsdk/zips/node-v12.18.1-linux-x64.tar.xz from https://storage.googleapis.com/webassembly/emscripten-releases-builds/deps/node-v12.18.1-linux-x64.tar.xz, 14695604 Bytes
Unpacking '/home/kapper/mame-ems/emsdk/zips/node-v12.18.1-linux-x64.tar.xz' to '/home/kapper/mame-ems/emsdk/node/12.18.1_64bit'
Done installing tool 'node-12.18.1-64bit'.
Installing tool 'releases-upstream-1914a1543f08cd8e41f44c2bb05f7a90d1920275-64bit'..
Downloading: /home/kapper/mame-ems/emsdk/zips/1914a1543f08cd8e41f44c2bb05f7a90d1920275-wasm-binaries.tbz2 from https://storage.googleapis.com/webassembly/emscripten-releases-builds/linux/1914a1543f08cd8e41f44c2bb05f7a90d1920275/wasm-binaries.tbz2, 121734269 Bytes
Error: Downloading URL 'https://storage.googleapis.com/webassembly/emscripten-releases-builds/linux/1914a1543f08cd8e41f44c2bb05f7a90d1920275/wasm-binaries.tbz2': [Errno 104] Connection reset by peer
Installation failed!
Re-ran, Errno 104, ran again, and it completes below but npm has an integrity error?..
Installing SDK 'sdk-releases-upstream-1914a1543f08cd8e41f44c2bb05f7a90d1920275-64bit'..
Skipped installing node-12.18.1-64bit, already installed.
Installing tool 'releases-upstream-1914a1543f08cd8e41f44c2bb05f7a90d1920275-64bit'..
Downloading: /home/kapper/mame-ems/emsdk/zips/1914a1543f08cd8e41f44c2bb05f7a90d1920275-wasm-binaries.tbz2 from https://storage.googleapis.com/webassembly/emscripten-releases-builds/linux/1914a1543f08cd8e41f44c2bb05f7a90d1920275/wasm-binaries.tbz2, 121734269 Bytes
Unpacking '/home/kapper/mame-ems/emsdk/zips/1914a1543f08cd8e41f44c2bb05f7a90d1920275-wasm-binaries.tbz2' to '/home/kapper/mame-ems/emsdk/upstream'
Done installing tool 'releases-upstream-1914a1543f08cd8e41f44c2bb05f7a90d1920275-64bit'.
Running post-install step: npm ci ...
Error running ['/home/kapper/mame-ems/emsdk/node/12.18.1_64bit/bin/npm', 'ci', '--production']:
npm WARN tarball tarball data for google-closure-compiler@20200224.0.0 (sha512-V81dRYygdHbZtOtU16VX26xAdJBB1UZyfSg3OTzdNl3l/xEIx1D/L7TYUqjeTXsxcy+JruJ/UfUlIJAOaMRTog==) seems to be corrupted. Trying one more time.
npm WARN tarball tarball data for google-closure-compiler-js@20200224.0.0 (sha512-70VKN0kbnTRtu2dqxDjWZQGfEQIHj7b7oUUCsYPO5oEXCDfgxNc13oYUJXvrTONLRWlHCNl/I8FNrVOwZ3gY/g==) seems to be corrupted. Trying one more time.
npm WARN tarball tarball data for google-closure-compiler-java@20200224.0.0 (sha512-palFcDoScauZjWIsGDzMK6h+IctcRb55I3wJX8Ko/DTSz72xwadRdKm0lGt8OoYL7SKEO+IjgD7s8XrAGpLnlQ==) seems to be corrupted. Trying one more time.
npm WARN tarball tarball data for google-closure-compiler-windows@20200224.0.0 (sha512-l6w2D8r9+GC9CQTAYEMAuNI996Zb6YV5qG7+FR0gCoL6h6S3Mc7mi87bafgwaicsVcmmHE/9kCBuW4ZyTMs5Fg==) seems to be corrupted. Trying one more time.
npm WARN tarball tarball data for google-closure-compiler-osx@20200224.0.0 (sha512-WXVNW9nPUqjvCe38mUIlBGEPVPCTKLtdaXC+q+kQdonkJFHNrpdyYWa746Y8cNP/byQyDNpPsqcKseZTLh17sQ==) seems to be corrupted. Trying one more time.
npm WARN tarball tarball data for google-closure-compiler-js@20200224.0.0 (sha512-70VKN0kbnTRtu2dqxDjWZQGfEQIHj7b7oUUCsYPO5oEXCDfgxNc13oYUJXvrTONLRWlHCNl/I8FNrVOwZ3gY/g==) seems to be corrupted. Trying one more time.
npm ERR! code EINTEGRITY
npm ERR! Verification failed while extracting google-closure-compiler-js@20200224.0.0:
npm ERR! Verification failed while extracting google-closure-compiler-js@20200224.0.0:
npm ERR! sha512-70VKN0kbnTRtu2dqxDjWZQGfEQIHj7b7oUUCsYPO5oEXCDfgxNc13oYUJXvrTONLRWlHCNl/I8FNrVOwZ3gY/g== integrity checksum failed when using sha512: wanted sha512-70VKN0kbnTRtu2dqxDjWZQGfEQIHj7b7oUUCsYPO5oEXCDfgxNc13oYUJXvrTONLRWlHCNl/I8FNrVOwZ3gY/g== but got sha512-kkaXeOSgbt9ACVn0Gk1PPZZFwuiC2jv31XjJqVoxCZ5MV1CIUzak2DxgSKP7kkKm2aUQOa93MTYaMGpJX7zisA==. (8864 bytes)

npm ERR! A complete log of this run can be found in:
npm ERR!     /home/kapper/.npm/_logs/2020-07-01T15_47_42_550Z-debug.log
Ran one last time and it completes
Installing SDK 'sdk-releases-upstream-1914a1543f08cd8e41f44c2bb05f7a90d1920275-64bit'..
Skipped installing node-12.18.1-64bit, already installed.
Skipped installing releases-upstream-1914a1543f08cd8e41f44c2bb05f7a90d1920275-64bit, already installed.
Running post-install step: npm ci ...
Done running: npm ci
Done installing SDK 'sdk-releases-upstream-1914a1543f08cd8e41f44c2bb05f7a90d1920275-64bit'.
Compiling MAME Using Emscripten
As a test, from within the root directory of our mame installation, run the following command to compile the pacman.cpp driver
emmake make SUBTARGET=pacmantest SOURCES=src/mame/drivers/pacman.cpp
SUBTARGET can be any unique identifier you want to specify for this build.
Be sure to append REGENIE=1 for rebuilds of mame to allow the settings to be rebuilt.
SOURCES can be used to target a driver program for testing..?
If you have access to multiple cores, be sure to pass the -j5 flag in the command above to take advantage of the extra processing power. Generally, the rule of thumb is to pass the number of cores in your processor + 1 to the -j flag.
When the compilation reaches the emcc phase, you may see a number of "unresolved symbol" warnings. At the moment, this is expected for OpenGL-related functions such as glPointSize. Any others may indicate that an additional dependency file needs to be specified in the SOURCES list. Unfortunately this process is not automated and you will need to search the source tree to locate the files supplying the missing symbols. You may also be able to get away with ignoring the warnings if the code path referencing them is not used at run-time. - MAME Emscripten Javacript and HTML Docs
If all goes well, a .js file will be output to the current directory. This file cannot be run by itself, but requires an HTML loader to provide it with a canvas to output to and pass in command-line parameters. The Emularity project provides such a loader. - MAME Emscripten Javacript and HTML Docs
Errors
I faced the following error with LzmaEnc.c when compiling MAME using Emscripten
../../../../../3rdparty/lzma/C/LzmaEnc.c:1405:9: error: misleading indentation; statement is not part of the previous 'if' [-Werror,-Wmisleading-indentation]
        {
        ^
../../../../../3rdparty/lzma/C/LzmaEnc.c:1401:7: note: previous statement is here
      if (repIndex == 0)
This can be resolved by opening the file referenced in the error above for editing within vim. Once open, run :1405 to jump to the block of code resulting in errors. You should see the code block below
1401       if (repIndex == 0)
1402         startLen = lenTest + 1;
1403
1404       /* if (_maxMode) */
1405         {
1406           UInt32 lenTest2 = lenTest + 1;
1407           UInt32 limit = lenTest2 + p->numFastBytes;
1408           if (limit > numAvailFull)
1409             limit = numAvailFull;
1410           for (; lenTest2 < limit && data[lenTest2] == data2[lenTest2]; lenTest2++);
1411           lenTest2 -= lenTest + 1;
1412           if (lenTest2 >= 2)
1413           {
1414             UInt32 nextRepMatchPrice;
1415             UInt32 state2 = kRepNextStates[state];
1416             UInt32 posStateNext = (position + lenTest) & p->pbMask;
1417             UInt32 curAndLenCharPrice =
1418                 price + p->repLenEnc.prices[posState][lenTest - 2] +
1419                 GET_PRICE_0(p->isMatch[state2][posStateNext]) +
1420                 LitEnc_GetPriceMatched(LIT_PROBS(position + lenTest, data[lenTest - 1]),
1421                     data[lenTest], data2[lenTest], p->ProbPrices);
1422             state2 = kLiteralNextStates[state2];
1423             posStateNext = (position + lenTest + 1) & p->pbMask;
1424             nextRepMatchPrice = curAndLenCharPrice +
1425                 GET_PRICE_1(p->isMatch[state2][posStateNext]) +
1426                 GET_PRICE_1(p->isRep[state2]);
1427
1428             /* for (; lenTest2 >= 2; lenTest2--) */
1429             {
1430               UInt32 curAndLenPrice;
1431               COptimal *opt;
1432               UInt32 offset = cur + lenTest + 1 + lenTest2;
1433               while (lenEnd < offset)
1434                 p->opt[++lenEnd].price = kInfinityPrice;
1435               curAndLenPrice = nextRepMatchPrice + GetRepPrice(p, 0, lenTest2, state2, posStateNext);
1436               opt = &p->opt[offset];
1437               if (curAndLenPrice < opt->price)
1438               {
1439                 opt->price = curAndLenPrice;
1440                 opt->posPrev = cur + lenTest + 1;
1441                 opt->backPrev = 0;
1442                 opt->prev1IsChar = True;
1443                 opt->prev2 = True;
1444                 opt->posPrev2 = cur;
1445                 opt->backPrev2 = repIndex;
1446               }
1447             }
1448           }
1449         }
Notice the commented out /* if (_maxMode) */ on line 1404, right above the indented block causing the error.
In the interest of using vim efficiently, this can be fixed in a few keystrokes from our current position after running :1405 within vim. Simply press v%<< to correct this block and save with :w. Now retry the compilation of pacmantest using the same command as before and everything should complete normally.
I'm not sure whos problem this would be, but there is no open issue on the emscripten GitHub
Configure Emularity
See TECHNICAL.md file for more technical documentation
Clone this repo, either directly within the root of your webserver or in another location and manually copy over the following files / directories to the root of your web server.
emulators/examples/images/logo/es6-promise.jsbrowserfs.min.jsloader.jsexample_arcade.html
First, take a look at the Emularity Example Arcade File as a good starting point. This file, example_arcade.html, contains the general directions below
<!-- The Emularity: An Example Arcade Machine Loader -->
<!-- For use with The Emularity, downloadable at http://www.emularity.com/ -->

<!-- For a collection of Arcade ROMs to download and test this script, visit http://mamedev.org/roms/ -->

<!-- SIMPLE STEPS to starting your arcade (using the 1980 Exidy Arcade Game TARG) -->

<!-- * Check out this repository in your browser-accessible directory;
       this file as well as es6-promise.js, browserfs.min.js and
       loader.js are required. The logo and images directories are
       optional, but the splash screen looks quite a lot better when
       they're available. -->
<!-- * Download the MAME Exidy emulator from
       https://archive.org/download/emularity_engine_v1/mameexidy.js.gz -->
<!-- * Download the Targ ROM files from http://mamedev.org/roms/targ/ -->
<!-- * Place the Targ ROM .zip file in an "examples" subdirectory. -->
<!-- * Visit your example_arcade.html file with a modern Javascript-capable browser. -->
By default, this file contains the following HTML
<html>
  <head>
    <meta http-equiv="Content-Type" content="text/html; charset=utf-8">
    <title>example arcade game</title>
  </head>
  <body>
    <canvas id="canvas" style="width: 50%; height: 50%; display: block; margin: 0 auto;"></canvas>
    <script type="text/javascript" src="es6-promise.js"></script>
    <script type="text/javascript" src="browserfs.min.js"></script>
    <script type="text/javascript" src="loader.js"></script>
    <script type="text/javascript">
      var emulator = new Emulator(document.querySelector("#canvas"),
                                  null,
                                  new JSMAMELoader(JSMAMELoader.driver("targ"),
                                                   JSMAMELoader.nativeResolution(256, 256),
                                                   JSMAMELoader.scale(3),
                                                   JSMAMELoader.emulatorJS("emulators/jsmess/mameexidy.js"),
                                                   JSMAMELoader.mountFile("targ.zip",
                                                                          JSMAMELoader.fetchFile("Game File",
                                                                                                 "examples/targ.zip"))))
      emulator.start({ waitAfterDownloading: true });
    </script>
  </body>
</html>
Before we continue, we will need to grab the relevant .js.gz for the game we are emulating from an Emularity archive. For me, this was mamebublbobl.js.gz. Direct Download. Run sudo gzip -d mamebublbobl.js.gz to extract the .js file needed to emulate this ROM.
The .js file extracted needs to be placed within the relevant directory specified within example_arcade.html.
To adjust this to my system, I need to edit driver, emulatorJS, mountFile, and fetchFile. If needed, the file can be adjusted further to suit your preferences or ROMS. My working example_arcade.html is seen below
<html>
  <head>
    <meta http-equiv="Content-Type" content="text/html; charset=utf-8">
    <title>example arcade game</title>
  </head>
  <body>
    <canvas id="canvas" style="width: 50%; height: 50%; display: block; margin: 0 auto;"></canvas>
    <script type="text/javascript" src="es6-promise.js"></script>
    <script type="text/javascript" src="browserfs.min.js"></script>
    <script type="text/javascript" src="loader.js"></script>
    <script type="text/javascript">
      var emulator = new Emulator(document.querySelector("#canvas"),
                                  null,
                                  new JSMAMELoader(JSMAMELoader.driver("bublbobl"),
                                                   JSMAMELoader.nativeResolution(256, 256),
                                                   JSMAMELoader.scale(3),
                                                   JSMAMELoader.emulatorJS("emulators/mamebublbobl.js"),
                                                   JSMAMELoader.mountFile("bublbobl.zip",
                                                                          JSMAMELoader.fetchFile("Game File",
                                                                                                 "examples/bublbobl.zip"))))
      emulator.start({ waitAfterDownloading: true });
    </script>
  </body>
</html>
Found on Emularity's GitHub, loader.js around line 1228, we can see the Emulator object's source code below.
   /**
    * Emulator
    */
   function Emulator(canvas, callbacks, loadFiles) {
     if (typeof callbacks !== 'object') {
       callbacks = { before_emulator: null,
                     before_run: callbacks };
     }
     var js_url;
     var requests = [];
     var drawloadingtimer;
     // TODO: Have an enum value that communicates the current state of the emulator, e.g. 'initializing', 'loading', 'running'.
     var has_started = false;
     var loading = false;
     var defaultSplashColors = { foreground: 'white',
                                 background: 'black',
                                 failure: 'red' };
     var splash = { loading_text: "",
                    spinning: true,
                    finished_loading: false,
                    colors: defaultSplashColors,
                    table: null,
                    splashimg: new Image() };

     var runner;

     var muted = false;
     var SDL_PauseAudio;
     this.isMuted = function () { return muted; };
     this.mute = function () { return this.setMute(true); };
     this.unmute = function () { return this.setMute(false); };
     this.toggleMute = function () { return this.setMute(!muted); };
     this.setMute = function (state) {
       muted = state;
       if (runner) {
         if (state) {
           runner.mute();
         } else {
           runner.unmute();
         }
       }
       else {
         try {
           if (!SDL_PauseAudio)
             SDL_PauseAudio = Module.cwrap('SDL_PauseAudio', '', ['number']);
           SDL_PauseAudio(state);
         } catch (x) {
           console.log("Unable to change audio state:", x);
         }
       }
       return this;
     };
Configure NGINX
If not installed, sudo apt install nginx to install and enable the nginx service on your local machine. If things are working normally, we should be able to visit localhost within a web browser to view the default nginx HTML example page. Next, we'll change this landing page to point to a directory where we will later copy our compiled emscripten files along with the relative emularity configurations.
Edit /etc/nginx/sites-enabled/default to pass to your preferred directory on your server by changing the root directive within the server block to point to your directoy, as seen below.
server {
        listen 80 default_server;
        listen [::]:80 default_server;
        root /var/www/mame-ems;
        server_name _;
        location / {
                # First attempt to serve request as file, then
                # as directory, then fall back to displaying a 404.
                try_files $uri $uri/ =404;
        }
}
From the directory where we ran emmake to compile mame using emscripten (the root directory of mame on our system), we will need to relocate the following files to the root NGINX directory
- The compiled MAME .js file (Output by emscripten after running
emmake make) - The compiled MAME .wasm file if using WebAssembly (In this case, we are not)
- The .js files from the Emularity package (es6-promise.js, browserfs.min.js and loader.js are required)
- A .zip file with the ROMs for the MAME driver you would like to run (if any)
- An Emularity loader .html modified to point to all of the above
Additionally, if you have any other software files you would like to run with the MAME driver, be sure to move them to the root NGINX directory as well.
Site Generators
Jekyll
Jekyll can be installed by following the Installation Instructions hosted on the official website. So if you are on Ubuntu Linux,
sudo apt-get install ruby-full build-essential zlib1g-dev
echo '# Install Ruby Gems to ~/gems' >> ~/.bashrc
echo 'export GEM_HOME="$HOME/gems"' >> ~/.bashrc
echo 'export PATH="$HOME/gems/bin:$PATH"' >> ~/.bashrc
source ~/.bashrc
gem install jekyll bundler
After running the above to install Jekyll, we just need to pick a project or theme to start our Jekyll server with. Check out GitHub or Google for some Jekyll themes, and clone one. Keep in mind to store this repository into a location on your host where you'd like to store the root of your blog, since we will use this repository to start our Jekyll server it will store all of our configuration files.
git clone https://github.com/streetturtle/jekyll-clean-dark
cd jekyll-clean-dark

# Build the site with the contents in the current directory
jekyll build

# Serve the site on a webserver and detach the process from this shell
jekyll serve --detach
Running jekyll build --watch on an active shell will check for any changes to the sites root directory and build them out to the published site.
When creating a new post, bundle exec jekyll post "Name" can be ran to create a draft post. The same command has various other uses that will help in the early stages of a blog -
Subcommands:
  docs
  import
  build, b              Build your site
  clean                 Clean the site (removes site output and metadata file) without building.
  doctor, hyde          Search site and print specific deprecation warnings
  help                  Show the help message, optionally for a given subcommand.
  new                   Creates a new Jekyll site scaffold in PATH
  new-theme             Creates a new Jekyll theme scaffold
  serve, server, s      Serve your site locally
  draft                 Creates a new draft post with the given NAME
  post                  Creates a new post with the given NAME
  publish               Moves a draft into the _posts directory and sets the date
  unpublish             Moves a post back into the _drafts directory
  page                  Creates a new page with the given NAME
Specifically, page, (un)publish, post, draft, serve, new, and build are the commands we will use heavily.
When generating a new post using bundle exec jekyll post "Name", you might notice at the top of the new post generated in ./_posts/ there is a block describing the page to Jekyll. This is an important block and can be used to customize how the page is displayed based on the arguments provided. For example, below is a default new post testpost
---
layout: post
title: testpost
date: 2019-09-01 12:00
description: A test page
tags:
- test
---
# Test
The above block does nothing but describe our page to Jekyll, up to our first header that is actually output to our post # Test. The layout is described in a corresponding file stored in the ./_layouts/ directory.
If we wanted to add a custom table of contents, for example, when running github.com/allejo/jekyll-toc Jekyll theme we can simply add an argument to our header and it will create a table of contents with anchored links to each topic header automatically, just by adding toc: true below.
You can also customize it by styling .toc class in **theme.scss**
layout: post
title: testpost
date: 2019-09-01 12:00
description: A test page
tags:
- test
toc: true
Now if we use markdown carefully Jekyll will automatically create a nice table of content based on the content of our post, and the structure / sizes of the headers for each topic within. (The above solution is based on github.com/allejo/jekyll-toc)
To display raw code, we'll need to use some Liquid syntax -
{% highlight md %}
{% raw %}
code
{% endraw %}
{% endhighlight %}
Here, we should also be sure to define the langue for syntax highlighting with {% highlight md %}
When trying out new themes, some images or symbols may not work correctly. In chasing these down, we will need to use a bit of HTML, CSS, Liquid, and Mardown. For example, I noticed a symbol or image that was used for bullet points in a list of tags was broken on my specific theme, appearing as an empty box instead. To track this down, tree -L 2 was useful in learning the layout of this unfamiliar project quickly. Eventually, through viewing the files related to tags within my theme, I found that the sidebar itself was an include in the below statement of ./_layouts/post.html -
<div class="col-md-3 hidden-xs">
  {% include sidebar.html %}
</div>
So, this pointed me to check out the ./_includes/ directory, where I found the below file -
./_includes/sidebar.html
<div class="sidebar ">
  <h2>Recent Posts</h2>
  <ul>
    {% for post in site.posts limit:5 %}
    <li><a href="{{ post.url | relative_url }}">{{ post.title }}</a></li>
    {% endfor %}
  </ul>
</div>

<div class="sidebar">
  <h2>Tags</h2>
  <ul class="sideBarTags">
    {% assign tags = (site.tags | sort:0) %}
    {% for tag in tags %}
    <li>
      <a href="{{ '/tag/' | append: tag[0] | relative_url }}" data-toggle="tooltip" data-placement="right" title="{{ tag[1].size }}">
        <span>{{tag[0] }}</span></a></li>
    {% endfor %}
  </ul>
</div>
The file above pointed me to the CSS classes below associated with each of the tags (<ul>) shown by the sidebar
<div class="sidebar">
  <h2>Tags</h2>
  <ul class="sideBarTags">
I knew these would be stored in the ./assets/ directory within the root of our Jekyll project, where I found ./assets/css/themes.scss contained the below CSS statement content: '\f02b'; - This was the symbol in the sidebar of my theme that was causing issues
//********************************************************
//                    Sidebar
//********************************************************
.sidebar li {
  margin-top: .7em;
  line-height: 1em;
}
ul.sideBarTags {
  list-style: none;
  li:before {
    content: '\f02b';
    font-family: 'FontAwesome';
    float: left;
    margin-left: -0.8em;
  }
}
By changing it, and also tweaking some other settings below, I was able to improve the look of the sidebar.
//********************************************************
//                    Sidebar
//********************************************************
.sidebar li {
  margin-top: .7em;
  line-height: 1em;
}
ul.sideBarTags {
  list-style: none;
  li:before {
    content: '-';
    font-family: 'FontAwesome';
    float: left;
    margin-left: -0.8em;
  }
}
Hexo
Hexo is a static site generator that converts Markdown syntax into prebuilt dynamic themes. Hexo's use of Node.js, HTML, and CSS / YAML makes for a simple, scalable website that is easy to maintain, build upon, or migrate.
Check out the book on Systemd Services for a quick example of running a hexo blog as a system service that starts automatically on reboot and can be controlled via systemctl and journalctl
Installing Hexo
Installing Hexo is done with npm, and requires Node.js. To meet these requirements, we first need to install both of these tools. Luckily, there are scripts and commands to help us do so.
# Install NVM to prep for Node
curl -o- https://raw.githubusercontent.com/nvm-sh/nvm/v0.34.0/install.sh | bash
# Close and reopen your terminal to start using nvm or run the following to use it now:
export NVM_DIR="$HOME/.nvm"
[ -s "$NVM_DIR/nvm.sh" ] && \. "$NVM_DIR/nvm.sh"  # This loads nvm
[ -s "$NVM_DIR/bash_completion" ] && \. "$NVM_DIR/bash_completion"  # This loads nvm bash_completion

# Install Node.js with NVM
nvm install stable
Now that we have everything we need, all that's left to do is install Hexo -
# Install Hexo with NPM
npm install -g hexo-cli
Creating Hexo Sites
Creating a site with Hexo requires that we first have an empty directory that we want to build our site within. Create this directory, then run hexo init to generate the files we will use to build our site.
mkdir /site/
hexo init /site/
Our site is generated within /site/, and within it we can find new files and folders Hexo generated when we ran the hexo init command on the directory. The basic structure of a hexo blog can be seen below -
├── _config.yml
├── db.json
├── node_modules
│   ├── JSONStream
│   ├── a-sync-waterfall
│   ├── abbrev
│   ├── accepts
│   │
│   ...More...
├── package.json
├── public
│   ├── 2019
│   ├── archives
│   ├── css
│   ├── fancybox
│   ├── images
│   ├── index.html
│   ├── js
│   ├── lib
│   └── tags
├── scaffolds
│   ├── draft.md
│   ├── page.md
│   └── post.md
├── source
│   ├── _drafts
│   └── _posts
└── themes
    ├── cactus
    └── landscape
The _config.yml file contains all of the settings for our site, and its important to step through them carefully to make the changes that may need to be made in order for the site to work properly.
The source directory contains all of our drafts, posts, and pages. This blog has no additional pages, so none are seen here, but they would be represented as additional directories within the source directory, titled with the page name. These page directories contain only the index.md file that is the content.
scaffolds are the defaults used when generating a draft, post, or page using Hexo. These are useful to edit when attempting to configure your changes to initialize with some settings or information, which speeds up the process of adding new content.
The public directory is generated by Hexo, and we don't need to worry much about it.
So, if we wanted to migrate our site from Hexo, the only files we'd need to worry about keeping are the Markdown files within source. Markdown is widely used across many tools and applications, so finding a new way to use these posts and pages is likely and easy to manage.
Installing themes
Hexo uses prebuilt themes for generating Markdown into webpages. I chose Cactus Dark for this site, and made changes where I seen fit.
Themes are installed by simply navigating to the root directory of your site, and cloning the repository into the themes directory. See the commands below for an example of installing this theme to a new Hexo site (without any modifications you may see here).
cd /site/
git clone https://github.com/probberechts/hexo-theme-cactus.git themes/cactus
Now within your root directory, modify the _config.yml to point to the cactus theme we just added. The default theme and value within the _config.yml is landscape, that value points to the theme directory we cloned above.
Its important to note that changes to the theme will need to take place within the /site/theme/cactus/ directory, which may contain a large set of files that are at first unfamilliar to you. After some time poking around your own small site, spend some time looking through the directories and files within your themes directories. They will often provide good examples to use on your own.
Hexo Commands
Also found by running hexo -h, see the below help text for a list of commands when using Hexo
Usage: hexo <command>

Commands:
  clean     Remove generated files and cache.
  config    Get or set configurations.
  deploy    Deploy your website.
  generate  Generate static files.
  help      Get help on a command.
  init      Create a new Hexo folder.
  list      List the information of the site
  migrate   Migrate your site from other system to Hexo.
  new       Create a new post.
  publish   Moves a draft post from _drafts to _posts folder.
  render    Render files with renderer plugins.
  server    Start the server.
  version   Display version information.

Global Options:
  --config  Specify config file instead of using _config.yml
  --cwd     Specify the CWD
  --debug   Display all verbose messages in the terminal
  --draft   Display draft posts
  --safe    Disable all plugins and scripts
  --silent  Hide output on console
For more help, you can use 'hexo help [command]' for the detailed information or you can check the Hexo Documentation
Git for Hexo
Even though GitHub Pages will host Hexo blogs for free, I choose to run mine on a VPS that I maintain myself out of personal interest. For that reason, my approach to using Git with Hexo is slightly different than the usual.
When running hexo init I noticed all it was doing was cloning a starter hexo repository and running npm install within, which kicked me off with a github repository that I had nothing to do with, generated theme files I didn't really need or want, and made moving my own site to a private repository a bit confusing. Initially, I thought the hexo init command was doing something to prepare the services on my system, and not just cloning a starters template to get me going.
This section assumes you have a running Hexo site that you want to track with Git and clone onto another system. Everyone starts somewhere, and running hexo init is a great place to start. Once you have your own hexo site setup, you can follow these steps to track it with Git.
After noticing this, it was quite easy to setup a private github repository that could be cloned onto any host just as quickly as hexo init, though we will need to run three commands instead of one. If you haven't already, run sudo rm -rf .git* from within the root directory of your hexo blog. This will remove Git from your directory so we can set it up with our own repository later.
First, grab the Hexo gitignore and create it within your hexo root directory.
.DS_Store
node_modules/
tmp/
*.log
.idea/
yarn.lock
package-lock.json
.nyc_output/
Then, we want to initialize a new git repository within our directory with git init and head over to GitHub to create your private repository. Once you've created a private repo, add your remote URL with git remote add origin https://github.com/username/repo. This is already nearly the end of the process.
Depending on your setup, you may not need to modify your themes layout, css, and various other settings. I have done all of these things, and made tracking such changes a bit more confusing, so I'll go over my process for keeping up to date with my theme's updates on Git while preserving the changes I've made myself.
Add your theme as a submodule within your hexoroot/themes/ directory with git submodule add https://github.com/probberechts/hexo-theme-cactus themes/hexo-theme-cactus. This will allow git to clone the updated contents of this repository when you clone using the --recursive flag.
Add the rest of your files to git and make your initial commit. Head over to your new server and you can get an exact copy of your website running with a few simple commands -
git clone --recursive https://github.com/username/repo
cd repo && npm install
hexo server
Now, provided you've already configured NGINX on the new host to point to the appropriate location, you can visit your IP or domain in a browser and see a your full blog has been easily copied across the web in three commands.
Markdown Guide
Below we can see the basic syntax used when writing raw markdown pages.
Headings
# Heading level 1
OR
Heading level 1
===============
## Heading level 2
OR
Heading level 2
---------------
### Heading level 3
#### Heading level 4
##### Heading level 5
###### Heading level 6
Italics Text
Italicized text is the *cat's meow*.
Italicized text is the _cat's meow_.
A*cat*meow
Bold text
I just love **bold text**.
I just love __bold text__.
Love**is**bold
Italics and Bold text -
This text is ***really important***.
This text is ___really important___.
This text is __*really important*__.
This text is **_really important_**.
Quotes
> Dorothy followed her through many of the beautiful rooms in her castle.
>
>> The Nested Blockquote
Blockquotes can contain elements
> #### The quarterly results look great!
>
> - Revenue was off the chart.
> - Profits were higher than ever.
>
> *Everything* is going according to **plan**.
Lists
1. First item
2. Second item
3. Third item
4. Fourth item
OR
- First item
- Second item
- Third item
- Indented item
- Indented item
- Fourth item
Inline `code`
Horizonal Rules
***
---
_________________
Links
My favorite link is [Duck Duck Go](https://duckduckgo.com)
<https://www.markdownguide.org>
<fake@example.com>
I love supporting the **[EFF](https://eff.org)**.
This is the *[Markdown Guide](https://www.markdownguide.org)*.
Images

The examples above were taken from The Official Markdown Guide
nginx.conf
Below is a basic nginx.conf that serves as an example of passing local traffic to the port running Hexo.
# A simple nginx.conf showing how to pass traffic to a docker container
user www-data;
worker_processes auto;
pid /run/nginx.pid;
include /etc/nginx/modules-enabled/*.conf;

events { }

http {
  include mime.types;

  # Redirect root domains
  server {
    listen 80;
    server_name domain.com www.domain.com;
    return 301 https://www.domain.com$request_uri;

  }


  # SSL - domain.com
  server {
    server_name domain.com www.domain.com;
    server_tokens off;
    listen 443 ssl;
    ssl_certificate /etc/letsencrypt/live/domain.com/fullchain.pem;
    ssl_certificate_key /etc/letsencrypt/live/domain.com/privkey.pem;

    # Pass to container
    location / {
      include proxy_params;
      proxy_pass http://localhost:1234/;
    }

  }

}
Troubleshooting layouts
Sometimes a layout may either need to be adjusted to your needs or corrected to fix some issue, which is easily done by modifying the CSS at hexoblogroot/themes/landscape/layout/ where laylout is a hexo theme I have installed on my hexo server.
For me, the files in this directory are seen below
hexoblogroot/landscape/layout/
.
├── _colors
│   ├── classic.styl
│   ├── dark.styl
│   ├── light.styl
│   └── white.styl
├── _extend.styl
├── _fonts.styl
├── _highlight   # Note that this directory controls syntax highlighting :)
├── _mixins.styl
├── _partial
│   ├── archive.styl
│   ├── article.styl
│   ├── categories.styl
│   ├── comments.styl
│   ├── footer.styl
│   ├── header.styl
│   ├── index.styl
│   ├── pagination.styl
│   ├── post
│   │   ├── actions_desktop.styl
│   │   └── actions_mobile.styl
│   ├── search.styl
│   ├── tags.styl
│   └── tooltip.styl
├── _util.styl
├── _variables.styl
├── rtl.styl
└── style.styl
These files contain the CSS that will be applied to the generated output of the static site generator after parsing your markdown. If you visit your site and notice that some element is not interactable, its probably being overlapped by another element. To check if this is the case, right click-> inspect element and hover over the HTML options at the bottom of your screen until the issue is highlighted. Then you'll notice some CSS is made available to you that describes how the element is being displayed. This is the same CSS in the files above, and if you make any live edits to the site using the inspector that you want to remain persistant on the site, apply those changes in the files above.
For me, I had an issue that was only seen on the desktop version of my sie. So, we look within hexoblogroot/themes/landscape/layout/_partial/post/actions_desktop.styl and see the issue within the first block -
header-post
  position: fixed
  top: 2rem
  right: 0
  display: inline-block
  float: right
  z-index: 100
The issue for me was z-index was causing the element to lay overtop of the text within a post on my website. The Z index represents the 'depth' of the element in 3D space, so increasing this over that of another element would overlay it. So, to fix this we just remove z-index and save the file! The changes are applied instantly when saving if the hexo server is kept running.
Generating favicons
For many websites you'll notice icons are consistent between all devices and locations, whether the icon is on someones desktop on their phone or PC the same image is adjusted to suit the appearance. these are favicons, and can be generated easily at realfavicongenerator. After generating them, theres a few things you'll need to do -
Insert the snippet generated by the favicon generator into the <head> of your website. This will direct all platforms to their respective image / icon.
Before uploading, you'll notice an option to specify where you'll place your favicon files on your webserver. For hexo, I chose /images/, and unzipped my generated favicon package to hexoblogroot/themes/landscape/source/images after removing the default icons there came with my theme.
<link rel="apple-touch-icon" sizes="180x180" href="/images/apple-touch-icon.png">
<link rel="icon" type="image/png" sizes="32x32" href="/images/favicon-32x32.png">
<link rel="icon" type="image/png" sizes="16x16" href="/images/favicon-16x16.png">
<link rel="manifest" href="/images/site.webmanifest">
<link rel="mask-icon" href="/images/safari-pinned-tab.svg" color="#5bbad5">
<link rel="shortcut icon" href="/images/favicon.ico">
<meta name="msapplication-TileColor" content="#da532c">
<meta name="msapplication-config" content="/images/browserconfig.xml">
<meta name="theme-color" content="#ffffff">
In a hexo blog, the <head> is located at hexoblogroot/themes/landscape/layout/_partial/head.ejs
Hugo
Hugo Docker Image that is not maintained by Hugo, but it is recommended by the official documentation
Nice blog post on using Hugo with Docker nodinrogers - Hugo in Docker
Site Setup
sudo apt install docker-compose
mkdir /Code/Docker/hugo && cd /Code/Docker/hugo
vim docker-compose.yml
Paste the following into the docker-compose.yml -
server:
  image: klakegg/hugo:0.93.2
  command: server
  volumes:
    - ".:/src"
  ports:
    - "1313:1313"
Now we try to start the container, but there's an error; This is because I had not created a site previously, so hugo has nothing to serve.
docker-compose up
Starting hugo_server_1 ... done
Attaching to hugo_server_1
server_1  | Error: Unable to locate config file or config directory. Perhaps you need to create a new site.
server_1  |        Run `hugo help new` for details.
server_1  |
hugo_server_1 exited with code 255
I don't have hugo installed locally, and one of the main attractions to Docker for me is avoiding installing service dependencies to my local system. So, I will use the following command to access the hugo CLI using Docker, which will generate a new site for us. Note that the /src/site directory is relative to the container, and not our local system. This command will bind our CWD to the container's /src directory ($(pwd):/src), and then generate the new site at /src/site on the container. Since this is a bound directory, the generated site files will be available on our local system.
docker run --rm -it -v $(pwd):/src klakegg/hugo:0.93.2 new site /src/site

Congratulations! Your new Hugo site is created in /src/site.

Just a few more steps and you're ready to go:

1. Download a theme into the same-named folder.
   Choose a theme from https://themes.gohugo.io/ or
   create your own with the "hugo new theme <THEMENAME>" command.
2. Perhaps you want to add some content. You can add single files
   with "hugo new <SECTIONNAME>/<FILENAME>.<FORMAT>".
3. Start the built-in live server via "hugo server".

Visit https://gohugo.io/ for quickstart guide and full documentation.
kapper@xps:~/Code/Docker/hugo/site$ tree -L 2
.
├── archetypes
│   └── default.md
├── config.toml
├── content
├── data
├── layouts
├── public
│   ├── categories
│   ├── index.xml
│   ├── sitemap.xml
│   └── tags
├── resources
│   └── _gen
├── static
└── themes
But when we run docker-compose up we still get the same error.
docker-compose up
Starting hugo_server_1 ... done
Attaching to hugo_server_1
server_1  | Error: Unable to locate config file or config directory. Perhaps you need to create a new site.
server_1  |        Run `hugo help new` for details.
server_1  |
hugo_server_1 exited with code 255
This is because the hugo container expects the /src volume to be bound to the directory that contains our site. We previously generated our site within the site subdirectory, so we need to modify our docker-compose.yml to reflect this under the volumes section -
server:
  image: klakegg/hugo:0.93.2
  command: server
  volumes:
    - "./site:/src"
  ports:
    - "1313:1313"
Now we can start our hugo site, and visit it in our browser at localhost:1313, assuming you are using the default ports above.
docker-compose up

Recreating hugo_server_1 ... done
Attaching to hugo_server_1
server_1  | Start building sites …
server_1  | hugo v0.93.2-643B5AE9 linux/amd64 BuildDate=2022-03-04T12:21:49Z VendorInfo=gohugoio
server_1  | WARN 2022/06/03 14:58:20 found no layout file for "HTML" for kind "home": You should create a template file which matches Hugo Layouts Lookup Rules for this combination.
server_1  | WARN 2022/06/03 14:58:20 found no layout file for "HTML" for kind "taxonomy": You should create a template file which matches Hugo Layouts Lookup Rules for this combination.
server_1  | WARN 2022/06/03 14:58:20 found no layout file for "HTML" for kind "taxonomy": You should create a template file which matches Hugo Layouts Lookup Rules for this combination.
server_1  |
server_1  |                    | EN
server_1  | -------------------+-----
server_1  |   Pages            |  3
server_1  |   Paginator pages  |  0
server_1  |   Non-page files   |  0
server_1  |   Static files     |  0
server_1  |   Processed images |  0
server_1  |   Aliases          |  0
server_1  |   Sitemaps         |  1
server_1  |   Cleaned          |  0
server_1  |
server_1  | Built in 1 ms
server_1  | Watching for changes in /src/{archetypes,content,data,layouts,static}
server_1  | Watching for config changes in /src/config.toml
server_1  | Environment: "DEV"
server_1  | Serving pages from memory
server_1  | Running in Fast Render Mode. For full rebuilds on change: hugo server --disableFastRender
server_1  | Web Server is available at http://localhost:1313/ (bind address 0.0.0.0)
server_1  | Press Ctrl+C to stop
At this point, the -d flag will be useful to us since we no longer need the debug output from the container. If you plan to have the container up for a while and won't be using this output, detach the container from your session -
docker-compose up -d

Starting hugo_server_1 ... done
Git Repository
You can track your entire site as a Git repository, if you want to. To to this, I would run the following commands, where the root of the repository ends up being the directory that contains the docker-compose.yml file. This bundles everything together so we can easily deploy the site on a new server if needed.
git init

Initialized empty Git repository in /home/kapper/Code/Docker/hugo/.git/
git status

On branch master

No commits yet

Untracked files:
  (use "git add <file>..." to include in what will be committed)
        docker-compose.yml
        site/

nothing added to commit but untracked files present (use "git add" to track)
This output produces a warning telling us that we have an embedded repository, because I ran git clone git@github.com:StaticMania/portio-hugo.git site/themes/portio before initializing the repository. I wanted to track some test theme in the initial commit, but my hugo site is still not configured to use any theme. This way I can always restore the original configurations if I ever need them, or I could even just reference them on Github by looking in the repository history.
git add .
warning: adding embedded git repository: site/themes/portio
hint: You've added another git repository inside your current repository.
hint: Clones of the outer repository will not contain the contents of
hint: the embedded repository and will not know how to obtain it.
hint: If you meant to add a submodule, use:
hint:
hint:   git submodule add <url> site/themes/portio
hint:
hint: If you added this path by mistake, you can remove it from the
hint: index with:
hint:
hint:   git rm --cached site/themes/portio
hint:
hint: See "git help submodule" for more information.
The above output indicates that we could run git submodule add git@github.com:StaticMania/portio-hugo.git site/themes/portio to track the Portio theme as a submodule of our repository. For me, I won't - simply because Portio was the theme I used for my first attempt at configuring a Hugo theme. I plan to shop around for a theme that I like, and when I settle on one I will likely add that as a submodule.
Now, before we install our theme we could make a commit to track the site as it was newly generated by Hugo. Simply run git commit and type your initial commit message, then continue to work. You don't need to push to a remote until you're ready. I'll probably just track this project locally for a while and push it to a repo only when I go to deploy it. This way I will retain my repository history and have access to useful git commands to restore files or view diffs.
Themes
To start, let's look at the Portio Hugo theme on GitHub. This repo provides these install instructions which we will use to configure the theme below
cd themes/
pwd
~/Code/Docker/hugo/site/themes
git clone git@github.com:StaticMania/portio-hugo.git portio
fatal: could not create work tree dir 'portio': Permission denied
To fix the above error, change ownership of these files to your current user -
kapper@xps:~/Code/Docker/hugo/site/themes$ cd ../../
kapper@xps:~/Code/Docker/hugo$ sudo chown -R kapper:kapper site/
kapper@xps:~/Code/Docker/hugo$ ll
total 16
drwxrwxr-x  3 kapper kapper 4096 Jun  3 11:29 ./
drwxrwxr-x  3 kapper kapper 4096 Jun  3 10:13 ../
-rw-rw-r--  1 kapper kapper  114 Jun  3 10:58 docker-compose.yml
drwxr-xr-x 10 kapper kapper 4096 Jun  3 10:57 site/
git clone git@github.com:StaticMania/portio-hugo.git portio

Cloning into 'portio'...
remote: Enumerating objects: 1377, done.
remote: Total 1377 (delta 0), reused 0 (delta 0), pack-reused 1377
Receiving objects: 100% (1377/1377), 8.63 MiB | 16.73 MiB/s, done.
Resolving deltas: 100% (502/502), done.
cp -r site/themes/portio-hugo/exampleSite/* site/
Now we can restart our docker container and see the theme in the browser!
docker-compose down && docker-compose up -d`
Unfortunately at this point the theme did not render correctly for me. This was because I was targeting the klakegg/hugo:0.93.2 docker image in my docker-compose.yml, and this theme requires Hugo Extended to render SASS/SCSS styling. So, we modify the docker-compose.yml to contain the below ext-ubuntu image instead -
server:
  image: klakegg/hugo:ext-ubuntu
  command: server
  volumes:
    - "./site/:/src"
  ports:
    - "1313:1313"
And when we restart the container with the following command once more, everything is working and the theme is rendered correctly!
docker-compose down && docker-compose up -d`

Creating Posts
In your config.toml, set the following option -
contentDir = 'content/'
Then we can create our posts directory, and run hugo new content/posts/post-name.md to create a new post.
URL Shortners
Documentation Generators
Read The Docs
Features
Static Generators
Read The Docs (RTD) is a documentation generator that utilizes either Sphinx or MkDocs to generate the documentation site and theme, depending on your choice. The RTD GitHub houses the configurations and files that generates the Official Website. This provides a good example of the many features RTD offers, and allows you to step through configurations in a more feature-rich and complete setup.
Since there are different choices for the backend static site generator, the deployment procedure is different depending on which one you choose. Below, we will cover deploying Read The Docs with Sphinx and MkDocs. These two sections are each entirely different deployments of RTD, where the difference is only the Backend Static Site Generator that is used to build your documentation.
Alternatively, you can simply sign up on the RTD official website and allow them to host the documentation for you by linking a repository to your user account and following the Quick Start Instructions. Since this is nearly turn-key, we won't cover deploying RTD this way.
Continuous Version Based Documentation
RTD utilizes webhooks within your VCS (GitHub, GitLab, BitBucket) to automatically build and deploy version-based documentation for your projects. If you've deployed a project to RTD, it automatically creates these webhooks for you. See the Webhook and Automation documentation for more info.
There are also two independent versions of RTD, one community and one for business related documentation that also supports private repositories and other security features. When visiting https://readthedocs.org, we are viewing community version. When visiting https://readthedocs.com, we are viewing the business version.
For the below documentation, we will be using the Community Version of Read The Docs since the business version is Subscription Based.
Downloadable Documentation
RTD supports downloading any hosted documentation in PDF, ePub, and Zipped HTML formats.
Text Search
Need a place to host your Sphinx docs? readthedocs.org hosts a lot of Sphinx docs already, and integrates well with projects' source control. It also features a powerful built-in search that exceeds the possibilities of Sphinx' JavaScript-based offline search. - Sphinx
RTD adds search functionality to your documentation that, in comparison to the sphinx builtin search capabilities, is a noteworthy improvement.
RTD with MkDocs
Deploying RTD with MkDocs is as simple as first deploying a MkDocs instance, and then importing this documentation into RTD. The RTD documentation provides instructions for Getting Started with MkDocs, which outlines the process below.
Install MkDocs
MkDocs supports Python versions 3.5, 3.6, 3.7, 3.8, and pypy3. If you have and use a package manager (such as apt-get, dnf, homebrew, yum, chocolatey, etc.) to install packages on your system, then you may want to search for a "MkDocs" package. If your package manager does not have a recent "MkDocs" package, you can still use your package manager to install "Python" and "pip". Then you can use pip to install MkDocs. - MkDocs Official Documentation
The quote above seems to suggest the preferred method for installation is pip, though it is possible to use your package manager. To make these instructions more portable, I'll only cover mkdocs installation using pip.
sudo apt update && sudo apt upgrade
sudo apt install python-pip -y
pip install --upgrade pip
sudo pip install mkdocs
MkDocs Man Pages
If needed, MkDocs provides man pages that can be installed with click-man by running the following commands
An explanation on why the man pages are not installed automatically with pip install mkdocs is described within the click-man GitHub README
pip install click-man
click-man --target path/to/man/pages mkdocs
Following the Man Pages Index Guidelines we can install the man pages to the appropriate section using the following command
click-man --target /usr/share/man/man1 mkdocs
Now we can see that the man pages for mkdocs have been installed and reference them as needed directly within our terminal -

Configuring MkDocs
MkDocs offers a range of custom configuration options which can be tailored to suit your needs aesthetically and in terms of functionality. To get started, run the following commands
mkdocs new my-project
cd my-project
This will have created a new directory relative to your CWD ./my-project generated two files within, ./my-project/mkdocs.yml and ./my-project/docs/index.md. For this section, we will be modifying mkdocs.yml
site_name: My Docs
nav:
  - home: index.md
theme: readthedocs
This adds a title for our documentation and says two things, we've created an ./my-project/docs/index.md that represents the home page content, and we want to use the ReadTheDocs theme for our instance of MkDocs. Now to apply these changes, we rebuild the documentation
mkdocs build
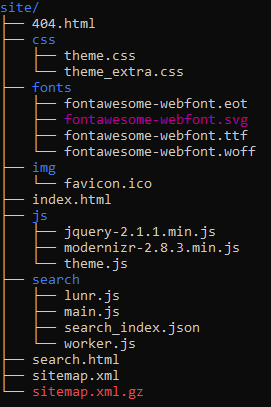
This generates raw HTML files within ./my-project/site, which will have the following file structure
These files do not need to be tracked by your VCS since they are generated, and if using git to track this MkDocs instance can be ignored with echo "site/" >> .gitignore
To update the generated file index with any removals or renamed pages, you'll need to run the following command
mkdocs build --clean
Once these files are updated, provided that you are working locally and hosting remotely, you can update your remote host with the new generated files -
mkdocs build
scp -r ./site user@host:/path/to/web/root
Alternatively, you can work directly on the host and serve the ./my-project/site directory directly.
Themes
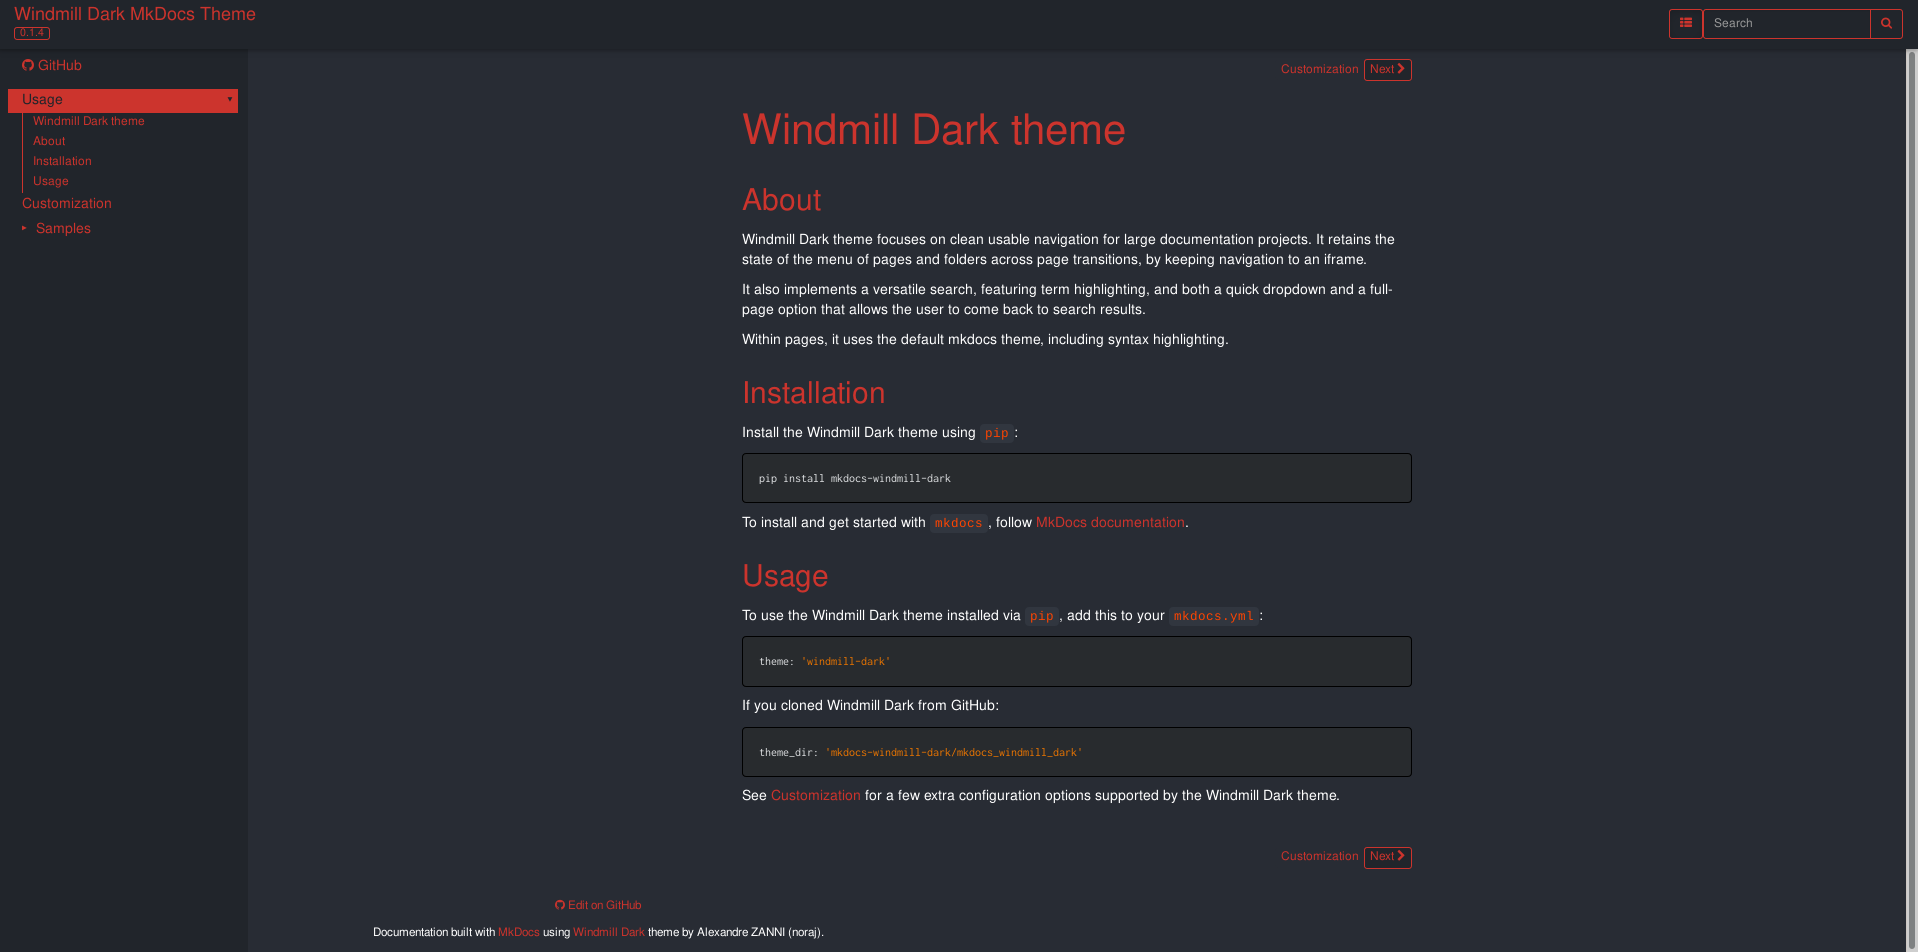
MkDocs is very themeable, you'll notice with the screenshot below that the Windmil theme is quite different from the ReadTheDocs theme used on the RTD Documentation.
Plugins
Mkdocs supports plugins which extend the functionality in more specific use cases. Check the GitHub Wiki for a complete list of plugins.
This feature came from a request for multiple projects documentation within a single MkDocs instance - Issue #265. Once plugins were added to MkDocs, Spotify/mkdocs-monorepo-plugin provided a plugin to support this feature, allowing for multiple documentation folders within a single MkDocs. Spotify even hosts a Live Demo showcasing the results of using the plugin and has well-written instructions on how to use it.
Deploying MkDocs
The files generated with MkDocs can be deployed using either GitHub Pages, RTD, or a local webserver like NGINX or Apache. Below, we look at a simple NGINX configuration to serve MkDocs
user www-data;
worker_processes auto;
pid /run/nginx.pid;
include /etc/nginx/modules-enabled/*.conf;

events { }

http {
  include mime.types;

  # Redirect root domains
  server {
    listen 80;
    server_name domain.com www.domain.com;
    # Pass to SSL
    return 301 https://www.domain.com$request_uri;

  }

  # SSL
  server {
    server_name domain.com  www.domain.com;
    server_tokens off;
    listen 443 ssl;
    ssl_certificate /etc/letsencrypt/live/domain.com/fullchain.pem;
    ssl_certificate_key /etc/letsencrypt/live/domain.com/privkey.pem;

    # Configure Server-wide logging
    access_log /var/log/nginx/access.log;
    error_log /var/log/nginx/error.log;


    # Pass to container
    location / {
      # Point NGINX to static site files
      root /path/to/my-project/site;
      include proxy_params;
    }

  }
}
As a final step, we restart the nginx service and navigate to our domain in a web browser.
sudo systemctl reload nginx
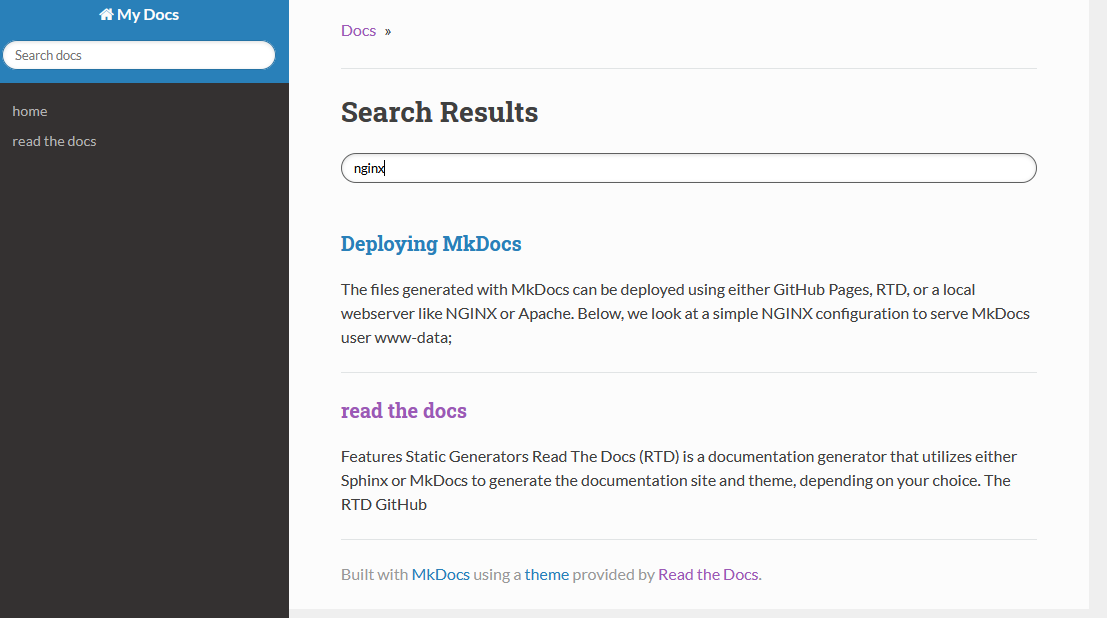
For demonstration, I've duplicated this page within my mkdocs instance, shown in the screenshot below

You can even search for keywords right out of the box with the builtin search field -
RTD with Sphinx
WIP
Gitea
This page doesn't intend to replace or improve existing documentation, but rather provides me with material to look back on in the future if I ever have to revisit this setup again. The information here may or may not help setting up your gitea, but in either case I strongly recommend checking out the following links to learn more about Gitea.
Gitea official GitHub repository
While learning Unreal Engine 5, I began exploring options for using Git LFS without breaking the bank or sacrificing content in my game to save space. I quickly realized this was going to become an issue, when GitHub alerted me that I hit the 1GB limit for LFS repositories. Honestly I'm not entirely sure why GitHub even offers LFS, if you're reaching for LFS chances are you'll hit that 1GB limit in a very short timeframe, if you hadn't already exceeded the limit before initializing LFS.
GitLab was a better option for a while, they offer 10GB free storage for LFS repositories, which was plenty to get started with UE5. Eventually I hit the 10GB mark, and explored pricing options for increasing storage.
GitLab charges $60 annually for 10GB, and I just can't reason with that price for a simple UE5 project with no need for CI / DevOps or any of the other features GitLab probably factored into their pricing.
So I realized I had to host my own Git service, and that's where Gitea comes in. The service outlined in this page offers me 25GB of LFS storage for $6 a month from Digital Ocean, and if I choose to upgrade that storage I pay $10/month for an additional 100GB. By doing this, I avoid running into a problem again in a few months, since I can easily upgrade this storage for a fraction of the cost when compared to LFS on GitLab.
With this setup, I pay $60 per year for 25GB, or $120 per year for 125GB of LFS storage. I like those numbers much better. At GitLab's price, this same setup would cost almost $800 per year to run with 125GB of LFS storage. I don't anticipate ever being able to fill this 125GB storage capacity, so this is the wost-case scenario, and I think $120 annually (10/mo) is a reasonable price to pay for this convenience
I'll admit I did not look at GitHub's pricing because I was initially frustrated with the 1GB limit for LFS repositories. It's unusable right from the start, and I'm not interested in shelling out hundreds of dollars to risk another road block like this in the future.
Server Setup
To start this process I purchased the cheapest VPS possible from DigitalOcean which costs only $6 a month. The server came with no configurations or services installed - I always select the latest barebones LTS Ubuntu version offered by DigitalOcean.
Once the droplet is created, login as the root user and create a user to run the service.
sudo adduser docker-gitea
sudo usermod -aG sudo docker-gitea
Now we go to the home directory of the user and set up the service within a subdirectory
sudo su docker-gitea
cd
mkdir docker-gitea
cd docker-gitea
vim docker-compose.yml
That's it! The next section will cover the contents of this new docker-compose.yml file, and how to start and stop the service.
Docker
To configure the service, I chose to use a docker container defined by a docker-compose.yml with the contents below. See the official Gitea Configuration Cheatsheet for details on what these options mean, if you're curious.
version: "3"

networks:
  gitea:
    external: false

services:
  server:
    image: gitea/gitea:latest
    container_name: gitea
    environment:
      - USER_UID=1000
      - USER_GID=1000
      - GITEA__database__DB_TYPE=mysql
      - GITEA__database__HOST=db:3306
      - GITEA__database__NAME=gitea
      - GITEA__database__USER=gitea
      - GITEA__database__PASSWD=somepassword
    restart: always
    networks:
      - gitea
    volumes:
      - ./gitea:/data
      - /etc/timezone:/etc/timezone:ro
      - /etc/localtime:/etc/localtime:ro
    ports:
      - "2000:3000"
      - "222:22"
    depends_on:
      - db

  db:
    image: mysql:8
    restart: always
    environment:
      - MYSQL_ROOT_PASSWORD=someotherpasswordforrootuser
      - MYSQL_USER=gitea
      - MYSQL_PASSWORD=somepassword
      - MYSQL_DATABASE=gitea
    networks:
      - gitea
    volumes:
      - ./mysql:/var/lib/mysql
Once you've looked over these configurations carefully, you can run the following commands to start the service from within the /home/docker-gitea/docker-gitea/ directory.
If you get Permission Denied errors, make sure to add your user to the docker group by running sudo usermod -aG docker docker-gitea where docker-gitea should be replaced with the username you selected for running your service
docker-compose up -d
You can now access your gitea service by visiting your server's IP and manually providing the port you specified in the docker-compose.yml. For the configuration above, we use 2000:3000 to route HTTP traffic, so we can visit <YOUR_SERVER_IP>:2000 and we are greeted with the gitea landing page!
To stop the service you can run this command, but the following sections will expect that the docker container is running and the service is up, so make sure it is before continuing.
docker-compose down
NGINX Configuration+
First, head over to Knoats - NGINX to see how to generate your SSL certificate, and maybe skim through some of the notes there on NGINX if needed. Don't let SSL setup intimidate you, it is not a difficult process and only takes a few extra minutes to setup. SSL is a very important security feature!
Once you have generated your SSL certificates, the only thing left to do on the back-end is route traffic and configure Gitea. For the docker-compose.yml outlined above, we should note the following lines that contain ports we will need.
    ports:
      - "2000:3000"
      - "222:22"
With this information in mind, we can run sudoedit /etc/nginx/nginx.conf and configure your NGINX server to route traffic to your docker container.
user www-data;
worker_processes auto;
pid /run/nginx.pid;

events { }

http {
  include mime.types;

# Basic Server Configuration
  server {
    # NGINX listens on port 80
    listen 80;
    server_name git.shaunreed.com;
    return 301 https://$host$request_uri;
  }

  # Terminate SSL and route traffic
  server {
    server_name localhost;
    server_tokens off;

    # SSL Settings
    listen 443 ssl;
    # NOTE: Full path to your SSL certificates
    ssl_certificate /etc/letsencrypt/live/git.shaunreed.com/fullchain.pem;
    ssl_certificate_key /etc/letsencrypt/live/git.shaunreed.com/privkey.pem;
    include /etc/letsencrypt/options-ssl-nginx.conf;
    ssl_dhparam /etc/letsencrypt/ssl-dhparams.pem;

    location / {
      include proxy_params;
      # Pass traffic to our docker container listening on port 2000
      # NOTE: Here is port 2000 from docker-compose.yml
      proxy_pass http://0.0.0.0:2000/;
    }
  }
}
Now run the following command to test NGINX configuration -
sudo nginx -t
If this test fails, the output should point you in the right direction, and google is your friend :)
Once the test passes, you're ready to restart the NGINX service and configure Gitea.
sudo systemctl restart nginx.service
Gitea Configuration
This section covers the various useful settings I found in Gitea for my use case. There may be other options that suit your use better, so I will again refer you to the Gitea Configuration Cheatsheet
By default when running gitea from a docker container as outline in the previous steps, your configurations will be mounted to /home/docker-gitea/docker-gitea/gitea/gitea/conf/app.ini
Here's some copypasta for the settings I found useful in the below configuration. The format is the same as the Configuration Cheatsheet, SETTING_NAME: default_value: <DESCRIPTION>
DOMAIN: localhost: Domain name of this server.
SSH_DOMAIN: %(DOMAIN)s: Domain name of this server, used for displayed clone URL.
LANDING_PAGE: home: Landing page for unauthenticated users [home, explore, organizations, login].
REGISTER_EMAIL_CONFIRM: false: Enable this to ask for mail confirmation of registration. Requires Mailer to be enabled.
REGISTER_MANUAL_CONFIRM: false: Enable this to manually confirm new registrations. Requires REGISTER_EMAIL_CONFIRM to be disabled. (I didn't use it, but it's neat)
DISABLE_REGISTRATION: false: Disable registration, after which only admin can create accounts for users.
ENABLE_NOTIFY_MAIL: false: Enable this to send e-mail to watchers of a repository when something happens, like creating issues. Requires Mailer to be enabled.
ENABLE_CAPTCHA: false: Enable this to use captcha validation for registration.
Here's the entire app.ini configuration for my gitea instance, with the private bits replaced with XX_PRIVATE_XX
APP_NAME = Gitea: Shaun Reed
RUN_MODE = prod
RUN_USER = git

[repository]
ROOT = /data/git/repositories

[repository.local]
LOCAL_COPY_PATH = /data/gitea/tmp/local-repo

[repository.upload]
TEMP_PATH = /data/gitea/uploads

[server]
APP_DATA_PATH    = /data/gitea
DOMAIN           = git.shaunreed.com
SSH_DOMAIN       = git.shaunreed.com
HTTP_PORT        = 3000
ROOT_URL         = https://git.shaunreed.com
DISABLE_SSH      = false
SSH_PORT         = 22
SSH_LISTEN_PORT  = 22
LFS_START_SERVER = true
LFS_CONTENT_PATH = /data/git/lfs
LFS_JWT_SECRET   = XX_PRIVATE_XX
LFS_HTTP_AUTH_EXPIRY = 40
OFFLINE_MODE     = false
LANDING_PAGE     = explore

[database]
PATH     = /data/gitea/gitea.db
DB_TYPE  = mysql
HOST     = db:3306
NAME     = gitea
USER     = gitea
PASSWD   = XX_PRIVATE_XX
LOG_SQL  = false
SCHEMA   =
SSL_MODE = disable
CHARSET  = utf8mb4

[indexer]
ISSUE_INDEXER_PATH = /data/gitea/indexers/issues.bleve

[session]
PROVIDER_CONFIG = /data/gitea/sessions
PROVIDER        = file

[picture]
AVATAR_UPLOAD_PATH            = /data/gitea/avatars
REPOSITORY_AVATAR_UPLOAD_PATH = /data/gitea/repo-avatars
DISABLE_GRAVATAR              = false
ENABLE_FEDERATED_AVATAR       = true

[attachment]
PATH = /data/gitea/attachments

[log]
MODE      = console
LEVEL     = info
ROUTER    = console
ROOT_PATH = /data/gitea/log

[security]
INSTALL_LOCK                  = true
SECRET_KEY                    =
REVERSE_PROXY_LIMIT           = 1
REVERSE_PROXY_TRUSTED_PROXIES = *
INTERNAL_TOKEN                = XX_PRIVATE_XX
PASSWORD_HASH_ALGO            = XX_PRIVATE_XX

[service]
DISABLE_REGISTRATION              = false
REQUIRE_SIGNIN_VIEW               = false
REGISTER_EMAIL_CONFIRM            = true
ENABLE_NOTIFY_MAIL                = true
ALLOW_ONLY_EXTERNAL_REGISTRATION  = false
ENABLE_CAPTCHA                    = true
REQUIRE_EXTERNAL_REGISTRATION_CAPTCHA = true
DEFAULT_KEEP_EMAIL_PRIVATE        = false
DEFAULT_ALLOW_CREATE_ORGANIZATION = true
DEFAULT_ENABLE_TIMETRACKING       = true
NO_REPLY_ADDRESS                  = noreply.private
REGISTER_MANUAL_CONFIRM = true

[mailer]
ENABLED        = true
FROM           = gitea@shaunreed.com
MAILER_TYPE    = smtp
HOST           = smtp.gmail.com:587
IS_TLS_ENABLED = false
USER           = mailedknoats@gmail.com
PASSWD         = `XX_PRIVATE_XX`


[openid]
ENABLE_OPENID_SIGNIN = true
ENABLE_OPENID_SIGNUP = true
Hopefully this page either helped you configure gitea, or helped you determine whether or not you want to deploy gitea on your server. For me it has been great, it's light weight, I like the interface, and it saves me a lot of money while offering peace-of-mind that my repositories have plenty of storage space. Good luck!
LFS Push Errors
If you're experiencing errors when pushing to an LFS project like I was, these links might be helpful.
Stackoverflow gitea HTTP 413 question
HTTP 413 LFS errors (Issue #2930)
Make HTTP auth period configurable (PR #4035)
This is what did it for me: NGINX client_max_body_size
Adding the client_max_body_size setting to our NGINX configuration would look like this
user www-data;
worker_processes auto;
pid /run/nginx.pid;

events { }

http {
  include mime.types;

# Basic Server Configuration
  server {
    # NGINX listens on port 80
    listen 80;
    server_name git.shaunreed.com;
    return 301 https://$host$request_uri;
  }

  # Terminate SSL and route traffic
  server {
    server_name localhost;
    server_tokens off;

    # SSL Settings
    listen 443 ssl;
    # NOTE: Full path to your SSL certificates
    ssl_certificate /etc/letsencrypt/live/git.shaunreed.com/fullchain.pem;
    ssl_certificate_key /etc/letsencrypt/live/git.shaunreed.com/privkey.pem;
    include /etc/letsencrypt/options-ssl-nginx.conf;
    ssl_dhparam /etc/letsencrypt/ssl-dhparams.pem;

    location / {
      include proxy_params;
      # Pass traffic to our docker container listening on port 2000
      # NOTE: Here is port 2000 from docker-compose.yml
      proxy_pass http://0.0.0.0:2000/;
    }
  }
  # NOTE: In my case, adding this line fixed HTTP 413 errors when pushing to LFS projects
  client_max_body_size 3000m;
}
Additionally, you should check that the ROOT_URL setting within your app.ini for gitea specifies https:// and not http://
Here's my ROOT_URL setting and all other LFS settings within my app.ini. With this setup I have pushed an LFS project >10GB in a single push with no issues.
[server]
APP_DATA_PATH    = /data/gitea
DOMAIN           = git.shaunreed.com
SSH_DOMAIN       = git.shaunreed.com
HTTP_PORT        = 3000
ROOT_URL         = https://git.shaunreed.com
DISABLE_SSH      = false
SSH_PORT         = 22
SSH_LISTEN_PORT  = 22
LFS_START_SERVER = true
LFS_CONTENT_PATH = /data/git/lfs
LFS_JWT_SECRET   = XX_PRIVATE_XX
LFS_HTTP_AUTH_EXPIRY = 40
OFFLINE_MODE     = false
LANDING_PAGE     = explore
You might also consider adjusting LFS_HTTP_AUTH_EXPIRY, if you think you're push will take longer than 40 minutes.
If you're still struggling, you could try adding these settings to your app.ini to enable more verbose logging
[log]
MODE      = file
LEVEL     = debug
ROUTER    = ,
ROOT_PATH = /data/gitea/log
And then watch the logs or check them after a push. I ran the following command to watch the logs during a push that I knew would fail
sudo tail -f /home/docker-gittea/docker-gittea/gitea/gitea/log/gitea.log
SSH Configuration
To clone via ssh with gitea listening on a custom port, place the following in your ~/.ssh/config, after editing path and url to match your instance
# Gitea
Host git.shaunreed.com
  HostName git.shaunreed.com
  Port <PORT_NUMBER>
  IdentityFile /home/kapper/.ssh/<PRIVATE_KEY_VAME>